
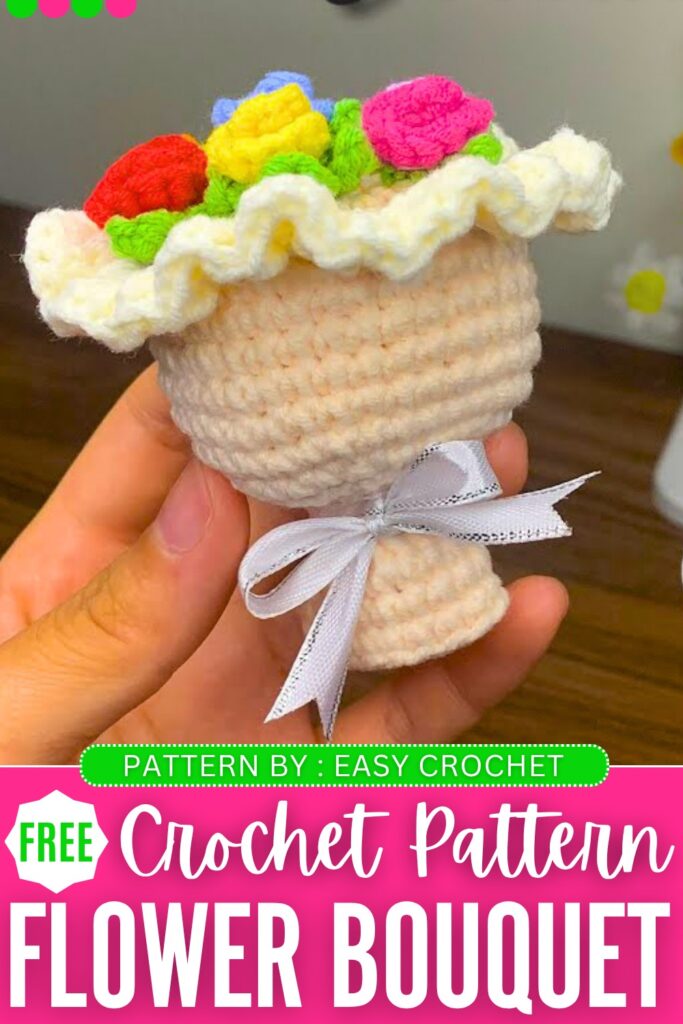
Let’s crochet a beautiful FLOWER BOUQUET of crochet roses with this pattern. It is a miniature version of the wedding bouquet, so it has that elegant round bouquet wrap with a ruffled opening edging. You can finish it off with a Satin Ribbon bow and prepare it as a Mother’s Day, wedding, or Valentine’s Day present.
You can also crochet it as the popular red rose and black cover bouquet for Valentine’s Day, just by changing the colors. Crocheting the small roses for this bouquet is very satisfying and easier. You can choose from purple, red, yellow, and orange roses.
The best part is its crochet bouquet wrap base that can also be used for any other crochet flower, such as tulips. Soon, I will also bring the Korean bouquet crochet pattern. Now, for this elegant crochet bouquet pattern, continue reading till the end.
Crochet Rose Flower Bouquet Keychain PATTERN
This beautiful mini crochet flower bouquet features a tiny pot that transitions into a ruffled wrapper, holding a delicate arrangement of mini roses. It makes a perfect desk accessory, gift, or keychain!
Quick Making Guide
- Skill Level: Intermediate Beginner
- Method: Amigurumi method worked in continuous spirals for the base pot, joined rounds for the wrapper and inner cup, and flat rows for the rolled mini roses.
- Construction: The pot and wrapper base are crocheted as one piece. An inner “cup” is built into the top of the pot to hold the bouquet. The starburst leaf base and the individual roses are crocheted separately and glued into the top cup.
Materials Needed
- Yarn: For a beautiful, high-quality velvety plush look, substitute the standard yarn with a super bulky chenille or velvet yarn. You will need your chosen colors for the Pot/Wrapper, Green for the leaves, and any colors you like for the roses.
- Crochet Hook: Match your hook to your yarn weight (e.g., 4.5mm to 6.0mm if using plush chenille, or 2.5mm if using standard cotton).
- Tools: Stitch marker, tapestry needle, scissors, polyfill stuffing, and a hot glue gun for easy assembly.
Abbreviations (US Terms)
- MR: Magic Ring
- Ch: Chain
- Sl st: Slip stitch
- Sc: Single crochet
- Hdc: Half double crochet
- Dc: Double crochet
- Inc: Increase (2 sc in the same stitch)
- Dec: Decrease (sc 2 together)
- BLO: Back Loop Only
- FLO: Front Loop Only
- St(s): Stitch(es)
Pattern Instructions
The Main Pot and Inner Cup
Start with the color you have chosen for the pot.
Round 1: 6 sc in a Magic Ring. (6)
Round 2: 6 Inc. (12)
Round 3: (1 sc, 1 Inc) repeat 6 times. (18)
Round 4: (1 sc, 1 Inc, 1 sc) repeat 6 times. (24)
Round 5: (3 sc, 1 Inc) repeat 6 times. (30)
Round 6: (2 sc, 1 Inc, 2 sc) repeat 6 times. (36)
Round 7: Working in BLO, 1 sc in each st around. (36)
Rounds 8 – 12: 1 sc in each st around for 5 rounds. (36)
Round 13: (2 sc, 1 Dec, 2 sc) repeat 6 times. (30)
Round 14: (3 sc, 1 Dec) repeat 6 times. (24)
Round 15: 12 Dec. (12)
Stuff the pot firmly with polyfill at this stage.
Round 16: 6 Dec. (6)
Do not fasten off. You will now build the inner cup that holds the bouquet.
Round 17: Ch 2. Work 3 Dc into each of the 6 remaining stitches. Sl st to the first Dc to join. (18)
Rounds 18 – 20: Ch 1, 1 sc in each st around. Sl st to join. (18 sts for 3 rounds). Fasten off and weave in the end. This cup will sit slightly recessed inside the wrapper frill.
The Wrapper Frill
Using the same color, attach your yarn to the unworked Front Loops left behind from Round 7.
Round 1: Ch 1, work 1 sc into every front loop around the edge. Sl st to join. (36)
Round 2: Ch 2. Work 3 Dc into every single stitch around to create a heavy ruffle. (108) Sl st to join. Fasten off and weave in the end.
The Leaf Starburst
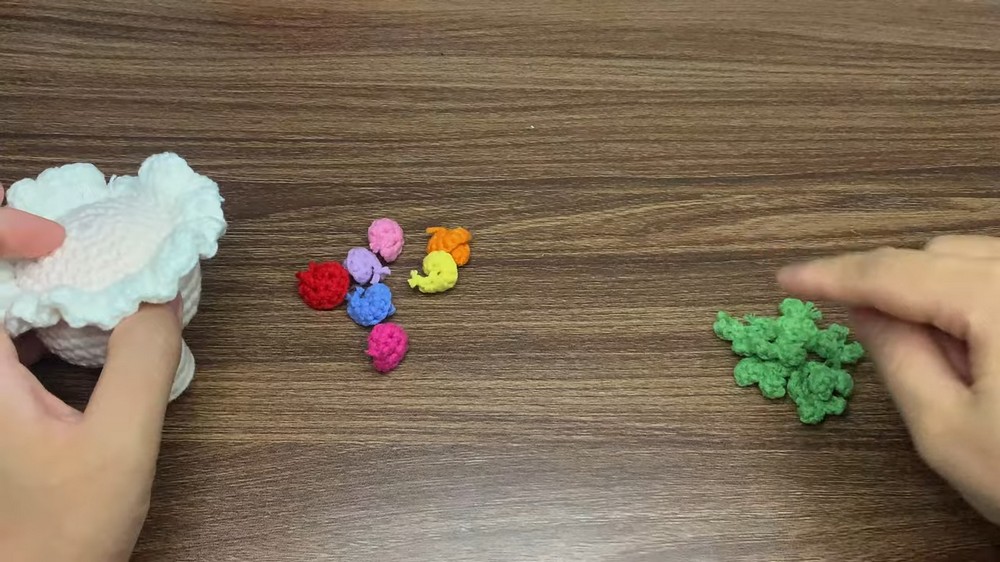
Use Green yarn. You will need one leaf point for every flower you plan to make. For a full bouquet, we will make 7 leaves.
Round 1: Create a Magic Ring.
The Leaves: (Ch 3. Skip the first ch from the hook. Work 1 sc in the next ch, 1 hdc in the last ch. Sl st directly into the Magic Ring.) Repeat the bracketed instructions 6 more times until you have 7 leaf points branching out of the center ring. Pull the magic ring closed tightly, fasten off, and weave in ends.
The Mini Roses (Make 7)
Use your chosen flower colors. You can make them all the same or mix and match!
Row 1: Ch 7.
Row 2: Skip the first ch from your hook. Work 1 sc in the next ch. Work 1 Inc in the next ch. Work 1 Inc in the next ch. Work 3 sc in the next ch. Work 3 sc in the next ch. Work 3 sc in the final ch. Fasten off, leaving a tail.
The piece will naturally want to curve. Starting from the single crochet end, roll the piece up tightly into a tiny rosebud shape. Use the tail and your tapestry needle to sew a few stitches through the base to hold the roll securely.
Assembly
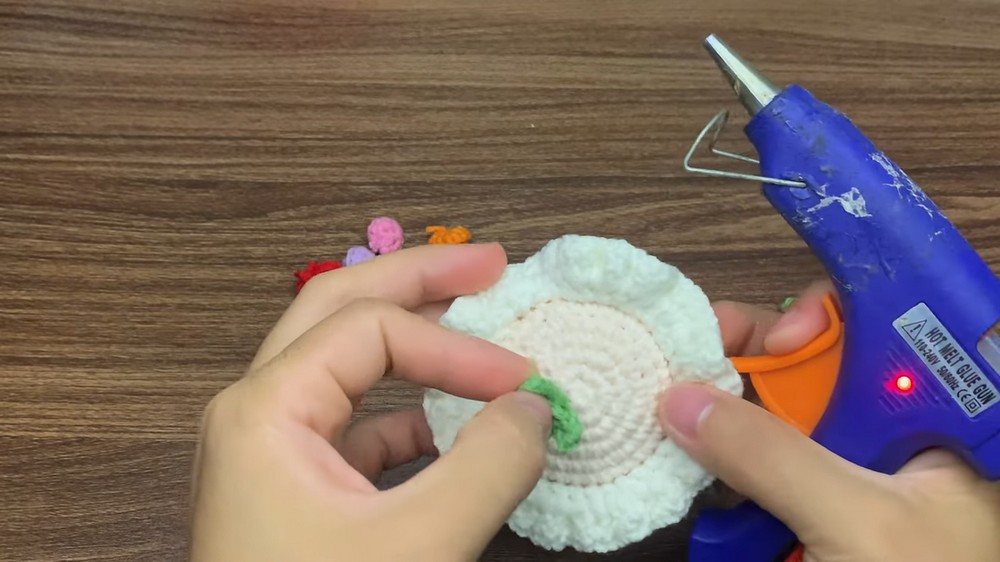
Step 1: Take your leaf starburst piece. Apply a generous amount of hot glue to the bottom center of it, and press it firmly down into the inner cup at the top of your pot. The leaves should poke out over the edges of the cup.
Step 2: Apply a dab of hot glue to the bottom of your first mini rose. Press it directly into the center of the leaf starburst.
Step 3: Glue the remaining 6 roses in a circle, completely surrounding the center rose. Gently arrange and press them together so they form a beautiful, tight dome.
Your miniature plush bouquet is finished!

About "Talha"
Hey, I’m Talha, the Crafter on Craftstive.com. I love to share guides on folding cute origami models and paper crafts, and I am always ready to inspire your next craft project with my weekly craft discussions.