

Learn how to tie a CUTE couqette bow from a satin ribbon and two of your fingers in 10 simple steps and under 10 seconds. This will be a double ribbon bow and make a more elegant gift charm than the single bow, and a hair tie add-on.
You can make it in a traditional style by making V-cuts in the tail. This method of tying a bow is the simplest and least confusing.
While in the demonstration, the thumb and index finger will be used; you can DIY with the index finger and the middle finger, whichever you are comfortable. I have already shown you how to make a paper bow for origami gift boxes, the puppy with bow present, and the heart with ribbon present. You can make similar things with this bow, too.
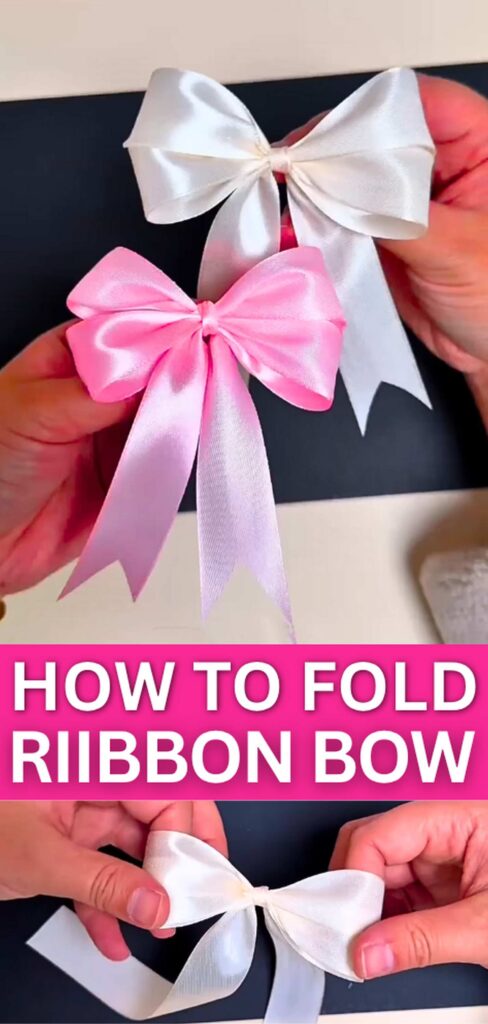
Tie the Double Ribbon Bow: Step-by-Step Instructions
Learn how to make this satin double ribbon bow with the following step-by-step instructions:
Method Type: Classical but Preferred
Time: 10 – 15 seconds (invest 1 minute for learning and practicing)
Materials Used:
- Satin ribbon (use pink, baby pink, or red)
- Scissors
- Your hands
Uses
- Gift Packaging: Glue or tie on jewelry boxes, gift bags, or envelopes.
- Hair Accessories: Attach the bow to a bobby pin, small alligator clip, or a thin headband.
- Greeting Cards & Scrapbooking: Use them as 3D embellishments for handmade cards, wedding invitations, or to decorate borders.
- Clothing Accents: Sew them onto the necklines of shirts, the pockets of cardigans.
Step 1: Position the Ribbon
- Open your thumb so that the index finger and thumb are forming a V. The tip-to-tip distance usually is about 10 cms.
- Drape the ribbon below the middle finger to secure it, and drape it over the index finger.

Step 2: Begin the Weave
Take the long end of the ribbon and wrap it around the back of your thumb finger. Then, bring it forward between your two fingers.
Step 3: Wrap the Index Finger
- Cross the ribbon over the front of the thumb and pass it back between your two fingers.
- Wrap the ribbon around the back of your index finger to start forming a figure-8 pattern.
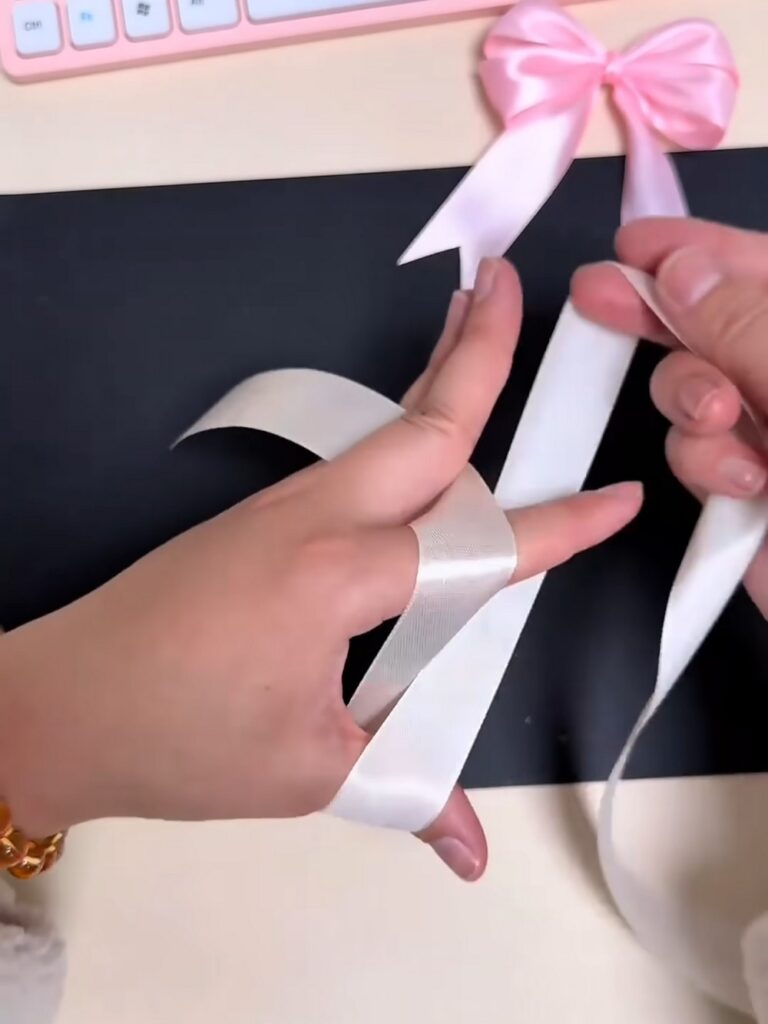
Step 4: Complete the Figure-Eight
- Bring the ribbon forward again from the back of your index finger.
- Cross it directly over the center space between your thumb and index finger.
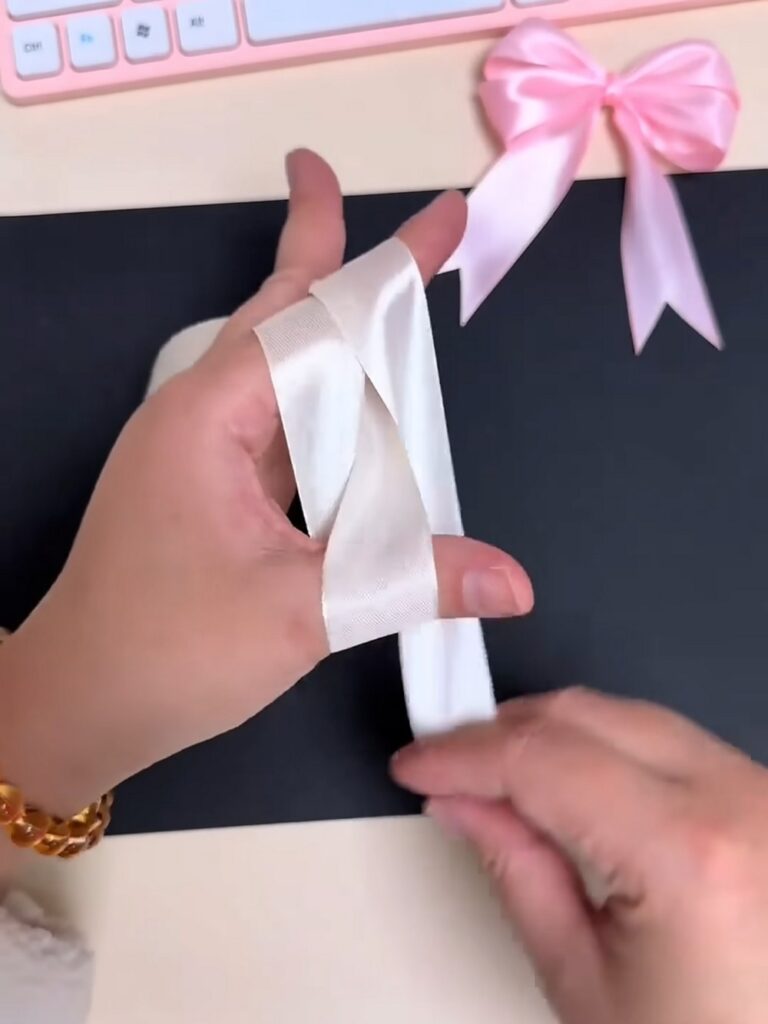
Step 5: Thread Underneath
- Take the working end of the ribbon and push it underneath the crossed section in the middle.

- Guide it through the gap between your thumb and index finger.
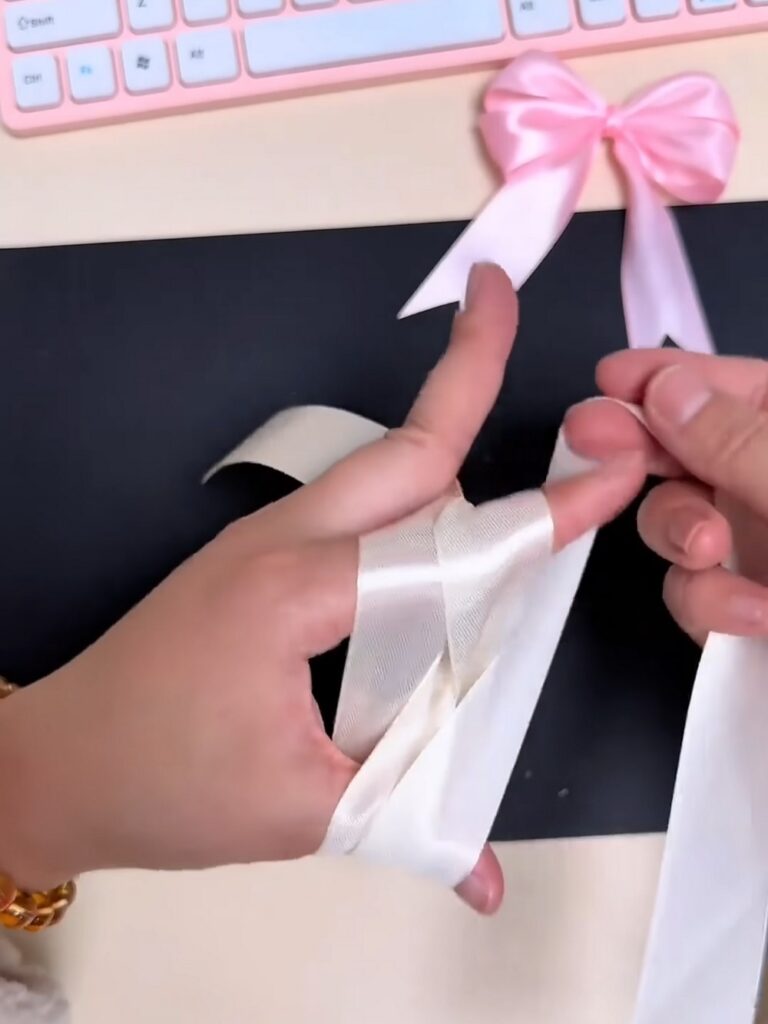
Step 6: Pull the Ribbon Through
- Reach under your fingers and grab the end of the ribbon.
- Pull it completely through the gap so the tail points down toward your palm.
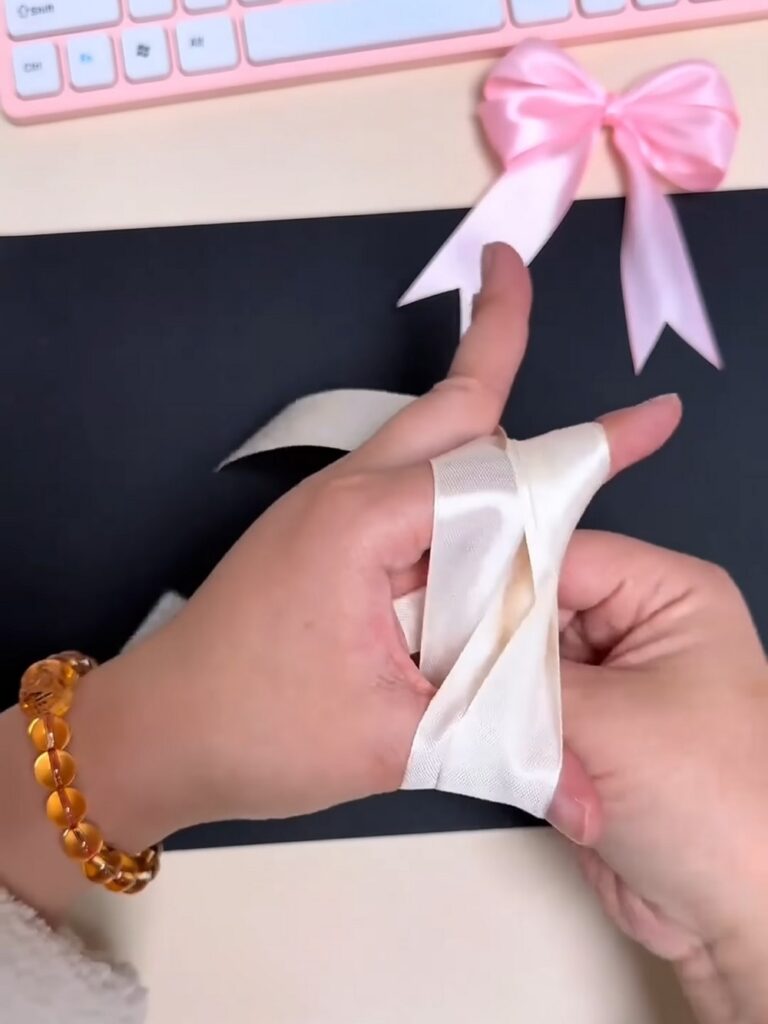
Step 7: Form the Knot Loop
- Bring the ribbon end back up and lay it over the center cross.
- This creates a small gap or loop at the top of the center point.

Step 8: Thread the Top Loop
- Push the ribbon end through the newly created loop at the top.
- Feed it through to start forming the final knot.
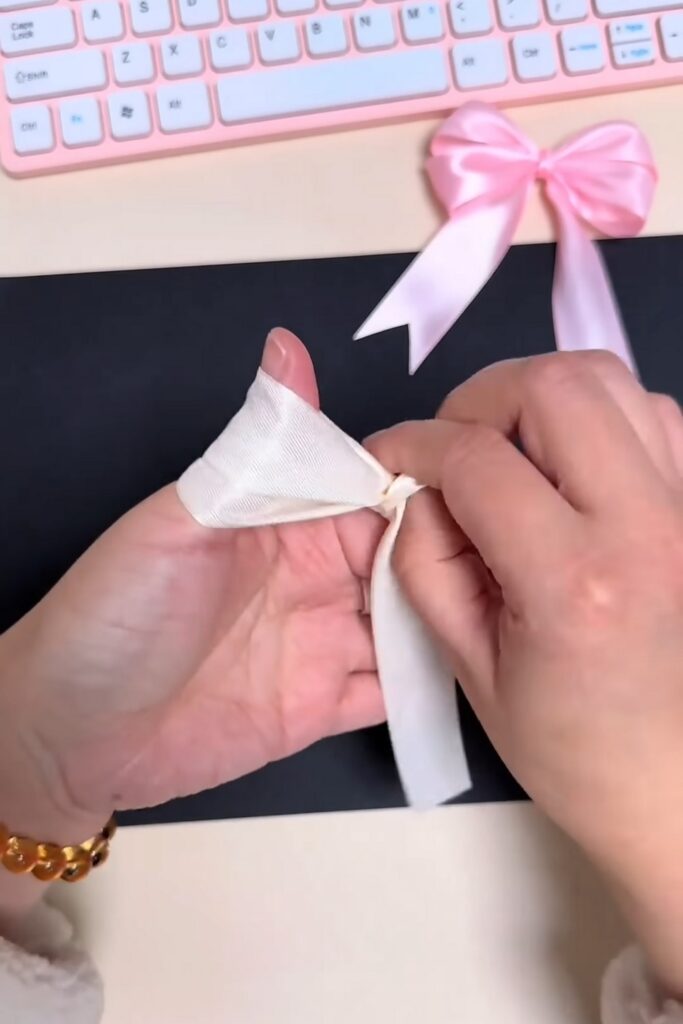
Step 9: Tighten the Center
- Grip the end of the ribbon firmly.
- Pull it tight to secure the knot around the center of the bow, locking the loops in place.

Feels Difficult?
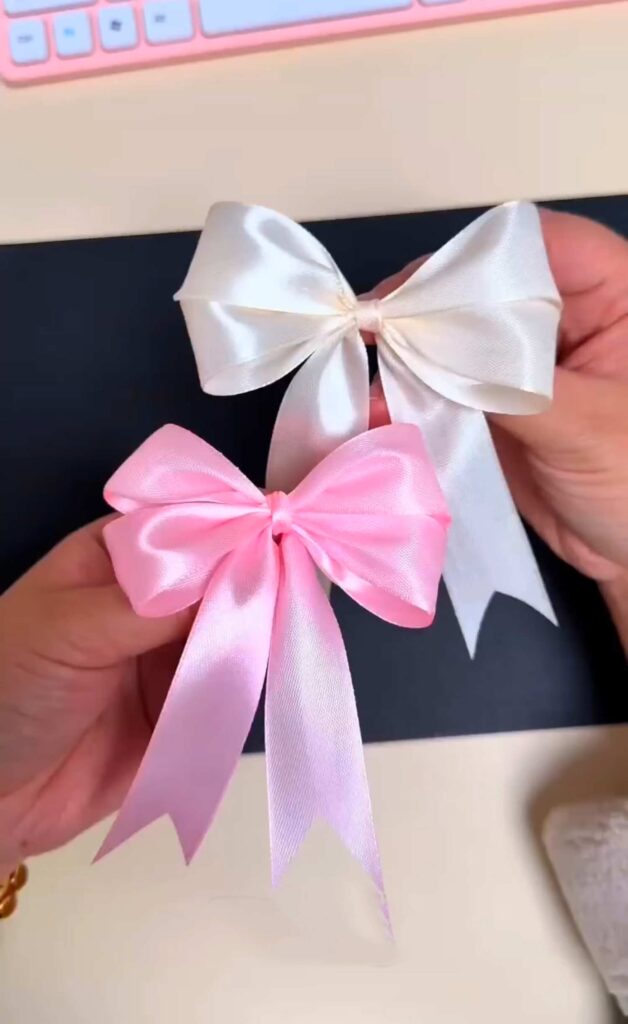
Step 10: Slide Off and Finish
- Gently slip the secured loops off your thumb and index finger.

- Adjust the loops to make them even and trim the tails if needed. You can also make V-cuts to make a traditional couquette bow.

And that’s it! This way, you can make a perfect double bow you can use in a number of ways.
Was this Tutorial Helpful? Tell us in the Comments.
Your feedback is a great way for us to improve the tutorials. Did you find the tutorial helpful? Be sure to subscribe to the creator’s channel!
About "MAKE DIY via YouTube"
She is running one of the most special corner of paper crafts that are all quick and easier and require no skill!

About "Talha"
Hey, I’m Talha, the Crafter on Craftstive.com. I love to share guides on folding cute origami models and paper crafts, and I am always ready to inspire your next craft project with my weekly craft discussions.