
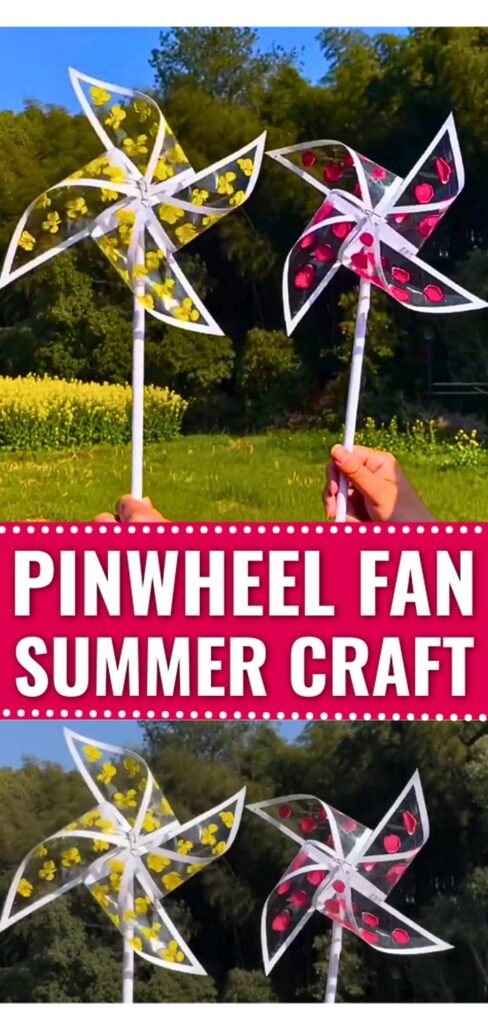
These instructions will show you how to DIY a beautiful transparent pinwheel fan filled with laminated flower petals that actually works! In my opinion, this is the most elegant pinwheel craft you will ever build, and luckily, it is the first of its kind (makes a good present!).
Kids can decorate their bicycle baskets with this pinwheel fan, or you, as an adult, can put it in a garden vase and see it spinning. We shall laminate the REAL rose petals (or you can put the vanilla flowers), so it will be an eternal and secure place for the petals. You can also put small beads, paper cutouts, or sequins! I have all the suggestions in the end.
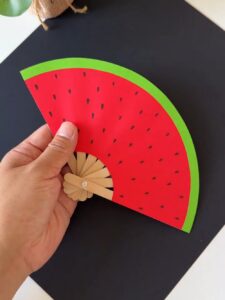
I will also provide you with a FREE printable to cut out the template. Basically, it is a different template from the usual pinwheel, but the end construction will be the same. You will especially like the white paper stripe edging. Afterwards, you can also check other fan ideas, such as the watermelon fan and the foldable paper fan! 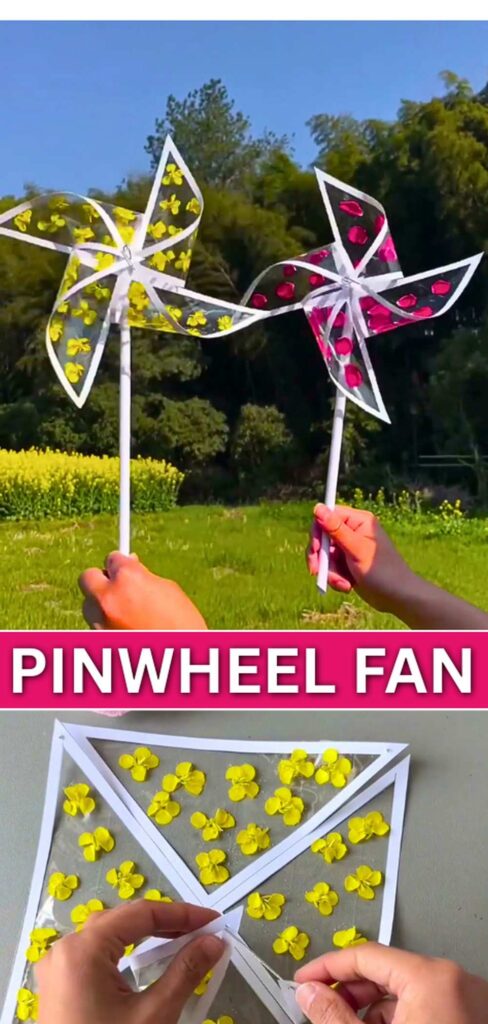
Time: 10 minutes
Supervision: Yes & (I recommend it as an adult craft)
Model Type: Unique, NEW & customized pinwheel idea
Techniques: With this pinwheel fan craft, you will learn and use the following techniques:
- Making a plastic sheet out of duct tape
- New template for making a pinwheel
- Standard pinwheel pattern
- How to laminate with a plastic sheet
- Geometric designing
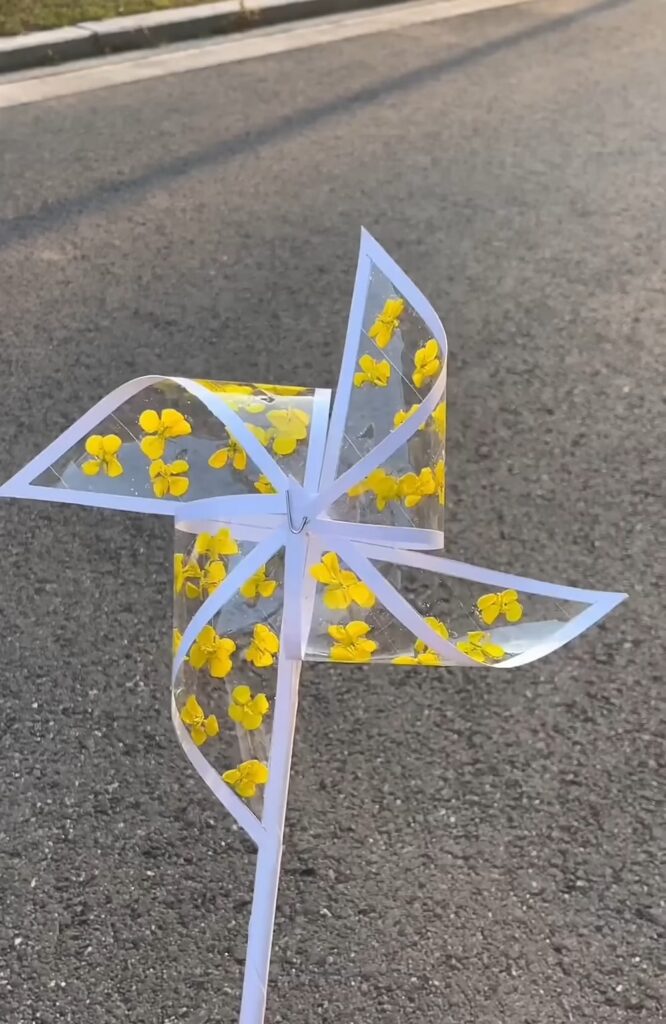
What you need
You will want to buy the following supplies and materials for making this elegant DIY pinwheel fan:
- White cardstock or thick paper – 1 sheet (21 × 21 cm)
- Transparent plastic sheet/duct tape as an alternative – enough to cover 21 × 21 cm (1–2 pieces)
- Small artificial or paper flowers – ~40–60 tiny pieces (yellow shown)
- Scissors – 1
- Pencil + ruler – for measuring and drawing
- Glue or double-sided tape – small amount
- Pin/thumbtack/paper fastener – 1 (for center)
- Stick/straw/skewer – 1 (handle, ~15–20 cm)
- Optional: tweezers (for placing tiny flowers neatly)
Subscribe for the PRINTABLE template in the end!
Crochet Pinwheel Craft Decoration: Step-by-Step Instructions
Follow these step-by-step instructions to make this paper and transparent sheet pinwheel fan that actually works:
THE BASE FRAME
The base template for this pinwheel craft is different from the traditional pinwheel. So, here is how you will prepare that:
Step 1: Prepare the square
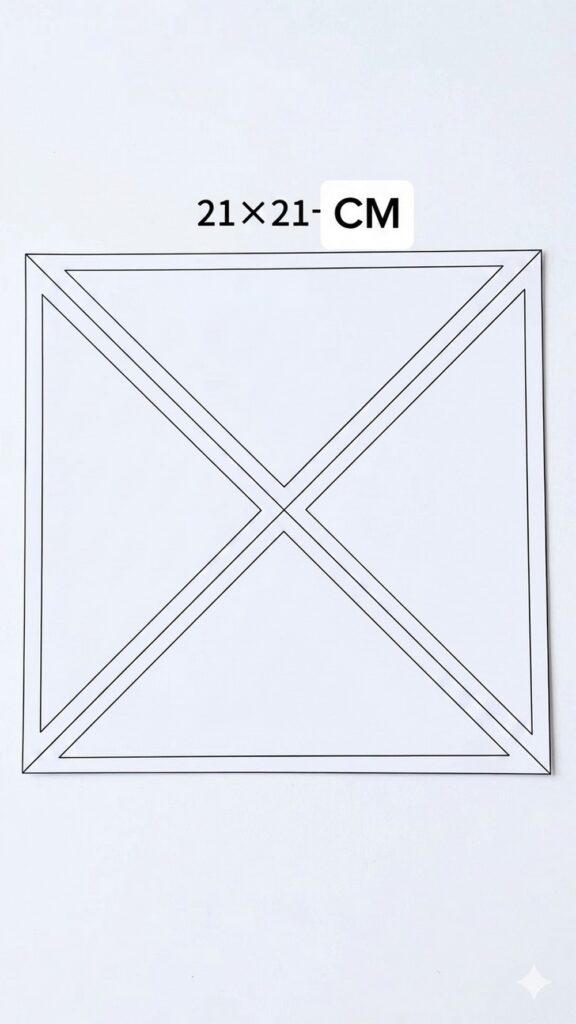
Cut cardstock into 21 × 21 cm
Draw two diagonal lines, corner to corner (an “X”)
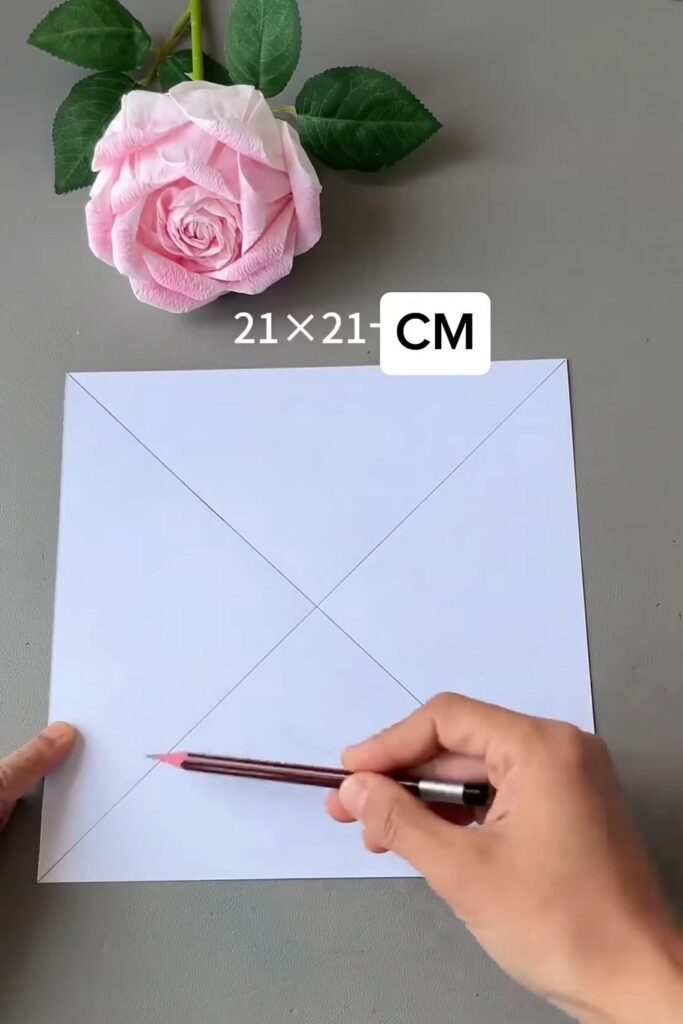
Tip: Keep lines light; they are just guides.
Step 2: Draw inner borders
Draw 2 parallel lines with each diagonal (~1–1.5 cm inside each edge). Be sure these lines don’t cross the diagonal lines.
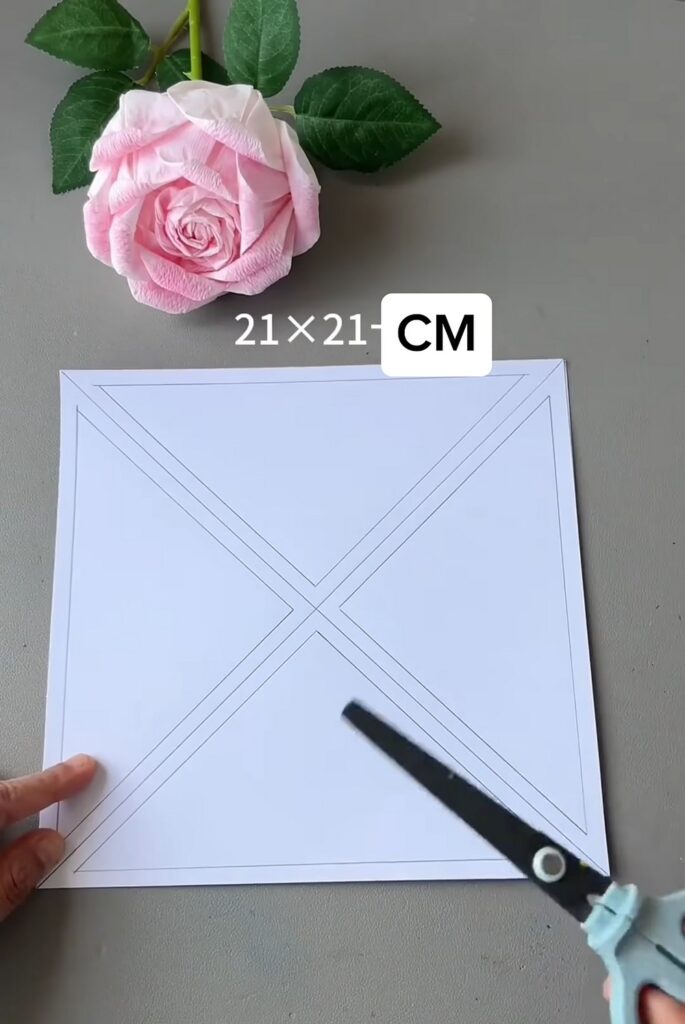
You will want to complete the triangle sections by joining the points of each pair of parallel diagonals.
This makes the white borders you see.
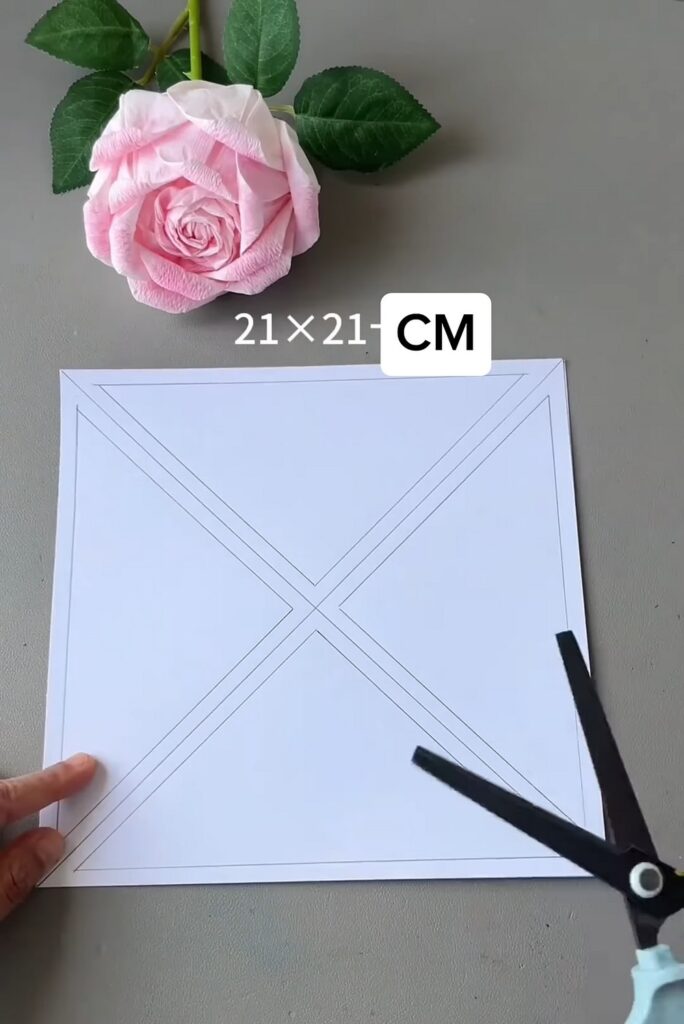
Step 3: Cut out the frame
Carefully cut along the inner lines
Remove the inner triangular sections
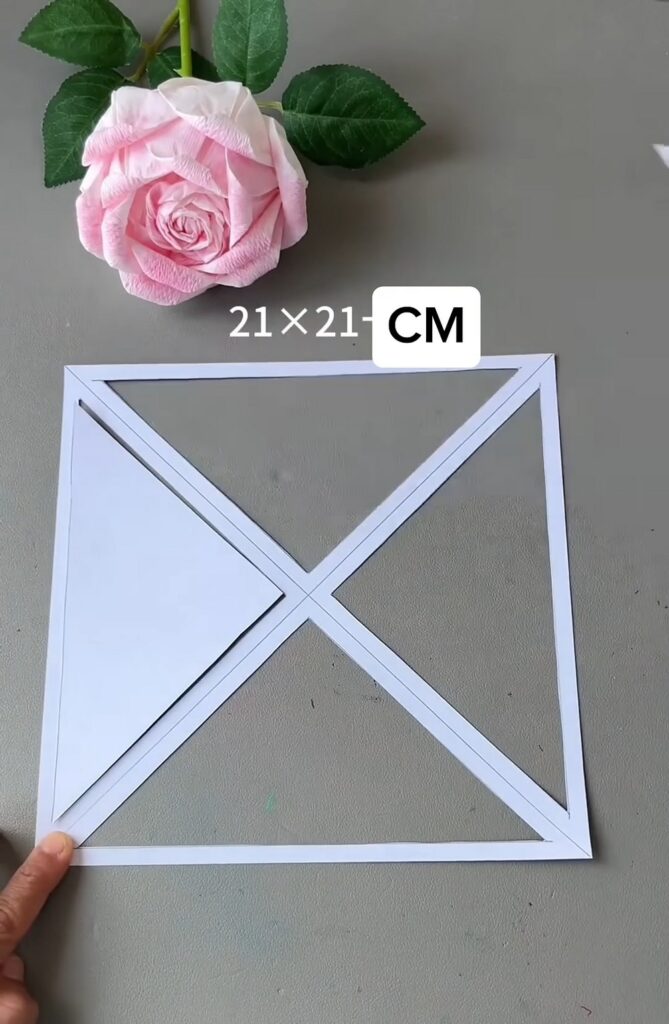
Result: A square frame with an “X” divider inside
Step 4: Prepare a transparent sheet
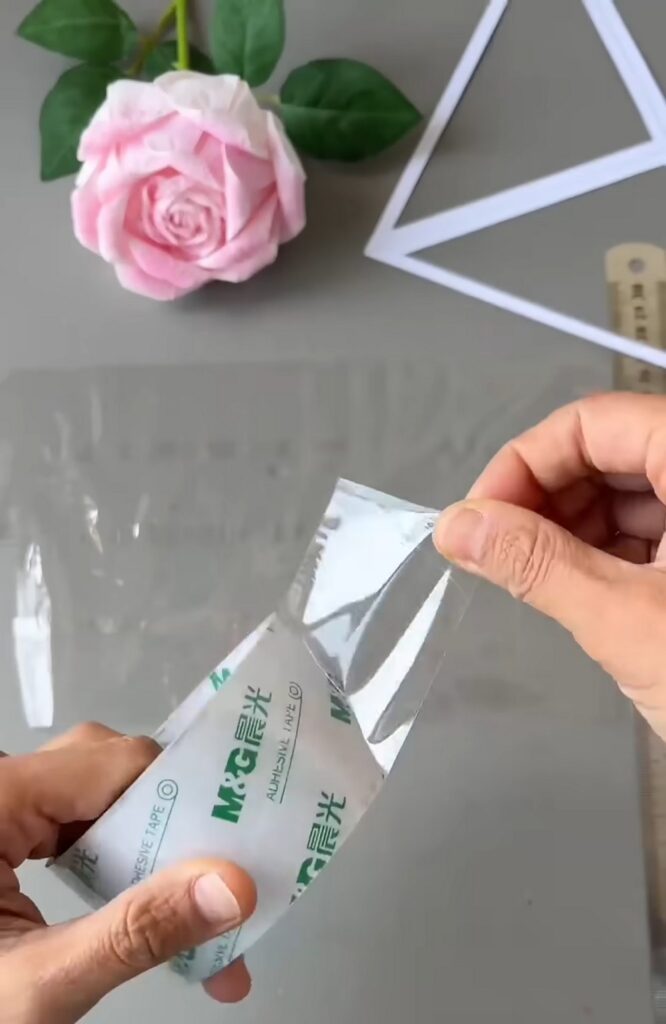
Cut a plastic sheet slightly larger than the frame (about 23 × 23 cm). Or join multiple duct tape pieces to complete the sheet square.
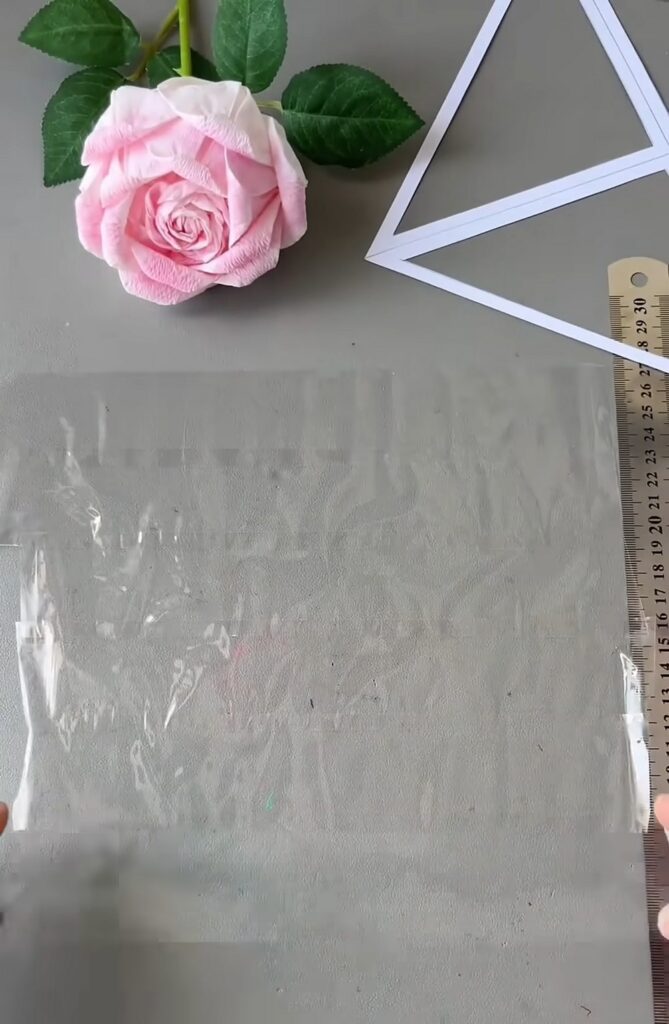
Step 5: Attach plastic backing
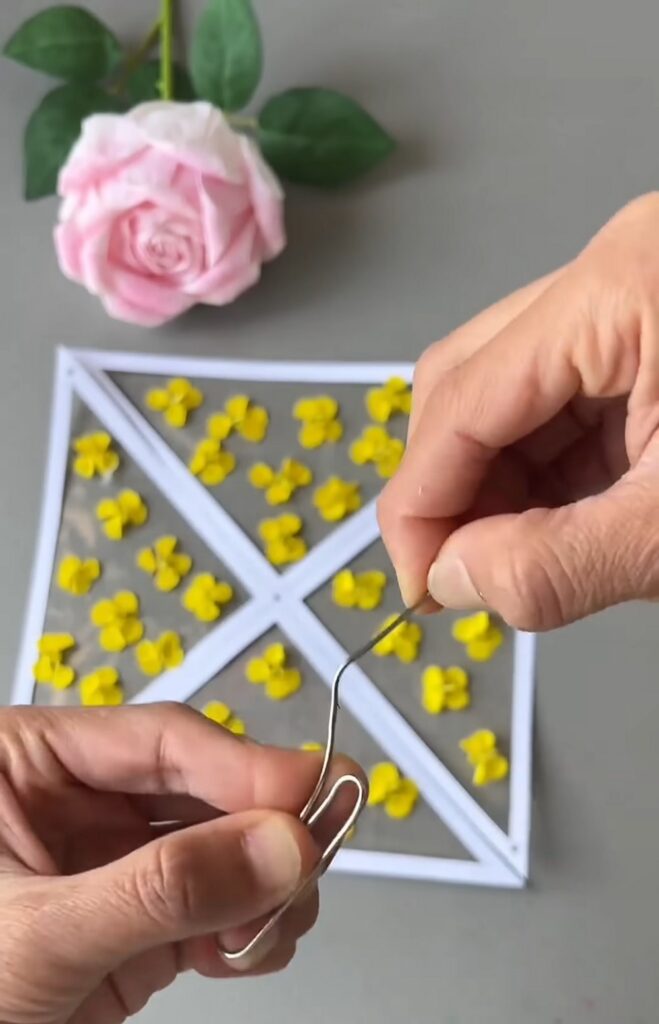
Stick a plastic sheet behind the paper frame using glue or tape. Now you have a see-through window frame.
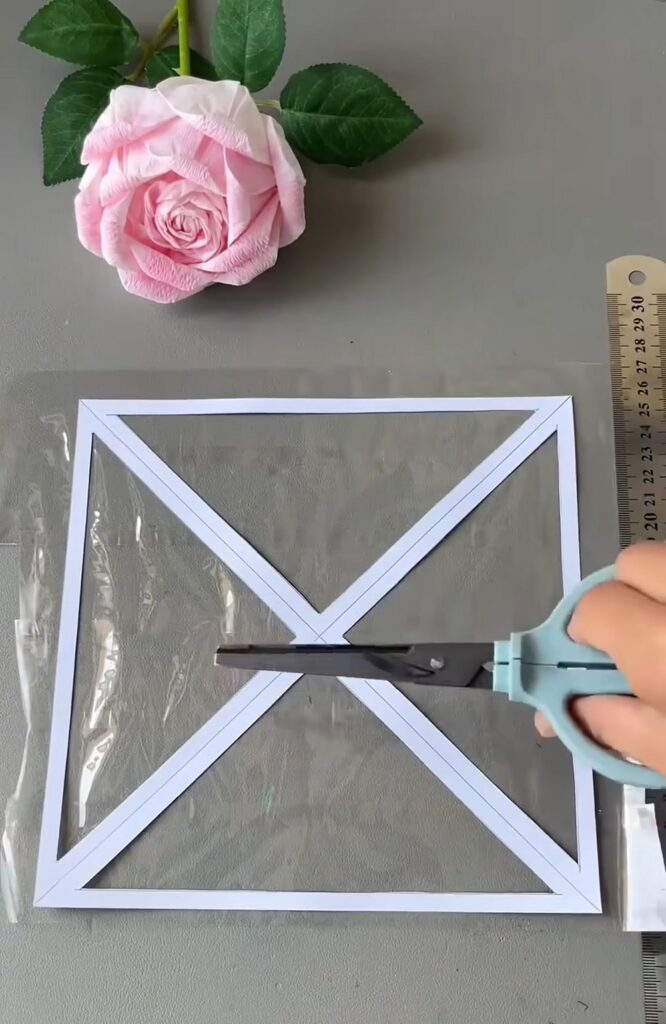
Step 6: Trim excess plastic
Cut around the edges so it matches the frame.
Step 7: Add decorations
Place small flowers evenly inside each triangular section. Stick them lightly (or sandwich them in the next step).
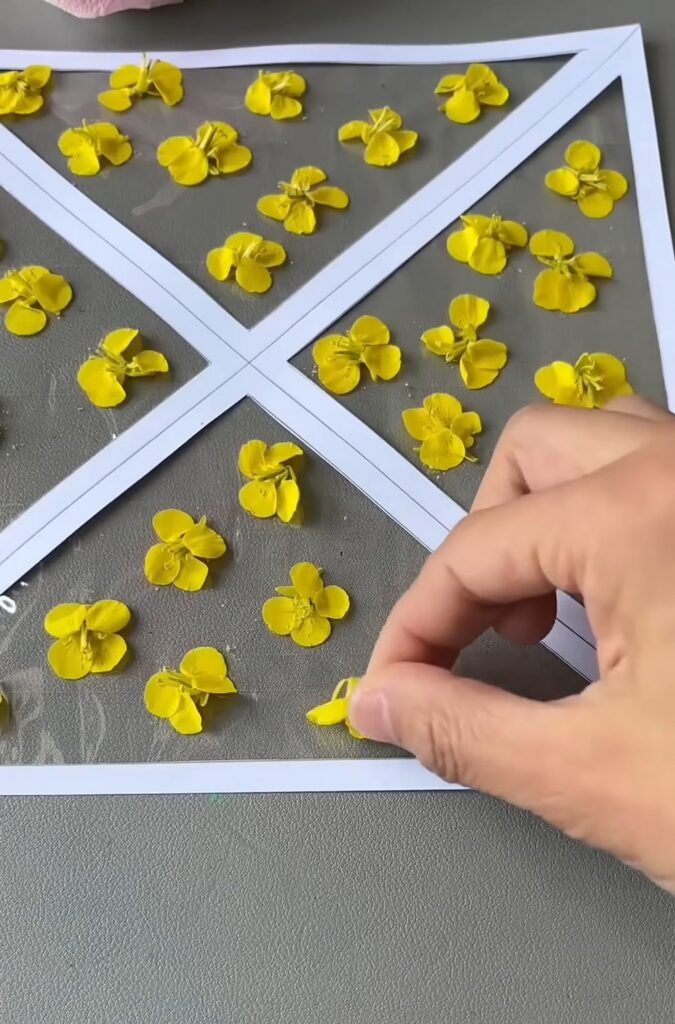
Suggested quantity:
~10–15 flowers per triangle × 4 sections
ASSEMBLING THE PINWHEEL
Now you turn the decorated frame into a spinning fan.
Step 8: Seal decorations
Add another layer of transparent sheet (or tape strips) on top. This traps flowers inside. Now it looks like a clear laminated panel.
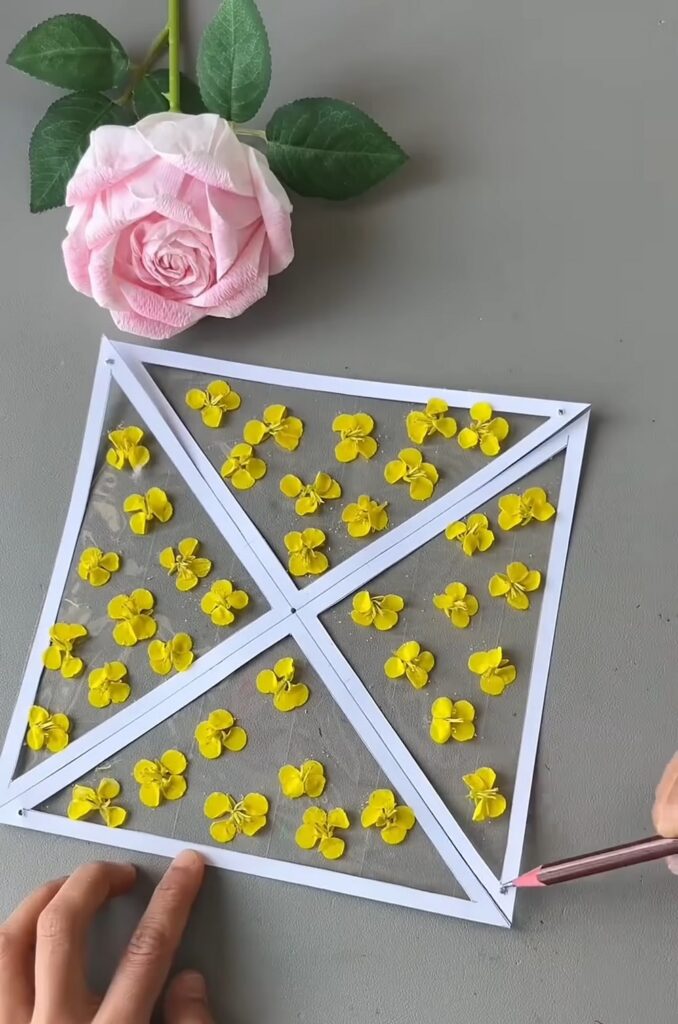
Step 9: Cut along diagonals (important!)
Cut from each corner toward the center. Stop about 2–3 cm before the middle. This is how the standard pinwheel template works. It is also similar to my origami bow cutting. Do NOT cut all the way through.
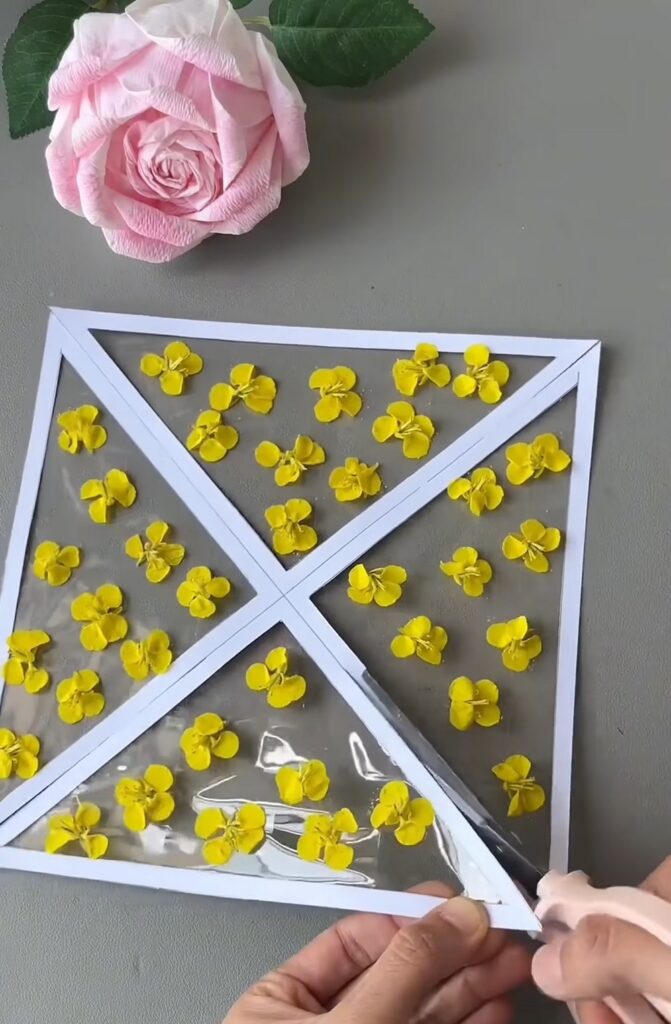
Step 10: Shape the pinwheel
Gently bend one corner of each triangle toward the center.
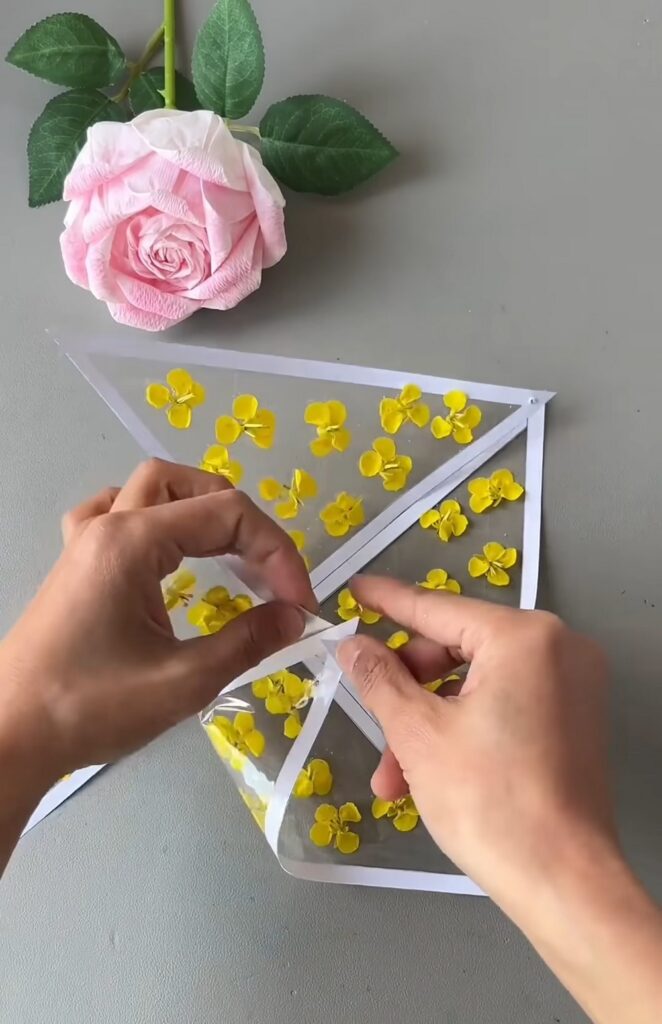
Repeat for all 4 sections (same direction), Classic pinwheel shape forms, this way.
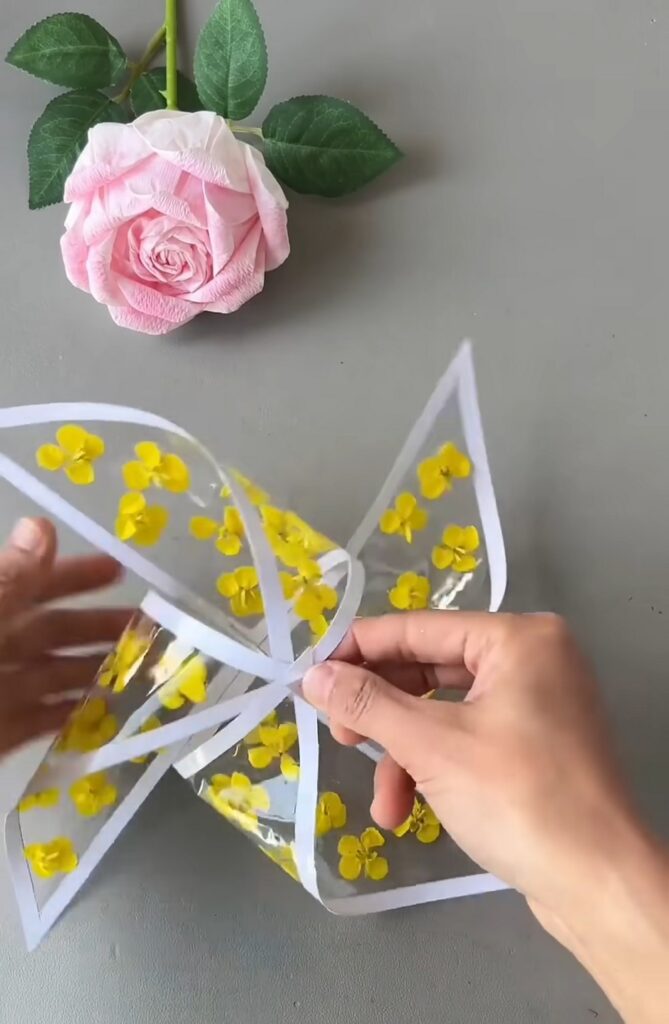
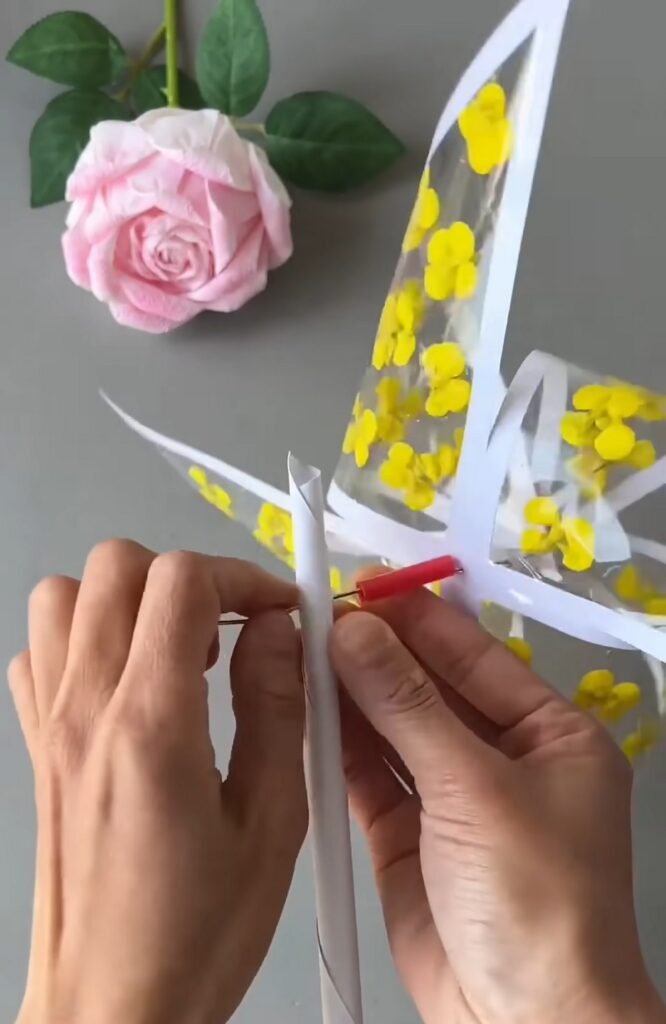
Step 11: Fix the center
Use a pin/thumbtack/brad fastener. Unfold one of the wires! Pierce through all folded corners into the center
Tip: Don’t press too tightly- leave space for spinning.
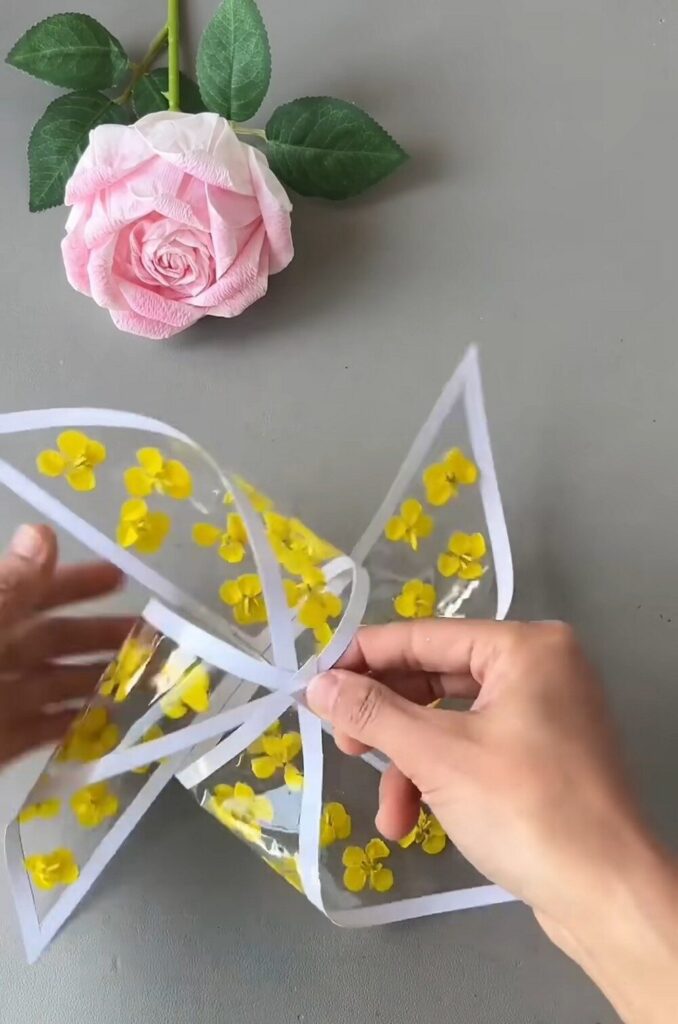
Step 12: Attach the handle
Insert pin into: Straw/stick / wooden skewer. Secure with glue if needed
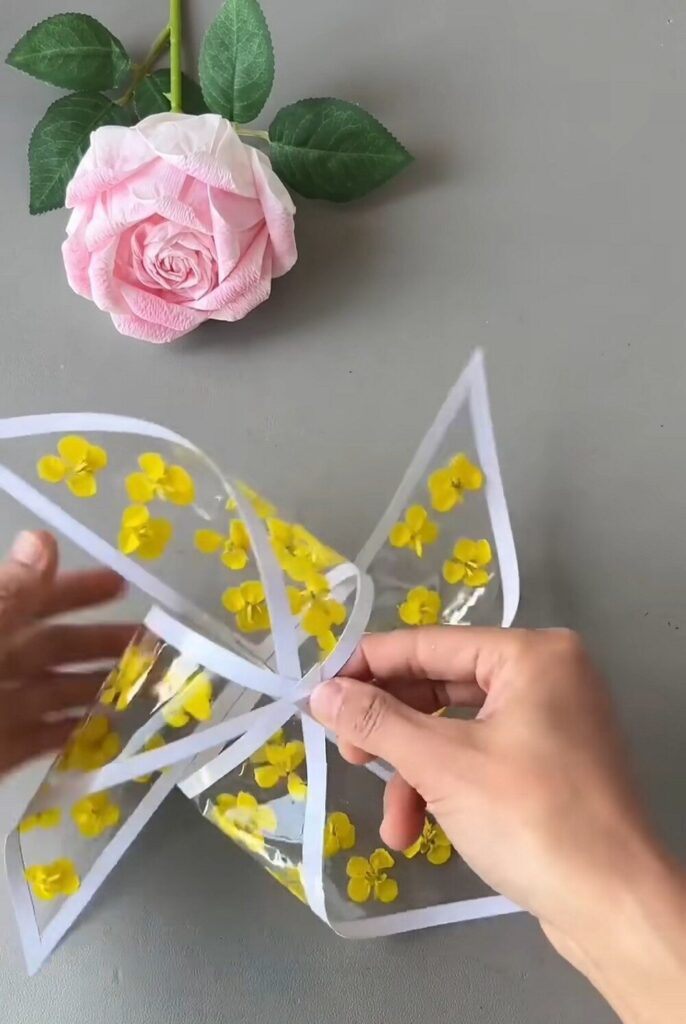
Your pinwheel is now functional!
Design & Decoration Suggestions
- Flowers & Fillers
- Paper confetti
- Dried flowers
- Glitter (light use)
- Sequins
- Frame alternatives
- Colored cardstock (pastel, neon, metallic)
- Foam sheet (for a thicker frame)
- Plastic sheet options
- Laminating sheet
- Clear file folder
- Wide transparent tape (layered)
Practical Tips
- Balance matters: distribute decorations evenly so it spins well
- Keep weight light: heavy items reduce spinning
- Use a loose center pin: tight = no spinning
- Wind test: blow gently to check movement before final fixing
Now, let the kids play with this paper & plastic sheet, and that’s how you will make this pinwheel. You can also use it as a decoration, too.
Was this Tutorial Helpful? Tell us in the Comments.
Your feedback is a great way for us to improve the tutorials. Did you find the tutorial helpful? Be sure to subscribe to the creator’s channel!
About "MAKE DIY via YouTube"
She is running one of the most special corner of paper crafts that are all quick and easier and require no skill!

About "Talha"
Hey, I’m Talha, the Crafter on Craftstive.com. I love to share guides on folding cute origami models and paper crafts, and I am always ready to inspire your next craft project with my weekly craft discussions.