
Subscribe to Kiki Crochet! The video tutorial & instructions are below!
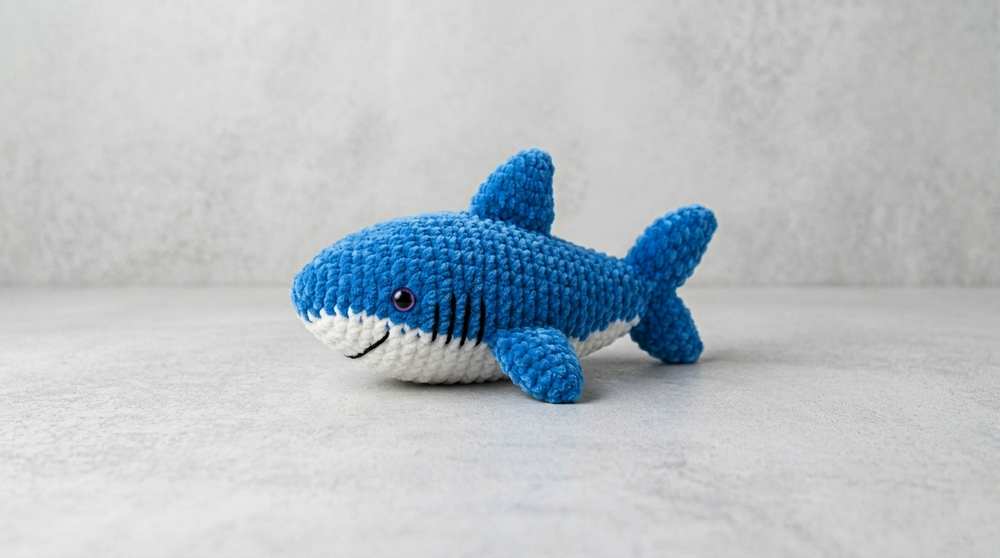
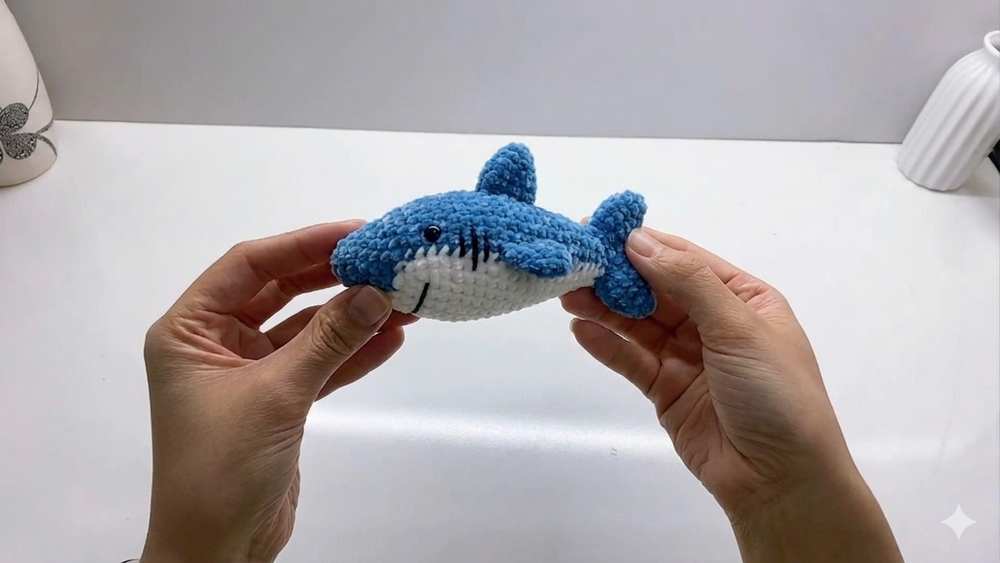
Most of you liked the crochet baby shark plushie pattern very much! Now, I will share a FREE pattern to crochet a slightly more detailed crochet shark plushie so you can complete a set of a shark family for this shark week. You can present this amigurumi shark as the mom shark. It is a low-sew fish amigurumi with a cute mouth, safety beads, and also body embroidery in black.
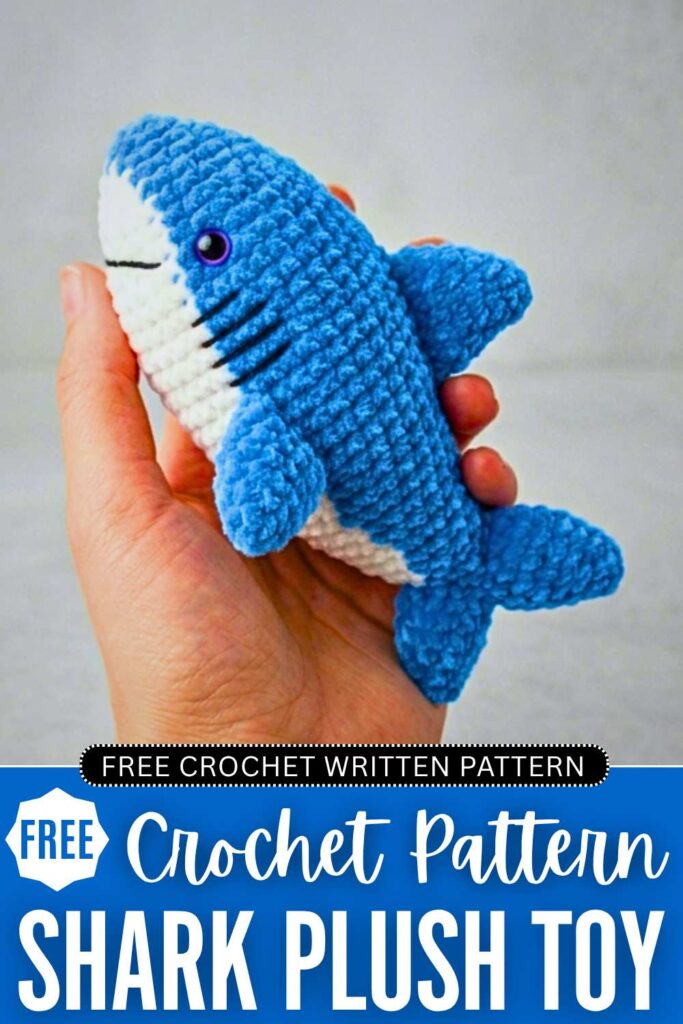
Originally, it was presented in a two-part tutorial, but now, there is a full written pattern below. Crochet it as a bag charm for your beach tote bag or make it a part of shark week cosplay. In either case, this crochet shark plush is simply irresistible. Now, continue reading for the full pattern to crochet this quick shark amigurumi and plushie!
Crochet Mom Shark Plushie: Row-by-Row Pattern
This project is an adorable, compact amigurumi shark designed by Kiki Crochet. Perfect as a keychain, desktop companion, or small gift, this beginner-friendly shark features a classic dual-color body (blue on top and white on the bottom) worked in joined rounds to create a distinct, clean separation of colors.
The pattern also includes custom-shaped side fins, a prominent dorsal fin, a split vertical tail fin, and simple embroidered facial expressions that give this miniature predator a friendly, charming personality.
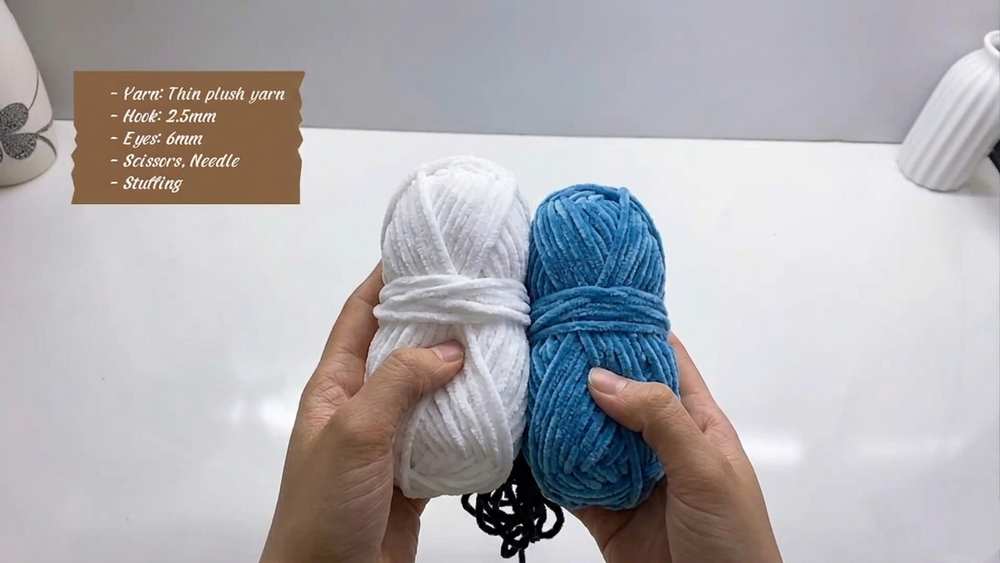
Materials Needed
- Milk Cotton Yarn: Blue (main color), White (belly color), and a small strand of Black (for the mouth embroidery)
- Crochet Hook: 2.5 mm
- Safety Eyes: One pair of small plastic craft eyes
- Toy Stuffing: Polyester fiberfill
- Tools: Yarn needle, scissors, and craft tweezers (to assist with stuffing small spaces)
Abbreviations Used
- MR: Magic Ring
- ch: Chain
- sc: Single Crochet
- hdc: Half Double Crochet
- inc: Increase (2 single crochet stitches worked into the same stitch)
- dec: Decrease (invisible single crochet 2 stitches together)
- sl st: Slip Stitch
- st / sts: Stitch / Stitches
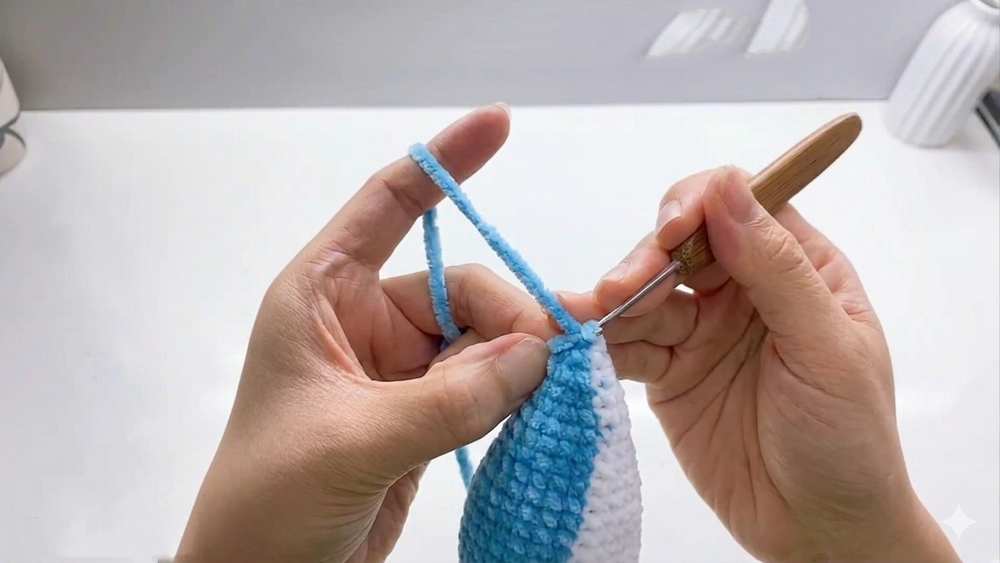
Color Changing Instructions To maintain crisp color boundaries, always perform the final pull-through of the stitch immediately preceding a color change with the new color yarn. Pull the slip stitch tight at the end of each body round to prevent visible seams.
Part 1: The Body
Worked in joined rounds. Always slip stitch to the first stitch of the round and chain 1 to start a new round.
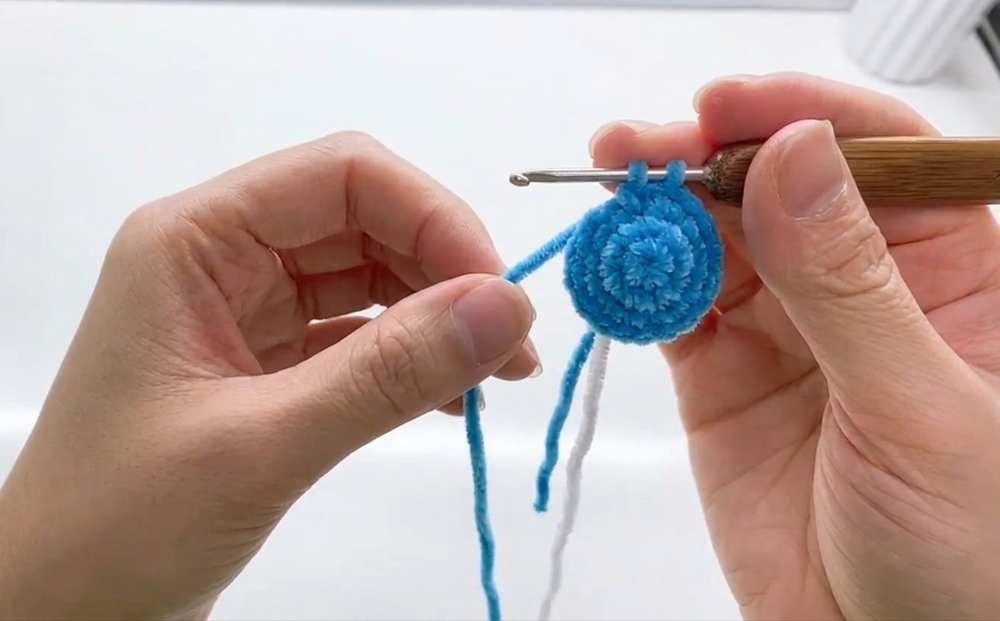
- Round 1: Using Blue yarn, make a MR. Ch 1, work 6 sc into the ring. Sl st to the first sc, ch 1. Total: 6 sts
- Round 2: (1 sc, 1 inc) x 3. Sl st, ch 1. Total: 9 sts
- Round 3: (1 sc, 1 inc, 1 sc) x 3. On the final pull-through of the last stitch, switch to White yarn. Sl st, ch 1. Total: 12 sts
- Round 4: 3 White sc (switch to Blue), 1 Blue inc, 3 Blue sc, 1 Blue inc, 3 Blue sc, 1 Blue sc, 1 inc worked as (1 Blue sc, 1 White sc) in the final stitch. Sl st, ch 1. Total: 15 sts
- Round 5: 4 White sc (switch to Blue), 1 Blue inc, 4 Blue sc, 1 Blue inc, 4 Blue sc, 1 inc worked as (1 Blue sc, 1 White sc) in the final stitch. Sl st, ch 1. Total: 18 sts
- Round 6: 5 White sc (switch to Blue), 1 Blue inc, 5 Blue sc, 1 Blue inc, 5 Blue sc, 1 inc worked as (1 Blue sc, 1 White sc) in the final stitch. Sl st, ch 1. Total: 21 sts
- Round 7: 6 White sc, 1 White inc, 1 White sc (switch to Blue), 5 Blue sc, 1 Blue inc, 6 Blue sc, 1 inc worked as (1 Blue sc, 1 White sc) in the final stitch. Sl st, ch 1. Total: 24 sts
- Round 8: 7 White sc, 1 White inc, 2 White sc (switch to Blue), 5 Blue sc, 1 Blue inc, 7 Blue sc, 1 inc worked as (1 Blue sc, 1 White sc) in the final stitch. Sl st, ch 1. Total: 27 sts
- Round 9: 11 White sc (switch to Blue), 16 Blue sc (switch to White). Sl st, ch 1. Total: 27 sts
- Round 10: 8 White sc, 1 White inc, 2 White sc (switch to Blue), 6 Blue sc, 1 Blue inc, 8 Blue sc, 1 inc worked as (1 Blue sc, 1 White sc) in the final stitch. Sl st, ch 1. Total: 30 sts
- Round 11: 12 White sc (switch to Blue), 18 Blue sc (switch to White). Sl st, ch 1. Total: 30 sts
- Round 12: 2 White sc, 1 White inc, 9 White sc (switch to Blue), 1 Blue inc, 9 Blue sc, 1 Blue inc, 6 Blue sc (switch to White), 1 White sc. Sl st, ch 1. Total: 33 sts
- Rounds 13–14: 13 White sc (switch to Blue), 20 Blue sc (switch to White). Sl st, ch 1. Total: 33 sts
- Round 15: 6 White sc, 1 White dec, 5 White sc (switch to Blue), 7 Blue sc, 1 Blue dec, 9 Blue sc, 1 Blue dec (switch to White). Sl st, ch 1. Total: 30 sts
- Round 16: 12 White sc (switch to Blue), 18 Blue sc (switch to White). Sl st, ch 1. Total: 30 sts
- Round 17: 5 White sc, 1 White dec, 5 White sc (switch to Blue), 6 Blue sc, 1 Blue dec, 4 Blue sc, 1 Blue dec, 4 Blue sc (switch to White). Sl st, ch 1. Total: 27 sts
- Round 18: 11 White sc (switch to Blue), 16 Blue sc (switch to White). Sl st, ch 1. Total: 27 sts
- Round 19: 4 White sc, 1 White dec, 5 White sc (switch to Blue), 5 Blue sc, 1 Blue dec, 4 Blue sc, 1 Blue dec, 3 Blue sc (switch to White). Sl st, ch 1. Total: 24 sts
- Round 20: 10 White sc (switch to Blue), 14 Blue sc (switch to White). Sl st, ch 1. Total: 24 sts
- Round 21: 4 White sc, 1 White dec, 4 White sc (switch to Blue), 4 Blue sc, 1 Blue dec, 3 Blue sc, 1 Blue dec, 3 Blue sc (switch to White). Sl st, ch 1. Total: 21 sts
- Round 22: 9 White sc (switch to Blue), 12 Blue sc (switch to White). Sl st, ch 1. Total: 21 sts
- Round 23: 3 White sc, 1 White dec, 4 White sc (switch to Blue), 3 Blue sc, 1 Blue dec, 3 Blue sc, 1 Blue dec, 2 Blue sc (switch to White). Sl st, ch 1. Total: 18 sts
- Round 24: 8 White sc (switch to Blue), 10 Blue sc (switch to White). Sl st, ch 1. Total: 18 sts
- Round 25: 3 White sc, 1 White dec, 3 White sc (switch to Blue), 2 Blue sc, 1 Blue dec, 2 Blue sc, 1 Blue dec, 2 Blue sc (switch to White). Sl st, ch 1. Total: 15 sts
- Round 26: 7 White sc (switch to Blue), 8 Blue sc (switch to White). Sl st, ch 1. Total: 15 sts
Firmly stuff the body with fiberfill at this point, shaping it evenly as you fill.
- Round 27: 3 White sc, 1 White dec, 2 White sc (switch to Blue), 1 Blue sc, 1 Blue dec, 2 Blue sc, 1 Blue dec, 1 Blue sc (switch to White). Sl st, ch 1. Total: 12 sts
- Round 28: 2 White sc, 1 White dec, 2 White sc (switch to Blue), 1 Blue dec, 2 Blue sc, 1 Blue dec (switch to White). Sl st to the first st, ch 1. Fasten off and cut yarn. Total: 9 sts
Use tweezers to push a small amount of extra fiberfill into the tail tip. Using a yarn needle, weave through the remaining front loops, pull tight to securely close the gap, and hide the yarn end inside the body. (Part 2)
Part 2: Fins & Tail
All parts are crocheted using Blue yarn and worked in continuous spiral rounds without joining at the end of each round.
Side Fins (Make 2)
- Round 1: Start with a MR, work 4 sc into the ring. Total: 4 sts
- Round 2: (1 sc, 1 inc) x 2. Total: 6 sts
- Turn the piece right-side out before moving on.
- Round 3: (1 sc, 1 inc) x 3. Total: 9 sts
- Round 4: 8 sc, 1 inc. Total: 10 sts
- Rounds 5–6: 10 sc around. Total: 10 sts
- Sl st to the first st, ch 1, and cut yarn leaving a long tail for sewing. Repeat to make a second fin.
Tail Fins (Make 2)
- Rounds 1–3: Repeat the exact instructions for Rounds 1 through 3 of the Side Fins.
- Round 4: 1 sc, 1 inc, 1 sc, 1 inc, 5 sc. Total: 11 sts
- Round 5: 11 sc around. Total: 11 sts
- Round 6: 6 sc, 1 dec, 3 sc. Total: 10 sts
- Flatten the fin flat. Crochet through both matching layers directly across the top opening to seal it closed: work 5 sc across. Ch 1, cut yarn leaving a long tail for assembly. Repeat to create the second fin half.
Top Dorsal Fin (Make 1)
- Rounds 1–3: Repeat the exact instructions for Rounds 1 through 3 of the Side Fins.
- Round 4: (1 sc, 1 inc, 1 sc) x 3. Total: 12 sts
- Round 5: 12 sc around. Total: 12 sts
- Round 6: 4 sc, 4 hdc, 4 sc. Total: 12 sts
- Sl st to the first st, ch 1, and cut yarn leaving a long tail for assembly.
Assembly & Finishing Touches
- Tail Fins: Position the two flattened tail fins vertically at the back tip of the body (one pointing upwards and the other pointing downwards). Use a yarn needle to stitch them securely onto the body tip, then weave in the tails.
- Side Fins: Sew the side fins symmetrically onto both the left and right sides of the shark’s body, targeting the lateral midline where the blue and white colors meet (around Rounds 12–14).
- Top Dorsal Fin: Sew the dorsal fin along the middle spine line on the shark’s back with the taller hdc stitches facing backwards to mimic a sweeping shark fin.
- Mouth Embroidery: Take a strand of black yarn and separate it into 2 thin fibers. Thread your needle and embroider a wide, wave-shaped or downward V-shaped mouth on the white belly section around Round 9.
- Eyes: Securely position and glue or snap the safety eyes into place directly on the blue upper portion, right around Rounds 10 and 11, evenly aligned with the mouth.
Your completed miniature crochet shark is now ready to enjoy!

About "Talha"
Hey, I’m Talha, the Crafter on Craftstive.com. I love to share guides on folding cute origami models and paper crafts, and I am always ready to inspire your next craft project with my weekly craft discussions.