
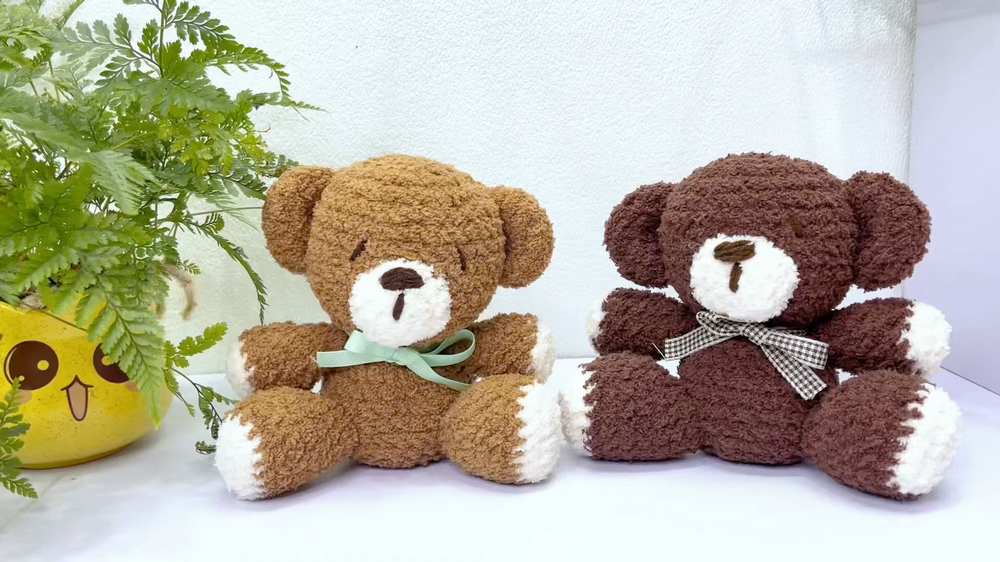
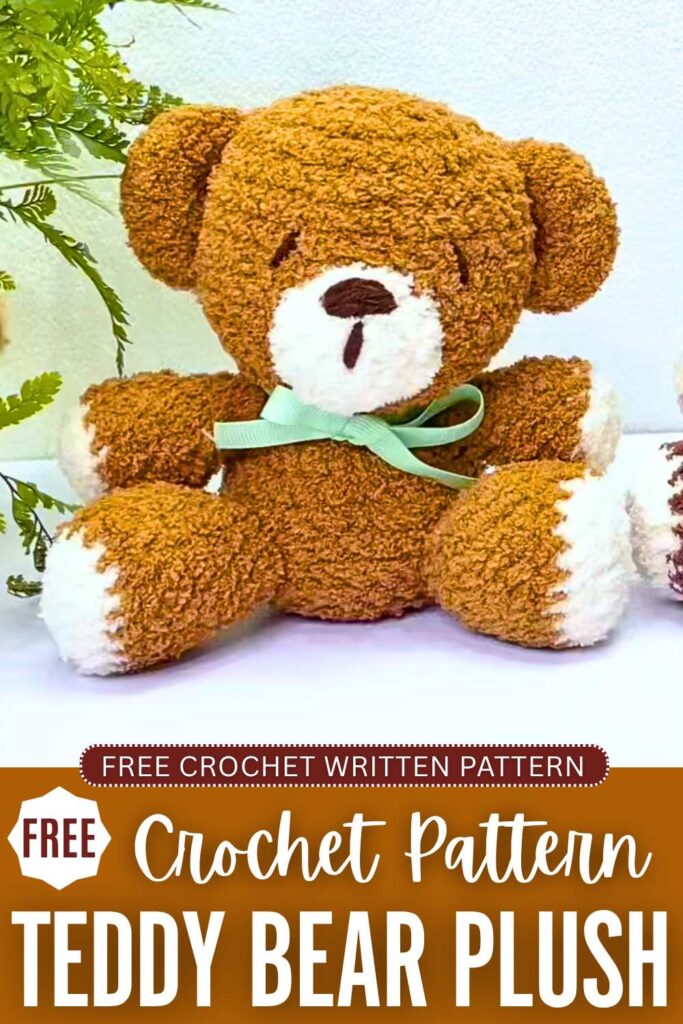
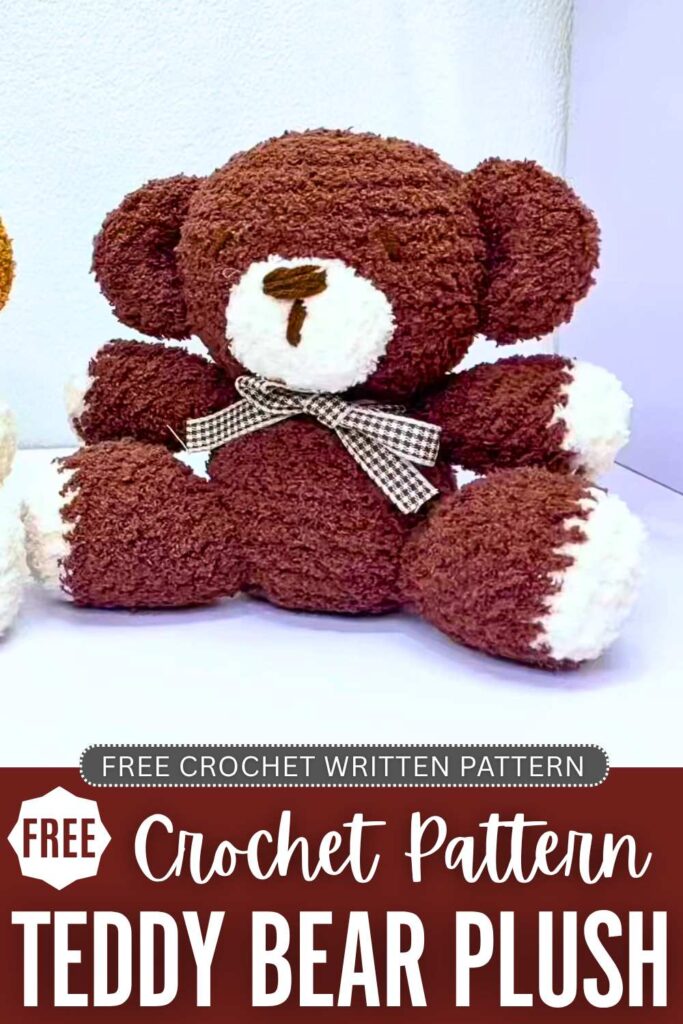
Here is another oh-so-cute snuggler plushie pattern that requires fuzzy yarn! Today, let’s crochet this super soft 15cm teddy bear plushie with a FREE pattern for all skill levels. You can either crochet the honey bear or the brown bear (grizzly bear) plushie using the same pattern. Will make the BEST Father’s Day, Valentine’s Day, and birthday present.
You can also use regular chenille yarn to crochet; it will still look just as adorable. This bear plush can sit on the receiver’s table without support, and you can pose it like a hug-ready. We will crochet the sleepy eyes for these, just like the capybara plush, so kids can use it as a sleeping snuggle. Now, continue reading for the full pattern.
Crochet Present Teddy Bear Plushie: Written Instructions
“`html
This adorable amigurumi teddy bear is a perfectly huggable 15 cm tall plushie that makes for an incredible handmade birthday gift or a soft companion for children.
The body and head are worked seamlessly in one piece, making assembly just a little bit easier. It uses a 4.5 mm crochet hook to accommodate the bulky and fluffy texture of the yarn.
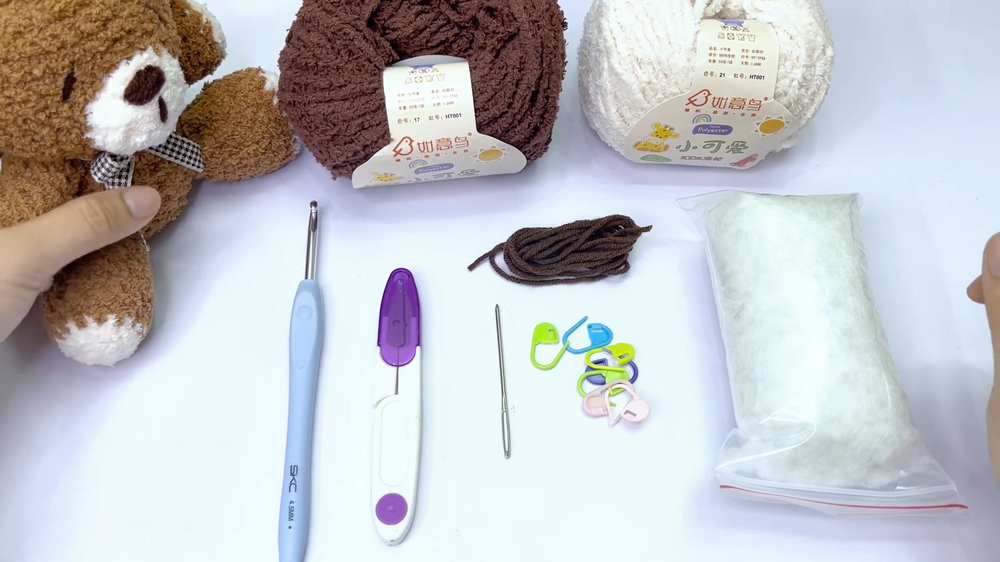
Materials
- Fluffy/chenille plush yarn in Brown (Color 17) for the main body, ears, arms, and legs.
- Fluffy/chenille plush yarn in Beige/Skin Color (Color 21) for the snout, hands, and feet.
- A small amount of extra yarn (around 50g) in an accent color (e.g., Color 61) if desired.
- Black embroidery thread or thin black yarn for embroidering the nose and eyes.
- Crochet hook (4.5 mm)
- Stitch markers (essential for fluffy yarn, as stitches can be hard to see)
- Yarn needle (tapestry needle) for sewing pieces together
- Scissors
- Fiberfill stuffing (approx. 50g)
Abbreviations (US Terms)
- MR: Magic Ring
- Ch: Chain
- Sc: Single crochet
- Inc: Increase (2 single crochet stitches in the same stitch)
- Dec: Decrease (Invisible decrease recommended: single crochet 2 stitches together)
- Sl st: Slip stitch
- St/Sts: Stitch / Stitches
- BLO: Back Loop Only
- ( … ) * x: Repeat the instructions between parentheses x times
Crochet Pattern
Note on working with fluffy yarn: Because the stitches can be difficult to see, highly recommend placing a stitch marker in the first stitch of every round. The creator of the pattern also recommends placing a stitch marker in the first stitch of every single increase or decrease grouping if you are a beginner, to avoid losing your place.
Head and Body (Worked in one piece) Use Brown yarn. Note: The creator ends every round with a slip stitch to the first stitch, and a Chain 1 to start the next round. The Ch 1 does not count as a stitch.
Round 1: MR, Ch 1, 7 sc into the ring. Sl st to join. (7 sts)
Round 2: Ch 1, 7 inc. Sl st to join. (14 sts)
Round 3: Ch 1, (1 sc, 1 inc) * 7. Sl st to join. (21 sts)
Round 4: Ch 1, (2 sc, 1 inc) * 7. Sl st to join. (28 sts)
Round 5: Ch 1, (3 sc, 1 inc) * 7. Sl st to join. (35 sts)
Rounds 6-12: Ch 1, 1 sc in each st around. Sl st to join. (35 sts)
Round 13: Ch 1, (3 sc, 1 dec) * 7. Sl st to join. (28 sts)
Round 14: Ch 1, (2 sc, 1 dec) * 7. Sl st to join. (21 sts)
Round 15: Ch 1, (1 sc, 1 dec) * 7. Sl st to join. (14 sts)
Round 16: Ch 1, 1 sc in each st around. Sl st to join. (14 sts) This creates the neck shaping. The body begins here.
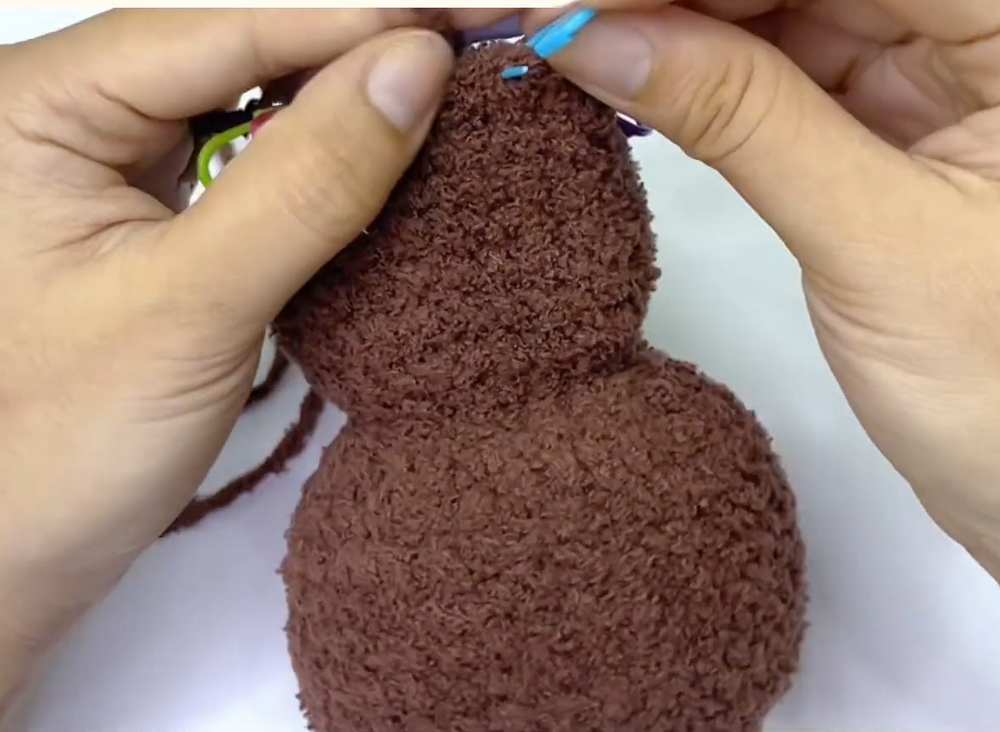
Round 17: Ch 1, (1 sc, 1 inc) * 7. Sl st to join. (21 sts)
Round 18: Ch 1, (2 sc, 1 inc) * 7. Sl st to join. (28 sts) Rounds 19-23: Ch 1, 1 sc in each st around. Sl st to join. (28 sts) Stuff the head firmly with fiberfill now before the opening gets too small.
Continue stuffing the body as you go.
Round 24: Ch 1, (2 sc, 1 dec) * 7. Sl st to join. (21 sts)
Round 25: Ch 1, (1 sc, 1 dec) * 7. Sl st to join. (14 sts)
Round 26: Ch 1, 7 dec. Sl st to join. (7 sts) Fasten off, leaving a long tail. Stuff the rest of the body firmly. Weave the yarn tail through the front loops of the remaining 7 stitches, pull tight to close the hole, secure, and weave in the end.
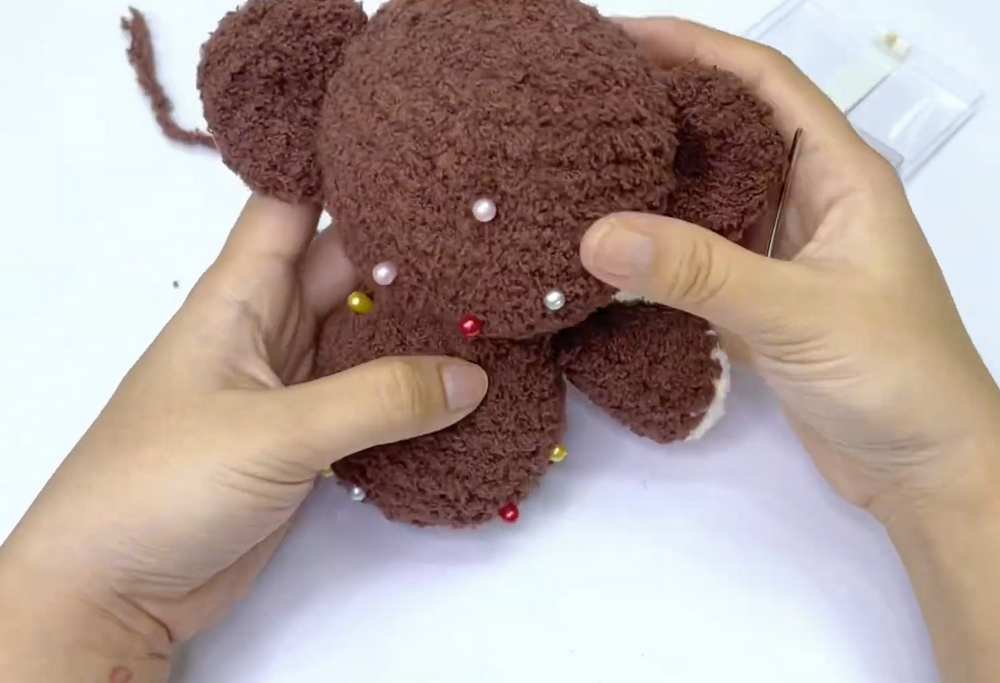
Ears (Make 2) Use Brown yarn.
Round 1: MR, Ch 1, 6 sc into the ring. Sl st to join. (6 sts)
Round 2: Ch 1, 6 inc. Sl st to join. (12 sts) Round 3: Ch 1, (1 sc, 1 inc) * 6. Sl st to join. (18 sts)
Rounds 4-5: Ch 1, 1 sc in each st around. Sl st to join. (18 sts) Fasten off, leaving a long tail for sewing. Do not stuff the ears. Pinch flat.
Arms (Make 2) Start with Beige/Skin Color yarn.
Round 1: MR, Ch 1, 6 sc into the ring. Sl st to join. (6 sts)
Round 2: Ch 1, 6 inc. Sl st to join. (12 sts) Change to Brown yarn.
Round 3: Ch 1, working in BLO, 1 sc in each st around. Sl st to join. (12 sts)
Rounds 4-5: Ch 1, 1 sc in each st around. Sl st to join. (12 sts) Round 6: Ch 1, (2 sc, 1 dec) * 3. Sl st to join. (9 sts)
Rounds 7-9: Ch 1, 1 sc in each st around. Sl st to join. (9 sts) Fasten off, leaving a long tail for sewing. Lightly stuff the bottom part of the arm, leaving the top unstuffed so it sits flat against the body.
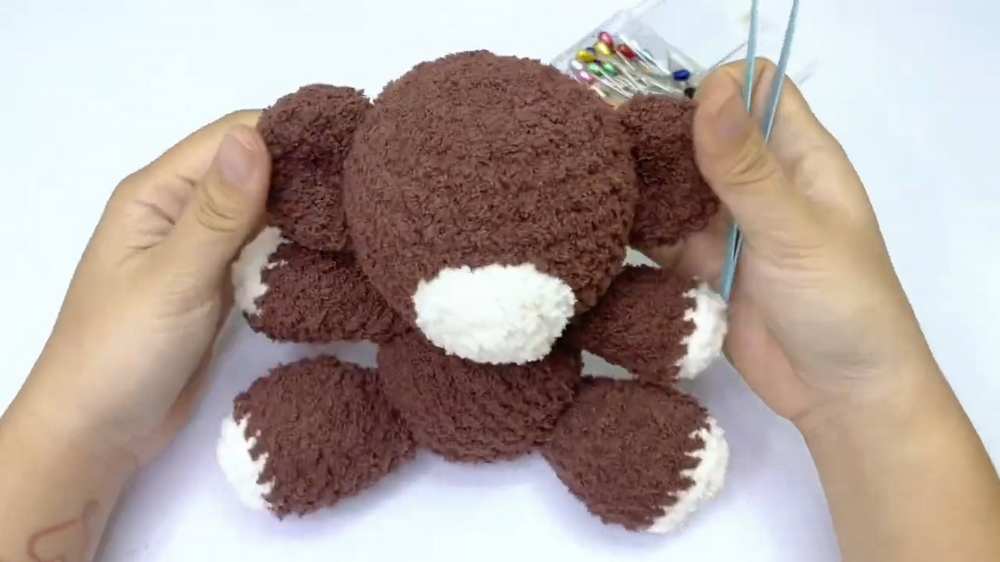
Legs (Make 2) Start with Beige/Skin Color yarn.
Round 1: Ch 6. Starting in the 2nd ch from the hook, work 4 sc. In the last chain, work 3 sc in the same stitch. Turn to work down the opposite side of the chain. Work 3 sc, and in the last chain space, work 2 sc (inc). Sl st to join. (12 sts) Round 2: Ch 1, 1 inc in the first st, 3 sc, 3 inc, 3 sc, 2 inc. Sl st to join. (18 sts) Change to Brown yarn. Rounds 3-6: Ch 1, 1 sc in each st around. Sl st to join. (18 sts) Round 7: Ch 1, 6 sc, 4 dec, 4 sc. Sl st to join. (14 sts) Round 8: Ch 1, 6 sc, 2 dec, 4 sc. Sl st to join. (12 sts) Round 9: Ch 1, 5 sc, 2 dec, 3 sc. Sl st to join. (10 sts) Fasten off, leaving a long tail for sewing. Stuff the foot firmly, and lightly stuff the top of the leg.
Snout Use Beige/Skin Color yarn.
Round 1: MR, Ch 1, 6 sc into the ring. Sl st to join. (6 sts) Round 2: Ch 1, 6 inc. Sl st to join. (12 sts) Round 3: Ch 1, 1 sc, 3 inc, 3 sc, 3 inc, 2 sc. Sl st to join. (18 sts) Fasten off, leaving a long tail for sewing.
Assembly
- Snout: Pin the snout to the lower middle part of the head, roughly between rounds 8 and 14. Sew around the edges, adding a tiny bit of stuffing underneath just before closing it up.
- Ears: Pin the ears to the top sides of the head. The video places them starting around round 5 or 6, curving downwards towards round 10. Sew securely in place.
- Arms: Pin the arms to the sides of the body, just below the neck (around round 17). Sew them flat against the body.
- Legs: Pin the legs to the bottom of the body, roughly between rounds 20 and 24, positioned so the bear is sitting down. Sew securely around the top opening of the legs to attach them to the body.
- Facial Features: Using black thread or thin yarn, embroider a triangular nose onto the top center of the beige snout, with a small straight line going down from the triangle. Embroider the eyes directly onto the brown part of the head, just above and slightly to the sides of the snout. You can sew small curves to make sleepy or happy eyes.
Learn with the Video Tutorial