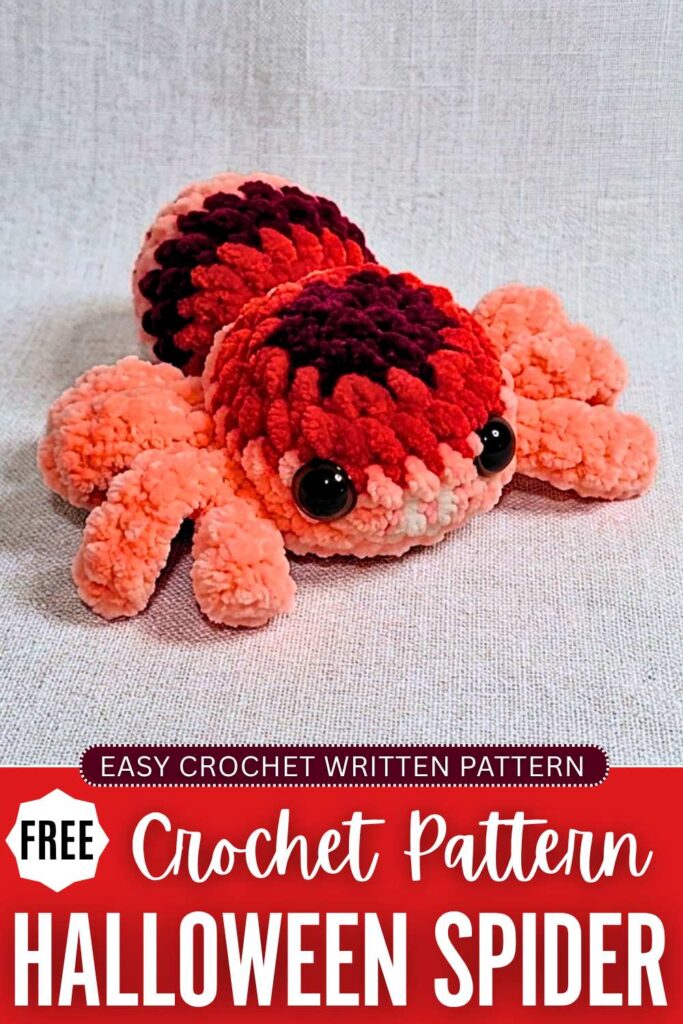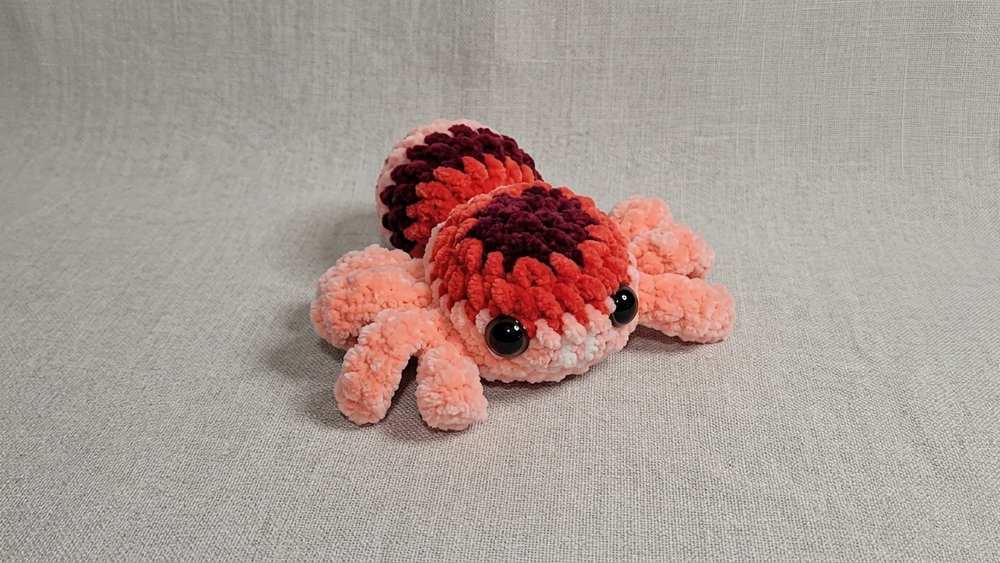
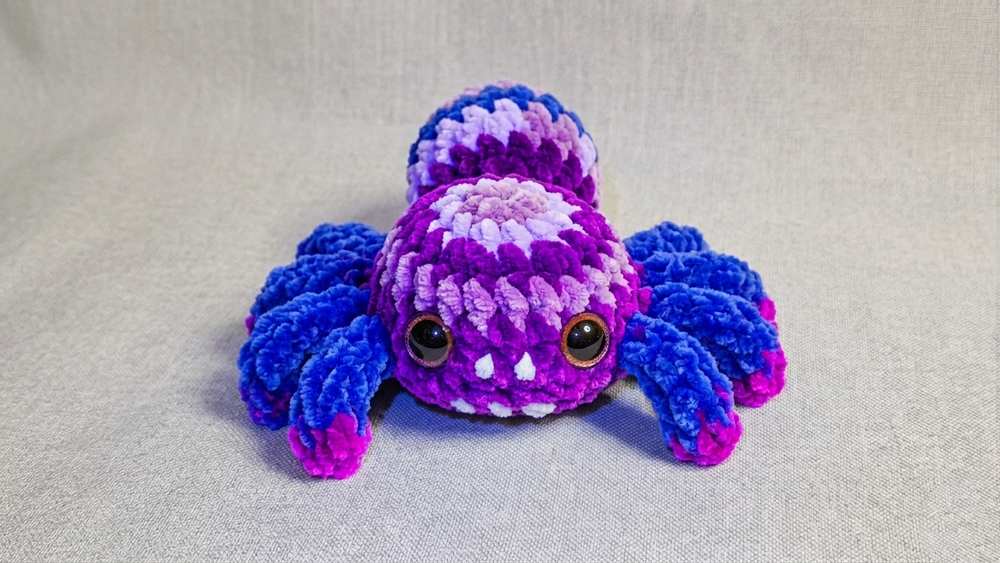
Learn how to crochet a medium-sized & low-sew baby spider plushie with beautiful spider stripes colorwork, following this pattern. This spider plush has the right amount of spookiness, cuteness, and colors. So, you can definitely make it a part of your Halloween present exchange. It is also quick to crochet, even for beginners.
You can crochet it in 3 shades of any color, such as blue, purple, black, and red. These can be tried as the popular options.
It has glittery eyes that make it even CUTER and irresistible. After Halloween, you can also make it a part of your desk buddy collection. Now, continue reading for the full crochet Halloween plush spider pattern.
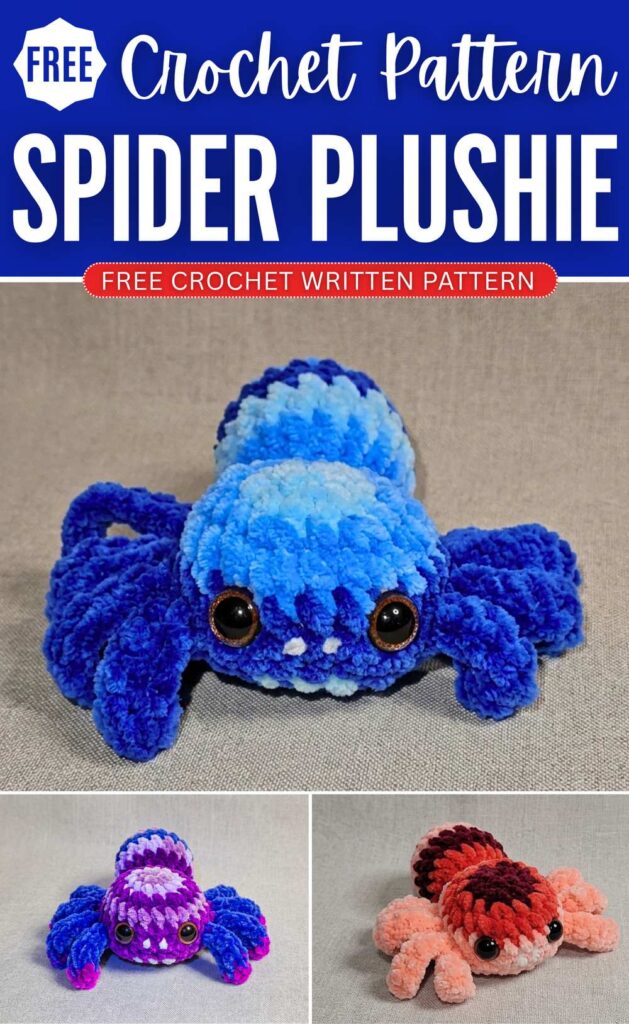
This project is a small crochet spider. It is made with soft plush yarn. It has colorful stripes on its body and head. The spider has eight thin legs and two eyes. It also has small white teeth. It is a quick and cute toy for kids or decorations.
Materials Needed
- Plush Yarn: Himalaya Dolphin Baby (or any super bulky velvet yarn) in three colors: Color A (Light Pink), Color B (Medium Pink), and Color C (Dark Pink). You will need around 6 to 10 grams of each color.
- Crochet Hook: Size 4.0 mm.
- Safety Eyes: One pair of 12 mm safety eyes (brown or black).
- Embroidery Thread: A small amount of thin white cotton yarn or thread to make the teeth.
- Stuffing: Polyester fiberfill to stuff the toy.
- Tools: A stitch marker, a yarn needle, and a pair of scissors.
Abbreviations
- ch: Chain
- sc: Single crochet
- inc: Increase (work 2 single crochet stitches into the same stitch)
- dec: Decrease (work 2 single crochet stitches together)
- sl st: Slip stitch
- BLO: Back loop only
- st(s): Stitch(es)
Crochet Pattern for the Spider Head
Start with Color A.
Round 1: Chain 2. Work 6 sc into the second chain from your hook. Do not join, work in continuous rounds. (6 sts)
Round 2: Work 1 inc into each of the 6 stitches around. On the very last stitch, change your yarn to Color B. (12 sts)
Round 3: Repeat (1 sc, 1 inc) 6 times around. (18 sts)
Round 4: Repeat (2 sc, 1 inc) 6 times around. On the very last stitch, change your yarn to Color C. (24 sts)
Round 5: Work 1 sc into each of the 24 stitches around. (24 sts)
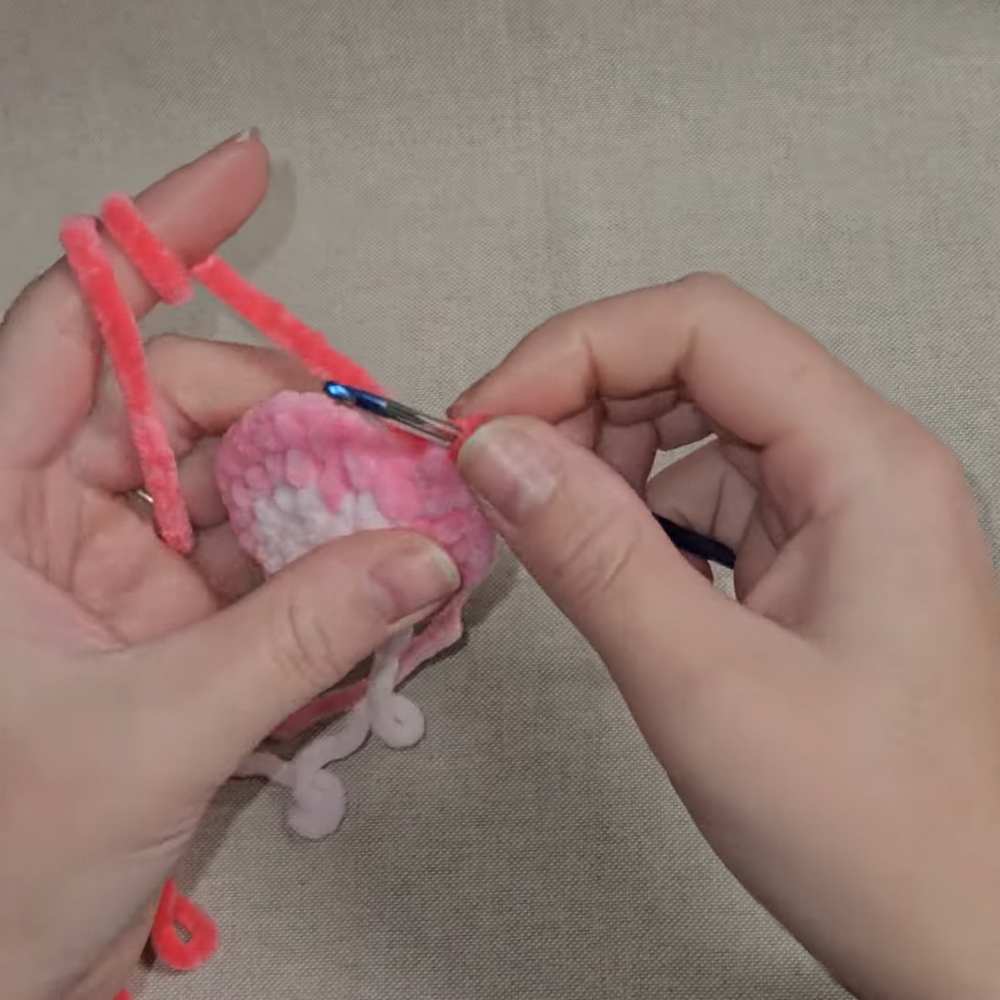
Round 6 (Legs Round): Work 1 sl st into the next stitch, then turn your work completely so you are looking at the inside/wrong side. Skip that sl st you just made.
- Work 4 sc through both loops.
- Now you will make the first 4 legs using the BLO (the loop furthest from you on the wrong side).
- For Leg 1: In the next loop, work a sl st, then chain 6. Starting from the second chain from your hook, work 5 sl st back down the chain. Work 1 sl st back into the exact same head loop.
- For Legs 2, 3, and 4: Repeat this leg process in each of the next 3 loops.
- Work 8 sc normally through both loops across the middle of the head.
- Now you will make the next 4 legs using the BLO in the next 4 loops.
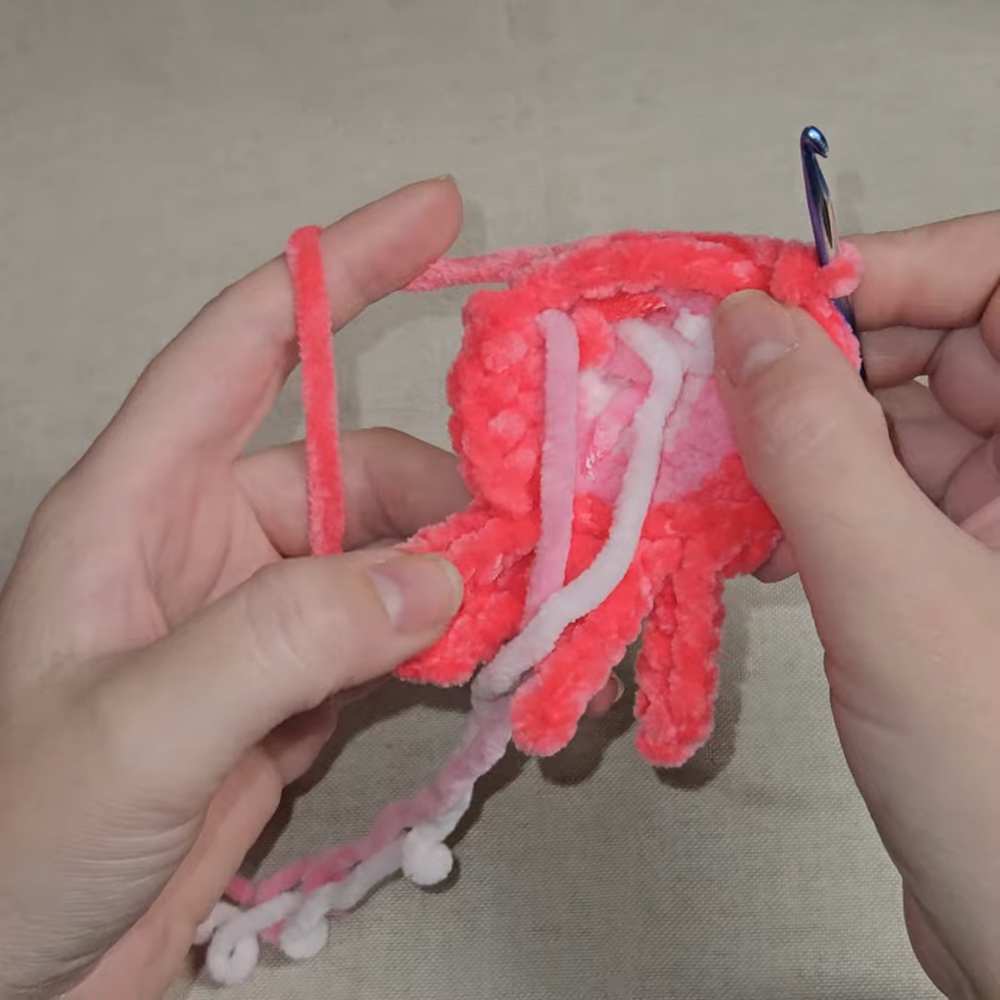
- For Legs 5, 6, 7, and 8: Repeat the same leg process (sl st, chain 6, 5 sl st down, sl st back into the same loop) in each of the next 4 loops.
- Work 4 sc through both loops to reach the end of the round. Join with a sl st and turn the work back to the right side facing you. (24 sts)
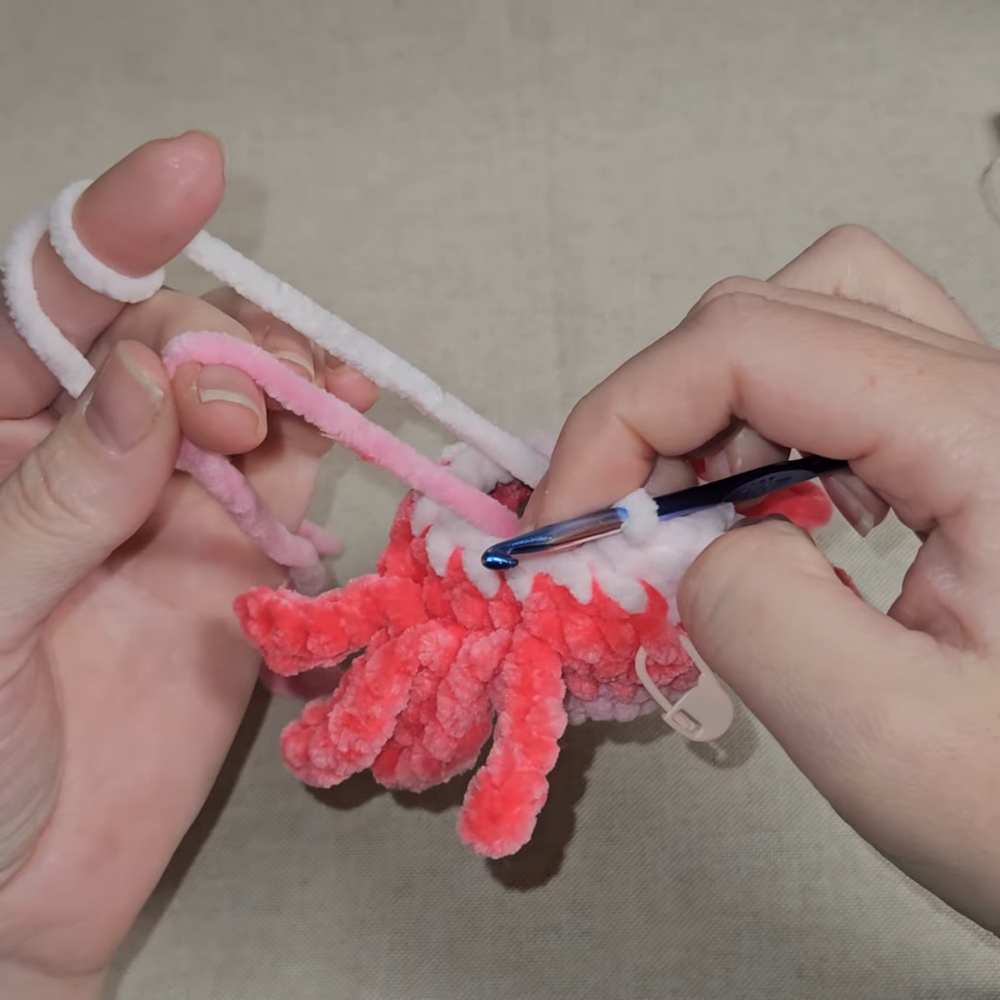
Round 7: Skip the slip stitch you used to turn.
- Work 4 sc through both loops.
- Work 4 sc into the remaining unworked loops from the leg section of the previous round.
More
- Work 8 sc through both loops across the middle.
- Work 4 sc into the remaining unworked loops from the second leg section.
- Work 4 sc through both loops to finish the round. On the last stitch, change your yarn back to Color A. Cut the yarn for Color C. (24 sts)
Round 8: Repeat (2 sc, 1 dec) 6 times around. (18 sts)
- Placing the Eyes: Take your 12 mm safety eyes. Place them between Round 5 and Round 6. Center them on the face so they sit about one single crochet stitch away from where the legs begin on each side. Snap the safety backings on tightly.
Round 9: Repeat (1 sc, 1 dec) 6 times around. On the last stitch, change your yarn to Color B. (12 sts)
- Stuffing: Stuff the head firmly with fiberfill stuffing. Make sure to push the stuffing around the safety eyes so the shape stays round.
Round 10: Work 6 dec around. (6 sts)
Cut your yarn, leaving a short tail. Thread the tail onto a yarn needle, weave it through the front loops of the remaining 6 stitches, pull it tight to close the hole, and hide the yarn tail inside the head.
Crochet Pattern for the Spider Body
Start with Color A.
Round 1: Chain 2. Work 6 sc into the second chain from your hook. (6 sts)
Round 2: Repeat (1 sc, 1 inc) 3 times around. On the last stitch, change your yarn to Color B. (9 sts)
Round 3: Repeat (2 sc, 1 inc) 3 times around. (12 sts)
More
Round 4: Repeat (3 sc, 1 inc) 3 times around. On the last stitch, change your yarn to Color C. (15 sts)
Round 5: Repeat (4 sc, 1 inc) 3 times around. (18 sts)
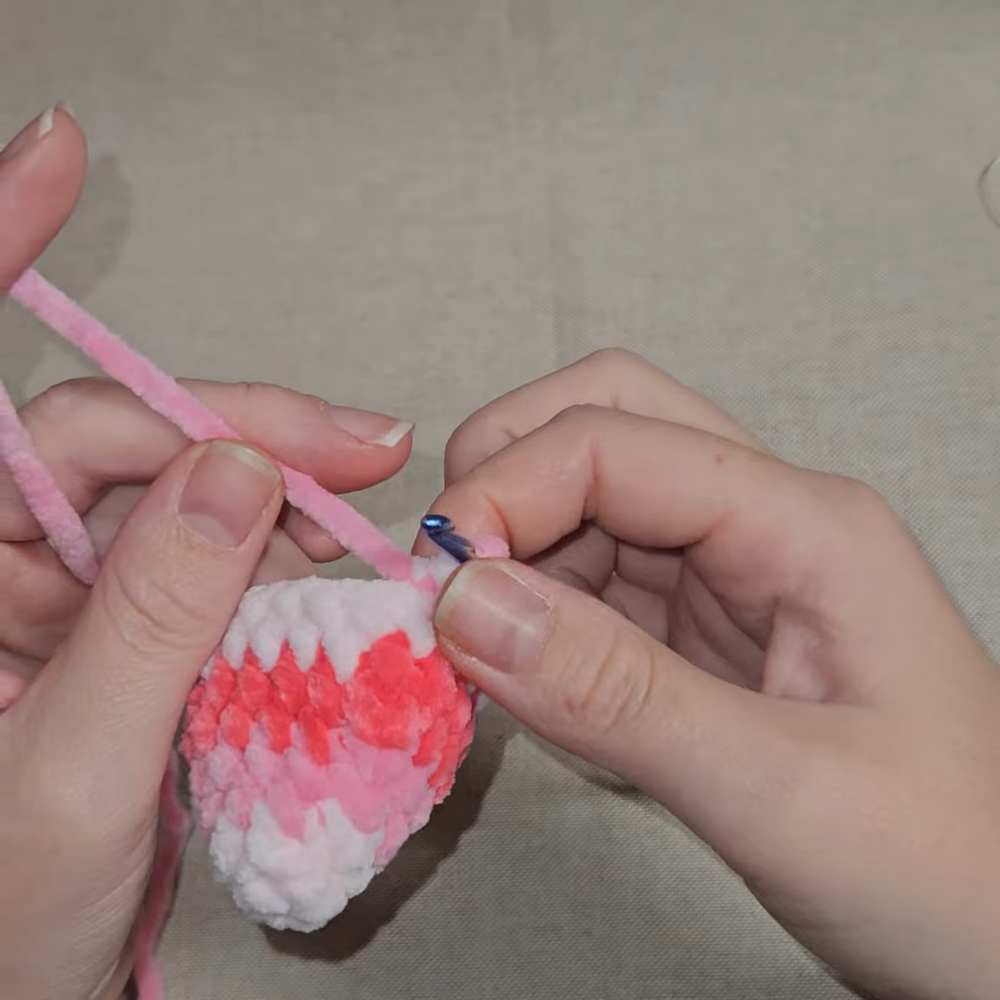
Round 6: Work 1 sc into each of the 18 stitches around. On the last stitch, change your yarn to Color A. Cut the yarn for Color C. (18 sts)
Round 7: Work 1 sc into each of the 18 stitches around using Color A. (18 sts)
Round 8: Work 1 sc into each of the 18 stitches around. On the last stitch, change your yarn to Color B. (18 sts)
Round 9: Work 1 sc into each of the 18 stitches around using Color B. (18 sts)
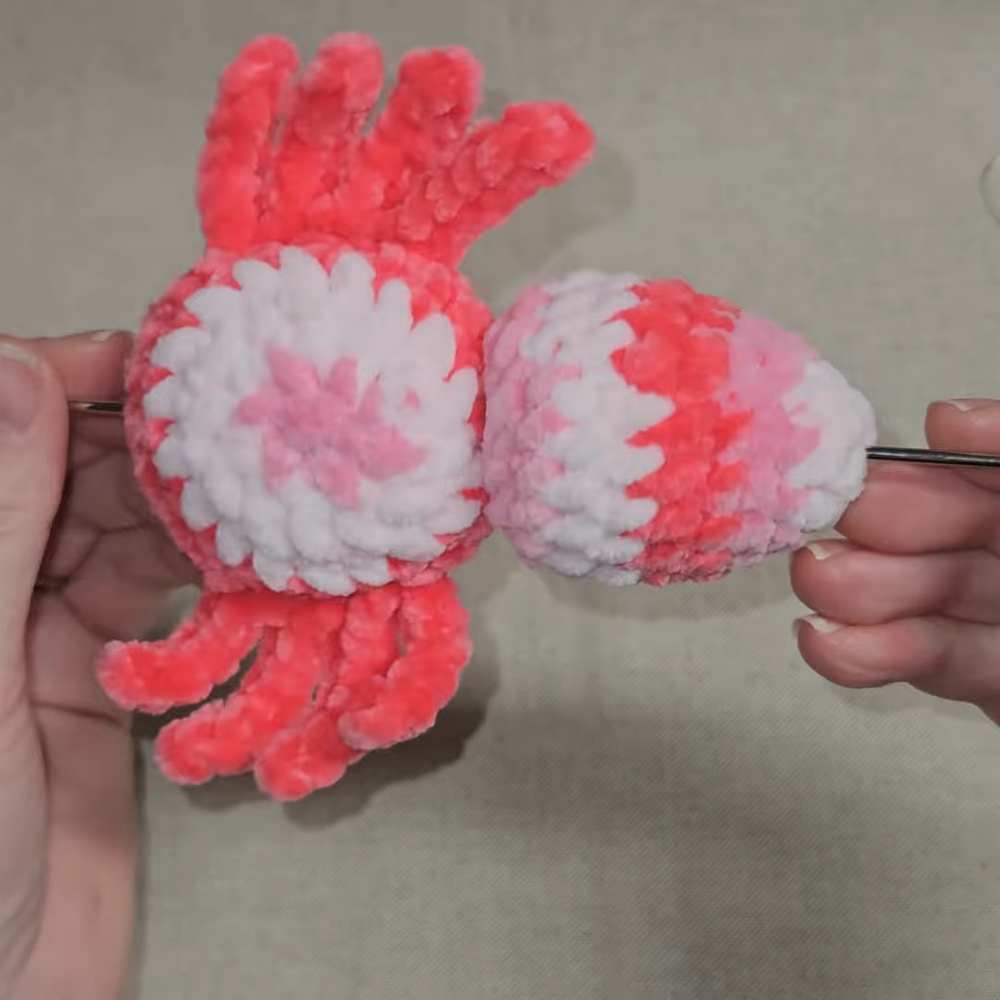
Round 10: Work 9 dec around consecutive stitches. (9 sts)
Join with a sl st into the next stitch. Cut your yarn, leaving a long tail for sewing the pieces together. Stuff the body firmly with fiberfill stuffing.
Assembly and Final Details
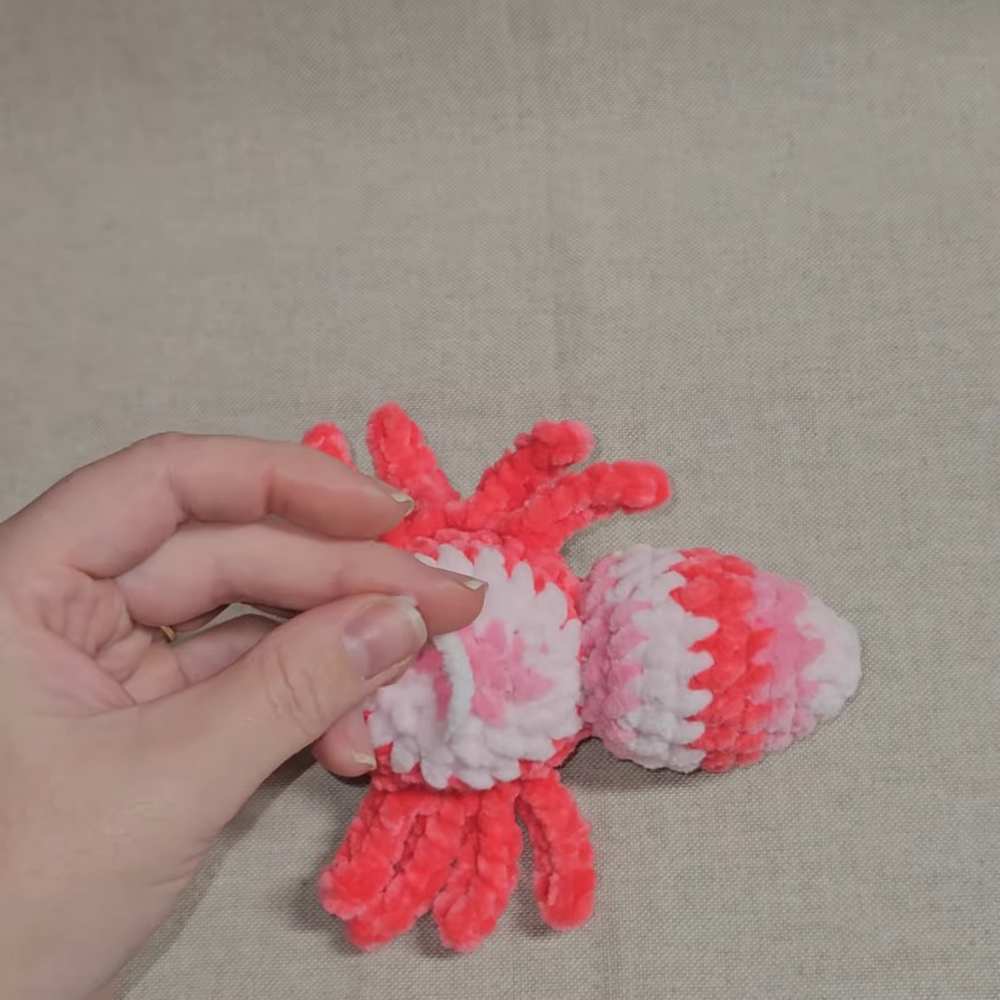
Positioning the Parts: Hold the body against the back of the head. Look at your color transitions and make sure the messy parts of the color changes are facing downwards on both the head and the body. This keeps the top of your spider looking neat.
Sewing: Use your yarn needle and the long yarn tail left on the body to sew the body directly to the head. Go through one stitch of the body and one stitch of the head all the way around until it is securely attached. Tie a double knot, hide the remaining yarn inside the body, and cut the excess.
Shaping the Legs: Gently pull and straighten the eight thin legs downward so they sit nicely on flat surfaces.
Embroidering the Teeth: Thread a small piece of thin white embroidery thread or cotton yarn onto your needle. Insert the needle from the bottom of the head and bring it out right between the eyes. Move one round down and create two small vertical lines or a little V-shape to look like spider fangs.
Bring the needle back out at the starting point, tie the ends together into a secure knot, and hide the ends inside the head. Your colorful plush spider is now completely finished!
Save for Later!