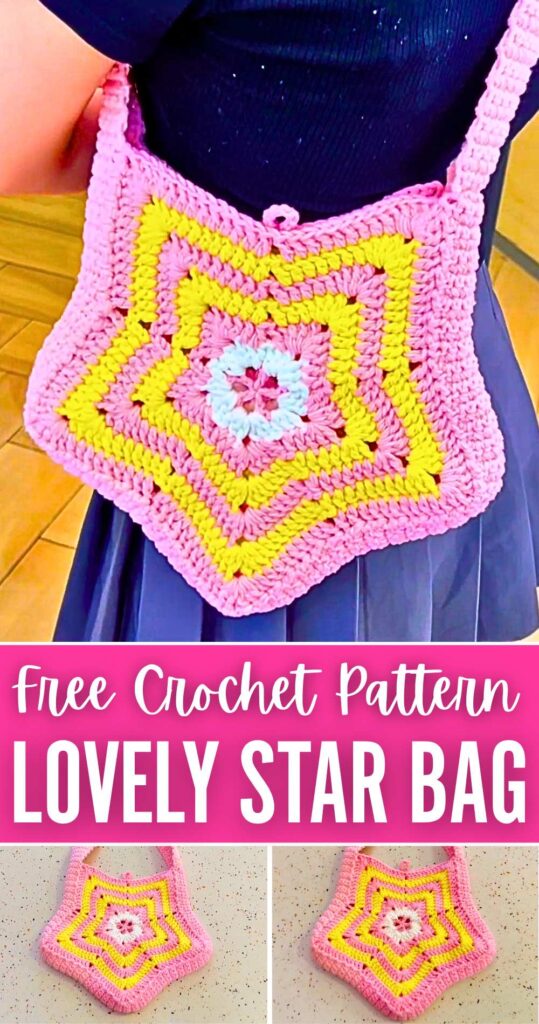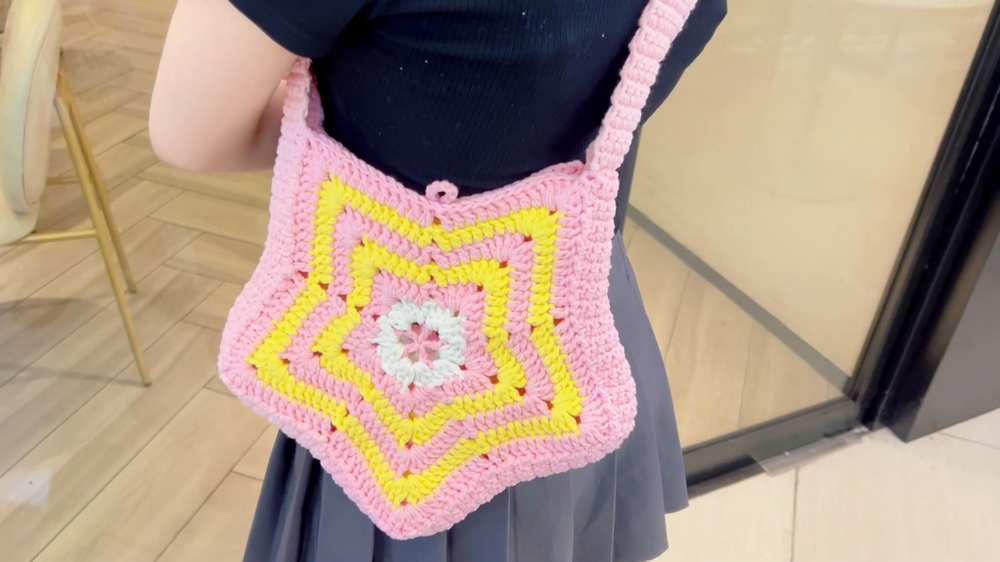
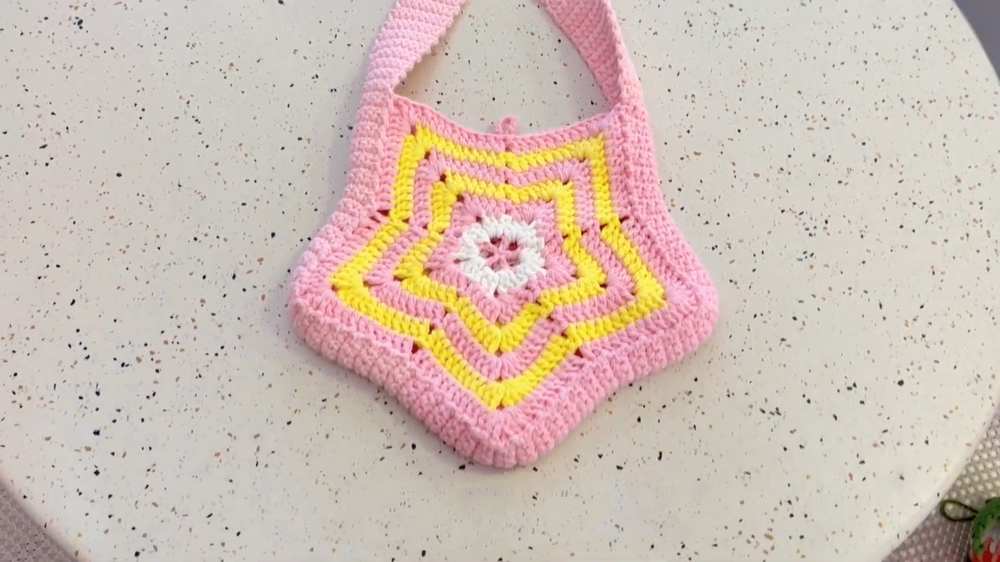
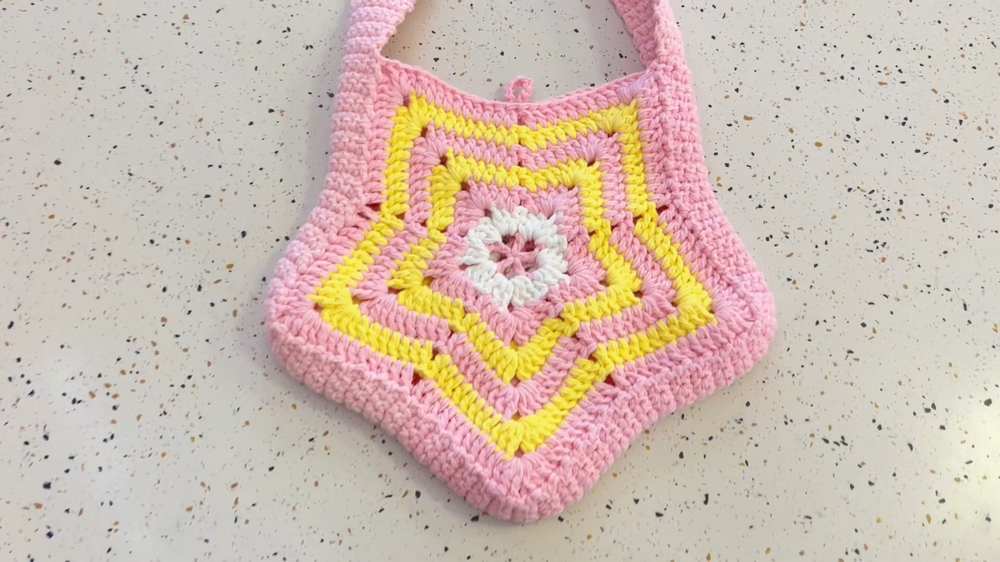
Looking for a trendy & themed crochet bag with cute colors? Learn how to crochet this star bag that can be worn cross-body or over one shoulder. This star-shaped crochet bag has stripes of pink, yellow, and white, plus a comfortable ribbed strap or handle.
You can also crochet a fall star bag version using the orange, autumn gold, and beige. This crochet bag is constructed by making two striped star motifs worked outward. You can wear it just like the loopy monster bag and the skirt bag.
It is perfect for casual wear, and it is much more functional than it looks due to the smooth star points. You can use it as a book holder and also attach your favorite bag charm through the small loop at the top of the bag. Now, continue reading for the full bag pattern.
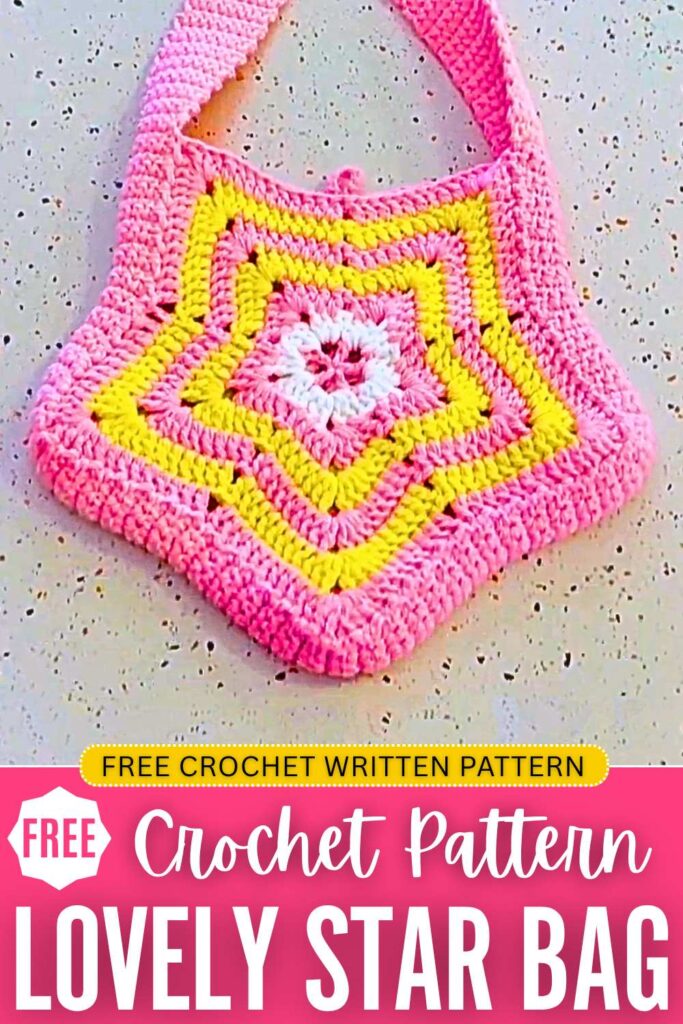
Crochet Star Motif Crossbody Pouch Pattern: Written Instructions
This vibrant, trendy project is a “Color-Blocking Star Bag” inspired by the playful, energy-boosting color trends. It features a unique five-pointed star motif worked in rounds using a granny-style technique.
By holding the yarn double-stranded, the bag gains an extra-sturdy, structured texture perfect for everyday use.
It has an impressive capacity and can be customized as either a shoulder bag or a crossbody bag. To top it off, it features an integrated button loop closure to keep your belongings completely secure.
Here is the complete, detailed step-by-step crochet pattern transcribed directly from the tutorial.
Materials Needed
- Yarn: 5-ply milk cotton yarn (used double-stranded throughout the project). The video features vibrant pink, white, and yellow colors, but feel free to choose your own color-blocking combination.
- Crochet Hook: 4.0 mm
- Closure: 1 decorative button or large pearl
- Tools: Tapestry needle (for weaving in ends and hiding yarn tails) and scissors
Abbreviations (US Terms)
- ch: chain
- dc: double crochet
- sc: single crochet
- sl st: slip stitch
- st(s): stitch(es)
- MR: Magic Ring / Magic Loop
Star Motif Panels (Make 2)
The bag consists of two star-shaped panels: a front panel and a back panel. Both begin exactly the same way, building outwards to form a five-pointed star.
Round 1 (Pink Yarn)
- Start by forming a magic ring wrapped twice around your fingers. Insert your hook, pull up a loop, and crochet 3 chains. These starting chains count as your very first double crochet stitch.
- Chain an additional 3 space chains.
- Work 1 double crochet into the magic ring, followed by 3 chains.
- Repeat this pattern sequence (1 dc, ch 3) inside the ring until you have a total of 5 double crochet “posts” separated by chain spaces.
- Gently pull the inner yarn tail to tighten the center ring securely.
- Close the round by working a slip stitch directly into the 3rd chain of your starting chain-3.
- Chain 1 to lock the stitch, cut your yarn, and pull it through to fasten off.
Round 2 (White Yarn)
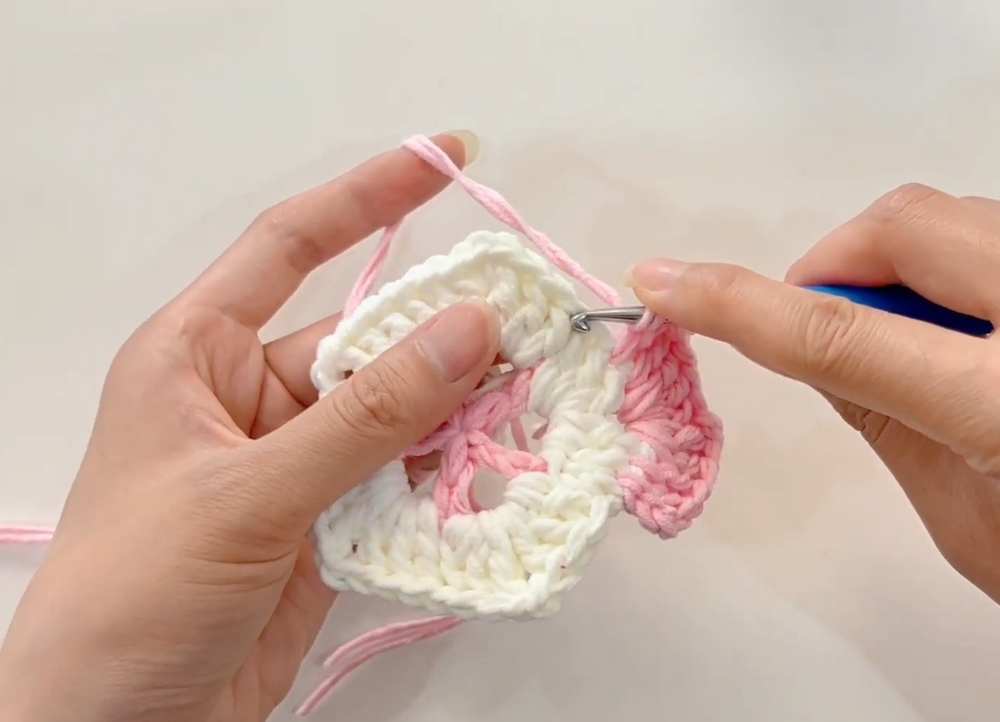
- Insert your hook into any of the large ch-3 spaces from the first round and pull up the white yarn. Trap your yarn tails against the edge to carry and crochet over them as you work.
- Chain 3 (counts as your first dc) and work 2 more double crochets into that same chain space.
- Chain 2, then work 3 more double crochets back into the exact same chain space. This completes your first star point corner cluster.
- Move directly to the next ch-3 space and work: 3 dc, ch 2, 3 dc.
- Repeat this cluster sequence (3 dc, ch 2, 3 dc) in each of the remaining 3 open spaces around the ring. You will have 5 points in total.
- Join the round with a slip stitch into the 3rd chain of the starting chain-3. Chain 1, cut the yarn, and fasten off.
Round 3 (Pink Yarn)
- Locate your previous slip stitch join. Insert your hook into the stitch immediately before it and pull up the pink yarn.
- Chain 3 (counts as your first dc), then work 1 double crochet into the next stitch.
- When you reach the ch-2 corner space at the tip of the star point, work the corner cluster: 3 dc, ch 2, 3 dc.
- Working down the opposite side of the point, push the corner stitches slightly to the right to reveal the hidden first stitch. Work 1 double crochet into each of the first 2 stitches.
- Skip the next 2 stitches entirely. These skipped stitches form the “valley” or inner indentation between the star points.
- Work 1 double crochet into each of the next 2 stitches as you ascend the next star point.
- In the next corner space, work your corner cluster: 3 dc, ch 2, 3 dc.
- Repeat this entire sequence all the way around the star: 2 dc along the side, skip 2 valley stitches, 2 dc up the next side, and a (3 dc, ch 2, 3 dc) cluster in the corner tips.
- At the very end of the round, skip the last 2 valley stitches, then slip stitch into the 3rd chain of your starting chain-3. Chain 1, cut the yarn, and fasten off.
Round 4 (Yellow Yarn)
- Attach your yellow yarn in the stitch right before the previous slip stitch join.
- Chain 3 (counts as 1 dc) and work 1 double crochet into each of the next 3 stitches. You will now have 4 double crochets on this initial side section.
- In the ch-2 corner tip space, work your standard corner cluster: 3 dc, ch 2, 3 dc.
- Work 1 double crochet into each of the next 4 stitches down the side.
- Skip the 2 valley stitches at the bottom indentation.
- Work 1 double crochet into each of the next 4 stitches up the next side, then work your corner cluster (3 dc, ch 2, 3 dc) in the tip.
- Repeat this rhythm around the entire star (4 dc, skip 2, 4 dc, corner cluster). Join with a slip stitch to the 3rd chain of the starting chain-3, chain 1, cut the yarn, and fasten off.
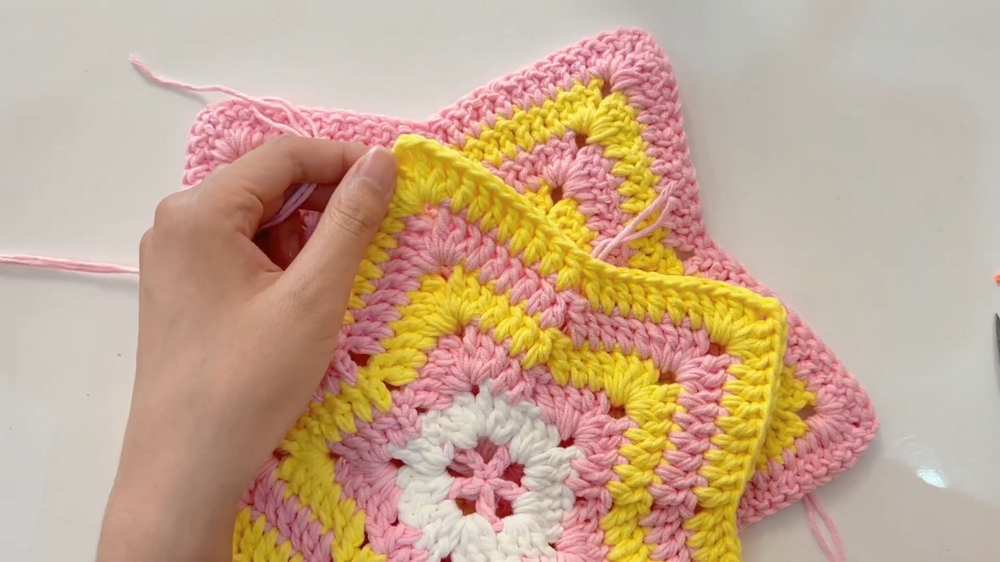
Round 5 (Pink Yarn)
- Attach your pink yarn in the stitch before the previous slip stitch join.
- Chain 3 (counts as 1 dc) and double crochet along the side. Following the established math pattern, each round expands by 2 stitches per side. Therefore, Round 5 requires 6 double crochets on each side section.
- In every corner tip space, work: 3 dc, ch 2, 3 dc.
- Along the sides, work: 6 dc, skip 2 valley stitches, and 6 dc up the next side.
- Complete the round following this pattern, join with a slip stitch, chain 1, cut the yarn, and fasten off.
Continuing for the Front Panel
To finish the Front Panel, continue expanding the star following the exact same rules. For Round 6, you will work 8 double crochets on each side section. For Round 7, you will work 10 double crochets on each side section. Once Round 7 is complete, fasten off normally.
Continuing for the Back Panel (With Button Loop)
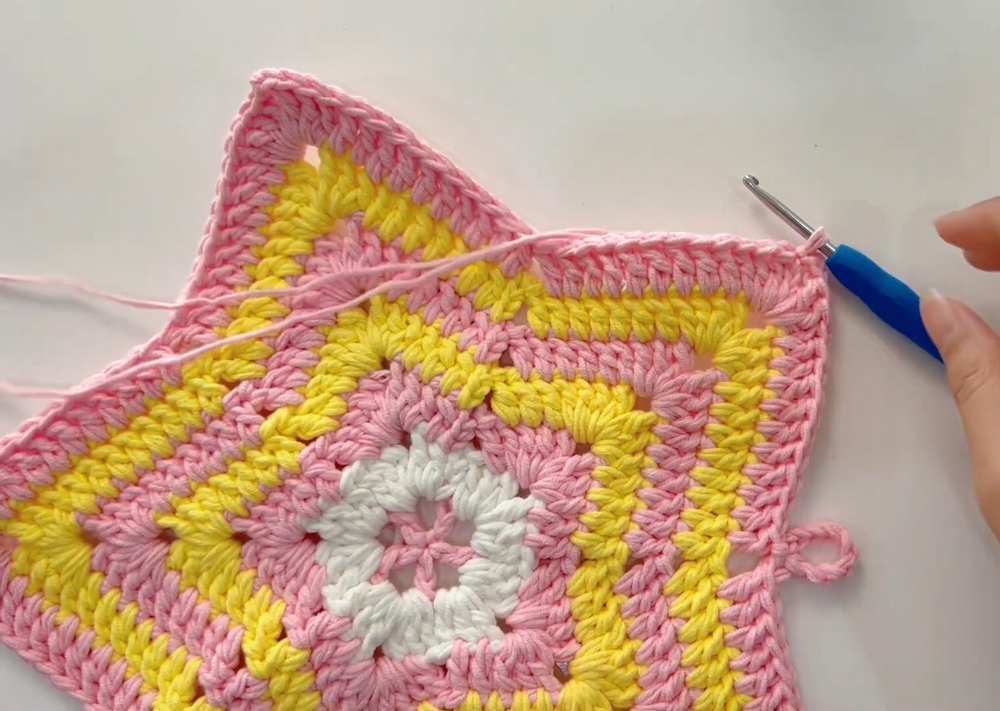
For the Back Panel, crochet normally through Round 6 only. Round 7 is customized to build a closure loop for the top of your bag:
- Choose any star point tip to serve as the top opening of your bag. Attach your pink yarn directly into this ch-2 corner space.
- Chain 3 and work 2 double crochets into that same corner space.
- Work 10 double crochets down the side, skip 2 valley stitches, and work 10 double crochets up the next side.
- Continue working around the star points normally (Corners: 3 dc, ch 2, 3 dc; Sides: 10 dc, skip 2, 10 dc).
- Stop when you reach the center valley of the final top side (the designated bag opening area). Work your 10 double crochets down the side.
- To make the button loop: Chain 12. Insert your hook through the front two loops of the very first chain loop you made and work a slip stitch to lock the loop together.
- Skip the 2 valley stitches on the bag body, then resume by working 10 double crochets up the remaining side.
- In the final corner tip space, finish with 3 dc, ch 2, and join with a slip stitch into the 3rd chain of your starting chain-3. Fasten off.
Side Panel Gusset & Joining
Instead of crocheting a separate piece and sewing it on later, the side panel is worked back and forth in rows while joining directly to the front and back star panels simultaneously.
-
Place your front and back panels together so their wrong sides (the sides with visible yarn tails) face each other inward.
-
Start at one of the top star points flanking the bag opening. Insert your hook through the corner space of the back panel, chain 6 to create the width of your side panel, and attach it to the corresponding corner space of the front panel using a slip stitch, then chain 1.
-
Row 1: Turn your work slightly and crochet 1 single crochet into each of the 6 chains you just made, giving you 6 single crochets across.
-
To attach to the main body panels: Slip stitch into the next available stitch along the edge of the front panel, then slip stitch into the following stitch to move your row upward. Chain 1 and turn your work around.
-
Row 2: Work 6 single crochets back across the side panel. Make sure to ignore the slip stitches you used to attach to the body; only crochet into the 6 actual single crochet stitches.
-
Attach to the opposite panel: Slip stitch into the next available stitch along the edge of the back panel, then slip stitch into the following stitch to move up. Chain 1 and turn your work.
-
Repeat this back-and-forth process down the edges of the star points.
-
Turning Corners: When your joining reaches a ch-2 corner tip or an inner valley indentation, remember that these chain spaces contain 2 chains. Work a slip stitch into the first chain loop to secure one row, and use the second chain loop to secure the subsequent row. This distributes the turns evenly without bunching.
-
Continue this join-as-you-go method around the sides and bottom of the star panels until you reach the opposite side of the top bag opening.
Bag Strap
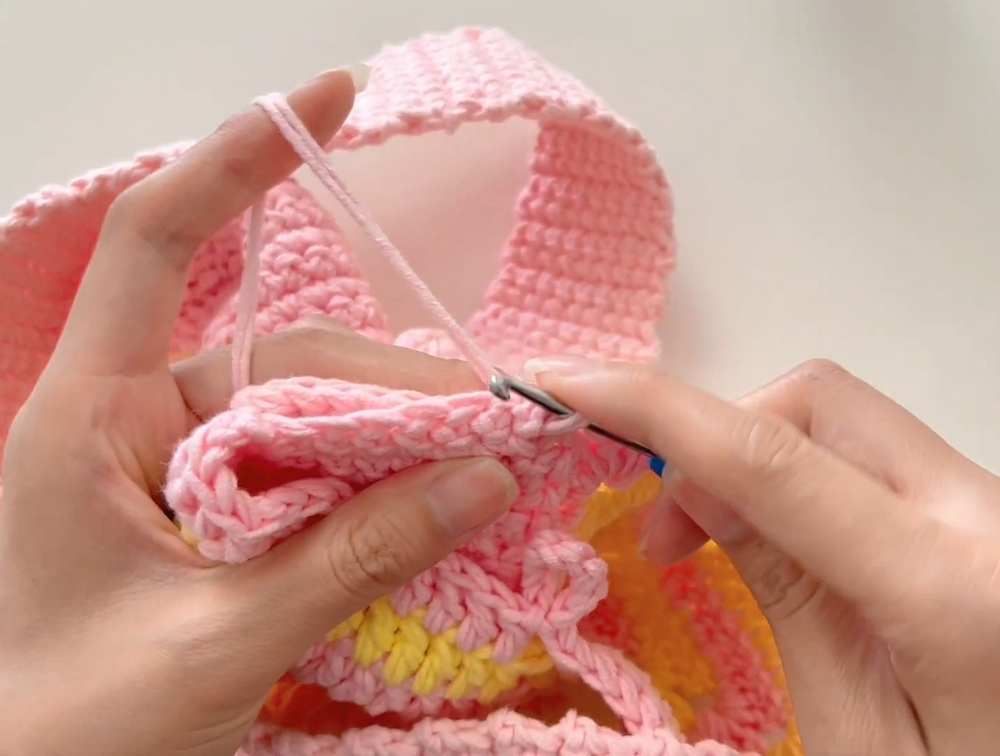
Once you reach the final top corner of the bag opening, do not cut your yarn. You will transition smoothly into creating the bag strap directly from the side panel stitches.
-
Chain 1 and turn. Instead of joining to the body, simply work single crochets straight across your side panel stitches. The creator notes that working 8 single crochets across instead of 6 creates a sturdier, cleaner strap edge.
-
Continue working rows of single crochets (single crochet across, ch 1, turn) until the strap reaches your desired length.
-
The tutorial recommends crocheting roughly 90 rows for a standard shoulder or crossbody fit. Keep in mind that cotton yarn naturally stretches over time under the weight of items inside the bag, so it is best to keep it slightly short initially.
Assembly & Finishing Touches
-
Once your strap is long enough, align the open end of the strap perfectly with the starting side panel on the opposite side of the bag opening, ensuring the strap is not twisted.
-
Flip the bag slightly inside out so you can seam from the interior. Align the stitches of the strap with the stitches of the side panel edge.
-
Insert your hook through the corresponding loops of both pieces together and work a slip stitch. Repeat across to securely seam the strap down with a total of 7 or 8 slip stitches.
-
Chain 1 to secure, cut the yarn, and pull the tail through to fasten off.
-
Thread all loose yarn tails onto a tapestry needle and weave them cleanly through the stitches on the inside of the bag to hide them safely.
-
Align the front panel with the back panel’s chain loop. Take your needle and matching yarn, and securely sew your decorative button or pearl onto the front panel. This button will catch the ch-12 loop to close up your gorgeous new star bag.