
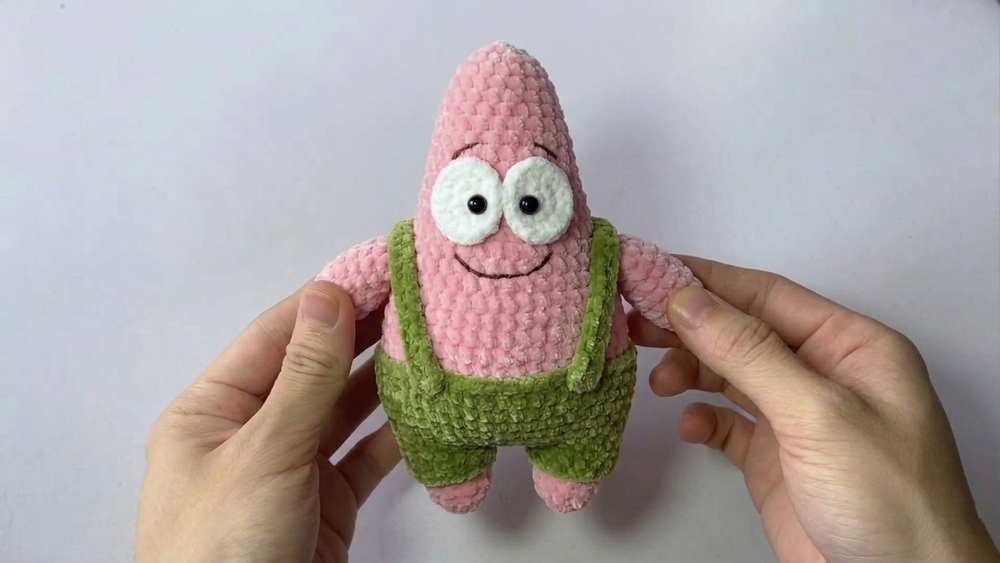
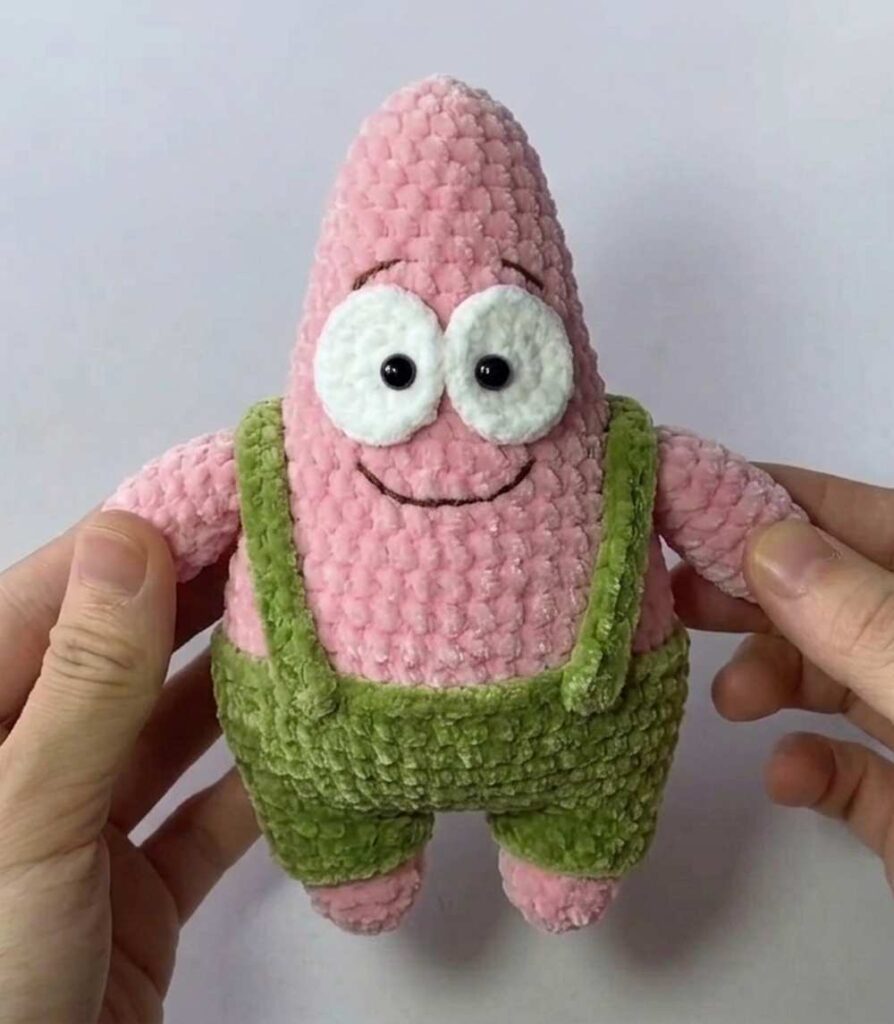
Learn how to crochet a no-sew Patrick Star plushie from SpongeBob SquarePants following this FREE pattern. I will soon provide you with a Santa Hat pattern to crochet as a Christmas present, too. For now, crochet it for summer, which can be customized in many ways. You can crochet the purple spots on the pants, make a French Knot belly button, or crochet it paired with a SpongeBob plushie.
This is a big crochet Patrick Star plushie with the same googly eyes and the CUTE smile. Even with the amigurumi yarn, you will end up with a 15cm amigurumi Patrick Star.
So, I recommend using a thin plush yarn as the pattern is big. Now, continue reading for the full Patrick Star doll pattern. I am also sharing Character plushies such as Baby Yoda, Among Us, and more, so be sure to check them, too.
Character plushies are the cutest! Did you check the following?
https://craftshive.com/crochet-baby-yoda-amigurumi-plush/Crochet Patrick Star Plushie Doll (Customizable): Round-by-Round Pattern
Note: This pattern makes a slightly pointy head for the crochet Patrick Star plushie. It is based on your responses by you:
Here is the written crochet pattern for the Plush Patrick Star plushie, with the assembly in the end:
Materials Needed
-
Yarn: Plush Acrylic or cotton yarn (1.6 mm thickness) in Pistachio Green (pants), Pink (body), and a small amount of White (eyes).
-
Crochet Hook: 2.0 mm
-
Safety Eyes: 5 mm (size may vary depending on your tension/yarn size)
-
Embroidery Thread: Black thread for the eyebrows and mouth.
-
Other Tools: Scissors, stitch marker, pins, tapestry needle (thick and thin), pliers (to pull the needle if it gets stuck), polyester fiberfill.
-
Pants Details: Purple and White fabric paint (Acrilex) + a fine brush. Alternatively, you can use purple felt or embroider the flowers instead of painting them.
Abbreviations Used
-
MR: Magic ring
-
ch: Chain
-
sc: Single crochet
-
inc: Increase (2 sc in the same stitch)
-
dec: Decrease (invisible decrease using front loops)
-
BLO: Back loop only
-
FLO: Front loop only
-
sl st: Slip stitch
-
st / sts: Stitch / Stitches
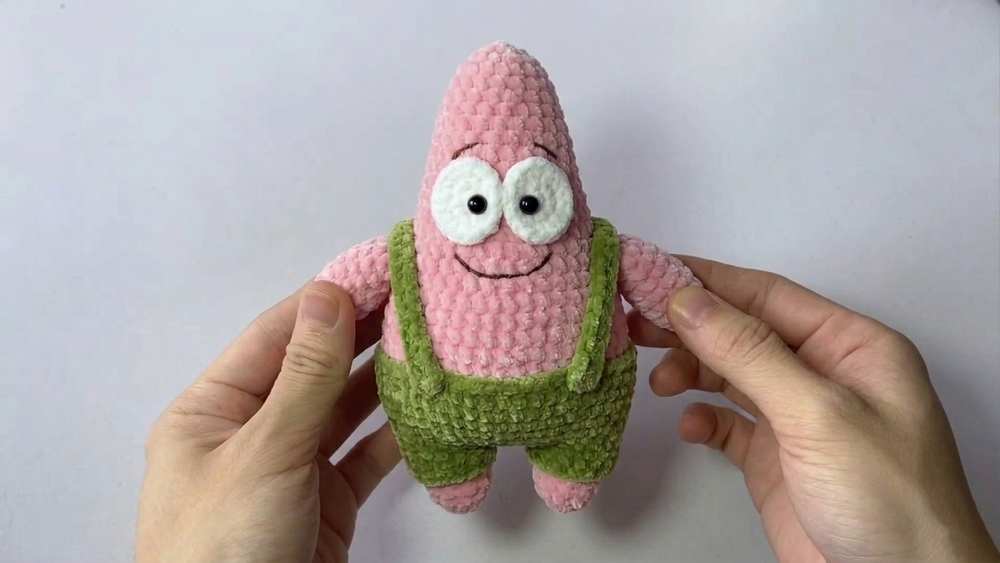
1. Legs (Make 2)
Start with Pistachio Green yarn.
-
Round 1: MR, 6 sc (6)
-
Round 2: 6 inc (12)
-
Round 3: [1 sc, 1 inc] repeat 6 times (18)
-
Rounds 4–5: 18 sc (18)
-
Round 6: [2 sc, 1 inc] repeat 6 times (24)
-
Rounds 7–8: 24 sc (24)
-
Round 9 (Color Change Prep): On the last stitch of Round 8, change to Pink yarn. Leave the green yarn attached (do not cut it) to the outside so you can make the pants border later. With Pink, make 24 very loose slip stitches around the leg. (24 sl st)
-
Round 10: Working into the back loops only (behind the slip stitches), work: [3 sc, 1 inc] repeat 6 times. (30)
-
Round 11: 30 sc (30).
-
Pants Border: Go back to the green yarn left on the outside. Crochet 24 sc into the exposed front loops of Round 8. Tie off the green yarn, knot the ends securely inside the leg, and cut the excess.
-
Finishing Leg 1: Fasten off the pink yarn.
-
Finishing Leg 2: Do not cut the pink yarn; you will continue directly to join the body.
2. Joining Legs & Body
-
Round 12 (Joining): From Leg 2, chain 2. Join to Leg 1 with a sc.
-
Work around Leg 1: [5 sc, 1 inc] repeat 5 times. (36)
-
Across the front of the ch-2: 2 inc. (4)
-
Work around Leg 2: [5 sc, 1 inc] repeat 5 times. (36)
-
Across the back of the ch-2: 2 inc. (4)
-
Total stitches in this round: (80) (Note: The creator states 78 stitches in the video by modifying the base count slightly during the join, so count your stitches to ensure symmetry around 78–80 sts).
-
-
Rounds 13–20: Work 78 sc around for 8 rounds. (78)
-
Round 21: Change back to Pistachio Green yarn (leave the pink attached outside for the pants edge later). Work 78 sc in BLO around. (78)
-
Rounds 22–31: 78 sc around for 10 rounds. (78)
-
Pants Border 2: Go back to the pink yarn left on the outside. Crochet 78 sc into the exposed front loops of Round 20. Fasten off and hide the pink yarn.
-
Round 32: [11 sc, 1 dec] repeat 6 times. (72)
-
Round 33: 72 sc (72)
-
Round 34: 5 sc, 1 dec, [10 sc, 1 dec] repeat 5 times, 5 sc. (66)
-
Round 35: 66 sc (66)
-
Round 36: [9 sc, 1 dec] repeat 6 times. (60)
-
Round 37: 60 sc (60)
-
Round 38: 4 sc, 1 dec, [8 sc, 1 dec] repeat 5 times, 4 sc. (54)
-
Round 39: 54 sc (54)
-
Stuffing: Begin stuffing the legs and lower body firmly.
-
Round 40: [7 sc, 1 dec] repeat 6 times. (48)
-
Round 41: 48 sc (48)
-
Round 42: 3 sc, 1 dec, [6 sc, 1 dec] repeat 5 times, 3 sc. (42)
-
Rounds 43–45: 42 sc around for 3 rounds. (42)
-
Round 46: [5 sc, 1 dec] repeat 6 times. (36)
-
Rounds 47–49: 36 sc around for 3 rounds. (36)
-
Round 50: 2 sc, 1 dec, [4 sc, 1 dec] repeat 5 times, 2 sc. (30)
-
Rounds 51–53: 30 sc around for 3 rounds. (30)
-
Round 54: [3 sc, 1 dec] repeat 6 times. (24)
-
Rounds 55–57: 24 sc around for 3 rounds. (24)
-
Round 58: [2 sc, 1 dec] repeat 6 times. (18)
-
Rounds 59–60: 18 sc around for 2 rounds. (18)
-
Round 61: [1 sc, 1 dec] repeat 6 times. (12)
-
Rounds 62–63: 12 sc around for 2 rounds. (12)
-
Stuffing: Pack the top of the head firmly with fiberfill.
-
Round 64: 6 dec. (6)
-
Finishing: Cut the yarn, weave through the remaining front loops, pull tight to close the point of the head, and hide the tail inside.
3. Arms (Make 2)
With Pink yarn.
-
Round 1: MR, 6 sc (6)
-
Round 2: 6 inc (12)
-
Round 3: [1 sc, 1 inc] repeat 6 times (18)
-
Round 4: [2 sc, 1 inc] repeat 6 times (24)
-
Rounds 5–21: 24 sc around for 17 rounds. (24)
-
Finishing: Stuff the bottom half of the arm firmly, but leave the top half lightly stuffed or empty. Flatten the opening and work 11 sc through both layers to close the arm. Leave a long tail for sewing.
4. Eyes (Make 2)
With White yarn. Worked in an oval around a foundation chain.
-
Foundation: Ch 4.
-
Round 1: Start in the 2nd ch from hook: 1 inc, 1 sc, 4 sc in the last chain loop. Turn and work down the opposite side of the chain: 1 sc, 1 inc. Sl st to join. (10)
-
Round 2: Ch 1, 1 inc in the first st, 3 sc, 2 inc, 3 sc, 1 inc. Sl st to join. (14)
-
Round 3: Ch 1, 1 inc in the first st, 5 sc, 2 inc, 5 sc, 1 inc. Sl st to join. (18)
-
Finishing: Leave a long white tail for sewing. Insert the 5mm safety eyes offset towards the inner-bottom corner of the white ovals. Melt the back plastic post of the safety eye flat using a lighter (instead of using the bulky plastic washer) so it sits flush against the body.
Costume Parts
- Stripes: Crochet two separate rows of single crochet with about 24 stitches each and secure the ends.
- Buttons (Optional X 2): 6sc in the magic ring and secure the end.
5. Assembly & Facial Details
1. Eyes: * Position the eyes centrally on the face (roughly 15 rounds down from the pointed tip of the head). Sew the white eye patches securely to the head using the long white tails.
2. Eyebrows (Black Thread): * Embroider thick black eyebrows in an angled “Z” or chevron shape. Start 2 rounds above the eyes, spanning 2 stitches wide, dipping downwards. Go over the stitch twice to make it thick.
3. Mouth (Black Thread):
-
Using pins, map out a wide, curved “U” shape for the mouth starting 1 stitch away from the bottom corner of each eye.
-
Use a single strand of black thread to stitch a continuous line connecting your pins. Wrap the thread tightly around each stitch base loop to secure the curve perfectly. Add tiny “smile crease” lines at the outer corners of the mouth.
4. Arms: * Sew the flattened arms to the sides of the body. Position them about 2 rounds below the eye line, slightly tilted backward.
5. Belly Button (optional): * Using pink yarn, embroider a “French Knot” right in the center of Patrick’s stomach, just above the pants line. Wrap the yarn around the needle 4 times before pulling it through to create a thick knot.
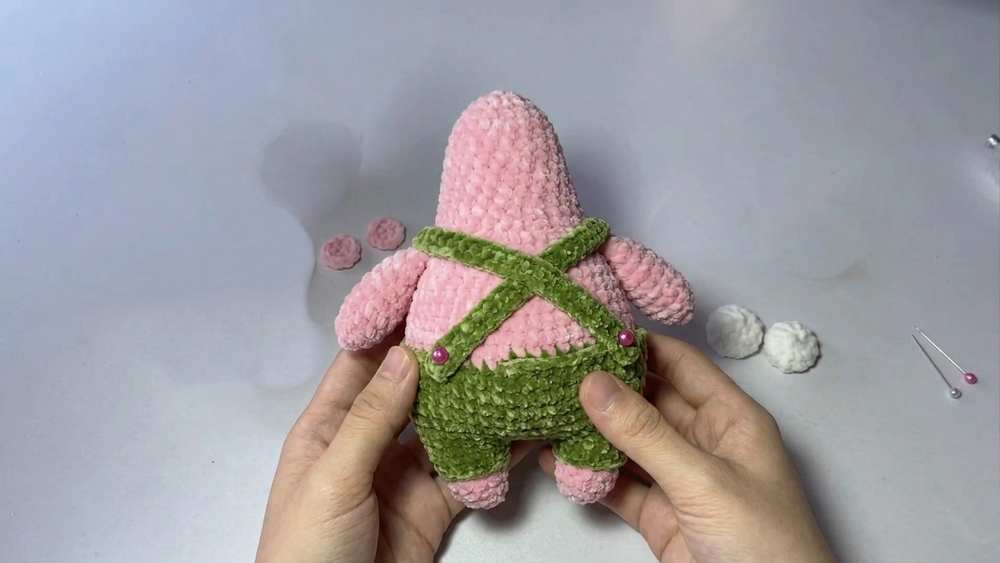
6. Costume: Just glue on the square pants and make the cross at the back.