This year, decorate a lady’s room with today’s DIY fabric pumpkin and grapevine wood table decoration! Introducing the DIY Sakura-inspired decoration for fall, made out of pink-shaded yarn-wrapped & fabric pumpkins and some faux roses and greenery. This is a perfect porch makeover decoration as well.
You can wrap some fairy lights around it to attach it near the corner of the porch or place it on the table and have cozy coffee parties.
We will also use a cinnamon stick to make the stem and pipe cleaners to make the curly pinkish vines. You can easily make this DIY couquette decoration in less than 50 minutes. Now, you can continue reading to learn more about this fall project!
[ez-toc]
Tutorial to Craft the Fall Pinkish Pumpkin Decoration
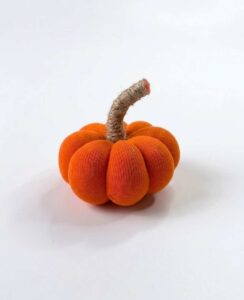
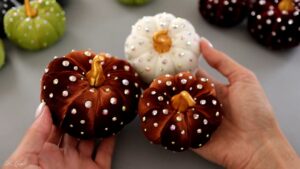
This project is about making a pretty pumpkin decoration. You use cloth, yarn, and glue. First, you cut circles from cloth. You sew the edges and put soft stuff inside. This makes a round pumpkin. You also make a pumpkin from yarn. You wrap yarn around a roll and tie it.
You glue small wood sticks on top for stems. You cut leaf shapes from paper and glue them on too. Finally, you glue all the pumpkins to a big piece of wood. You add fake flowers to make it look nice. It is a fun and easy craft to do at home.
Detailed Guide for DIY Pumpkin Decoration
What you will need:
-
Scraps of fabric (pink, floral, and bright pink)
-
Yarn (pink and dark red)
-
Fiberfill (stuffing)
-
Needle and thread
-
Cinnamon sticks (for stems)
-
Cardboard or paper (pink and white)
-
A large piece of driftwood or a thick tree branch
-
Artificial flowers and greenery
-
Scissors and a pen
-
Hot glue gun
Video Tutorial?
Step-by-Step Instructions
1. Make the Stuffed Fabric Pumpkins
-
Take a piece of fabric and draw a large circle on it. Cut the circle out.
-
Using a needle and thread, sew a “running stitch” (up and down) all the way around the edge of the circle.
-
Pull the thread slightly to create a little pouch.
-
Fill the pouch with fiberfill stuffing until it is firm and round.
-
Pull the thread tight to close the hole at the top and sew it shut with a few knots.
-
Repeat this with different fabrics (floral and pink) to make three different stuffed pumpkins.
2. Make the Yarn Pumpkins
-
Take a small cardboard tube (or your fingers) and wrap yarn around it many times until it is very thick.
-
Carefully slide the yarn off the tube while keeping it in a circle.
-
Take a separate piece of yarn and tie it tightly through the center hole to hold the bundle together.
-
Spread the yarn out with your fingers until it looks like a round, ribbed pumpkin.
3. Create the Base Pumpkins (The Rings)
-
Cut a small ring from a cardboard tube.
-
Wrap tape or white paper around the ring to cover it.
-
Take long strips of fabric or yarn and wrap them through the center of the hole and around the outside until the ring is completely covered.
-
Glue the ends down inside the hole.
4. Make the Leaves and Stems
-
Leaves: Draw leaf shapes on pink paper or thin fabric. Cut them out. For extra detail, you can draw “veins” on the leaves with a pen.
-
Stems: Cut a cinnamon stick into small pieces (about 1–2 inches long).
-
Vines: To make curly vines, wrap a piece of yarn around a pencil. Apply a little bit of glue to hold the shape, let it dry, and slide it off.
5. Assemble the Pumpkins
-
Use the hot glue gun to stick the paper leaves to the top of each fabric and yarn pumpkin.
-
Glue a cinnamon stick piece into the center of the leaves to act as the stem.
-
Glue the curly yarn vines next to the stem.
6. Create the Final Decoration
-
Take your large piece of driftwood or branch.
-
Find the best spots to place your pumpkins and glue them down one by one along the wood.
-
Once the pumpkins are secure, use hot glue to add artificial flowers and green leaves in the gaps between the pumpkins.
-
Arrange them until the wood is mostly covered and it looks like a full, beautiful centerpiece.
Your DIY pumpkin wood decoration is now finished!