
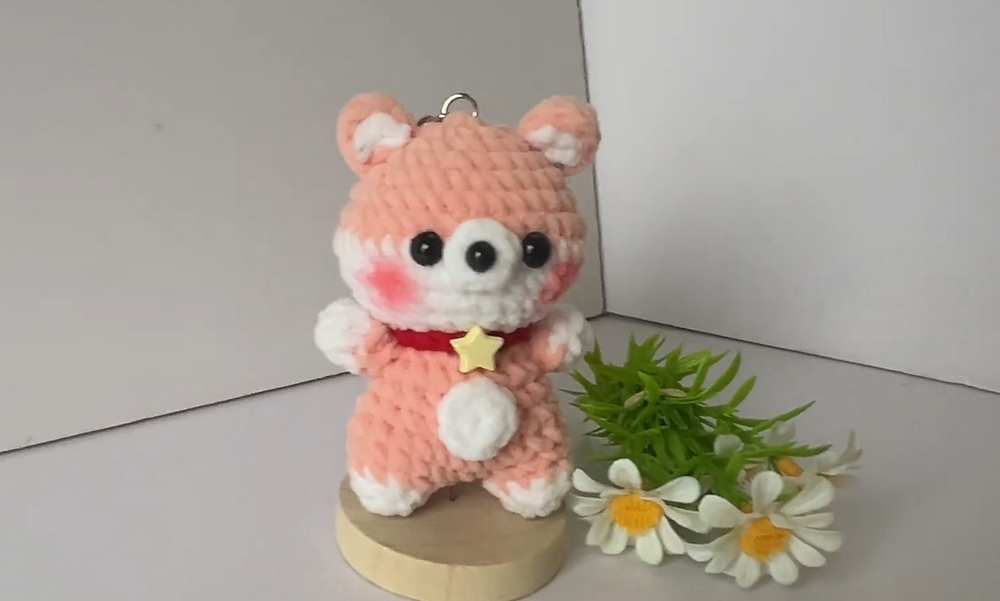
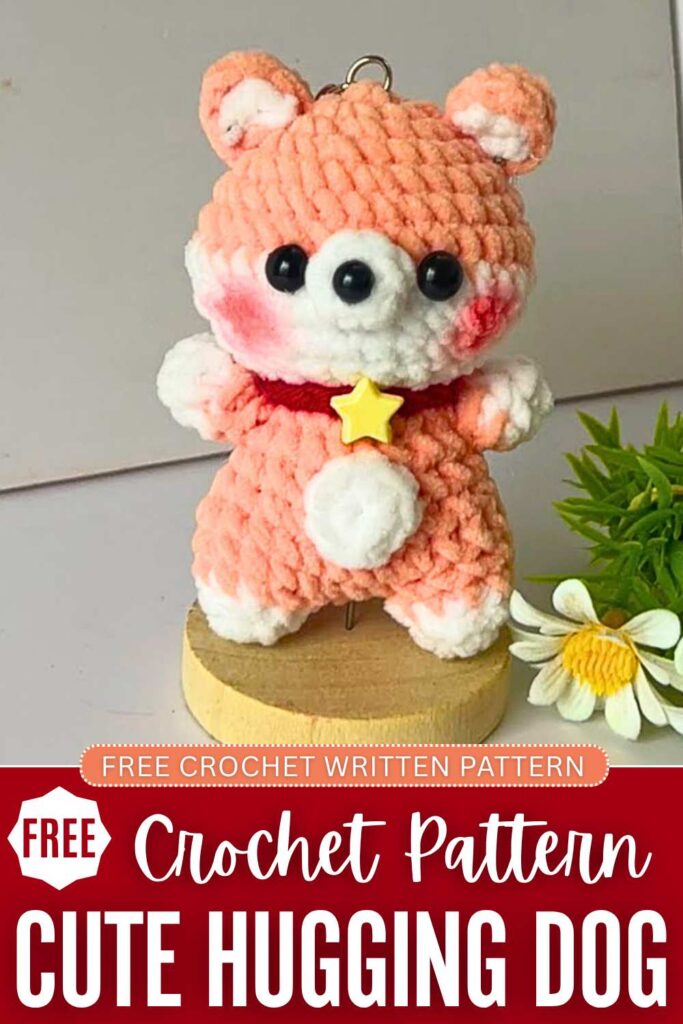
Today, let’s crochet this low-sew puppy dog plushie with a FREE written pattern. I have named it the “hugging dog plushie” because it has open arms and blush on the cheeks. It is simply adorable and quick to crochet, even for beginners. With the thin plush yarn, you can crochet it as a bag charm present for Valentine’s Day or just because.
We will use the usual no-sew animal body base that also works fine for other animals other than this oh-so-cute dog plush. It is as easy as the luxury dog plush!
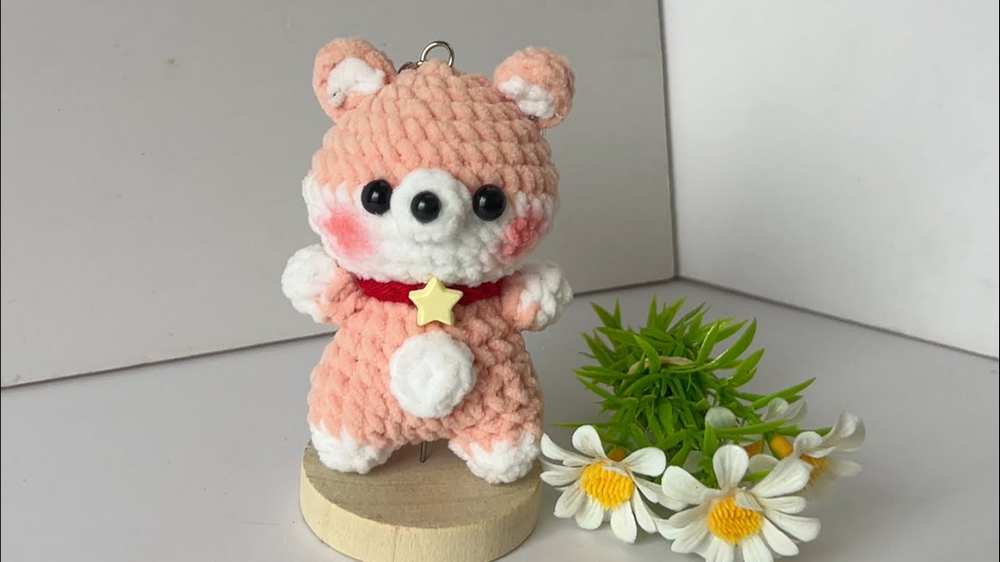
This crochet dog doll amigurumi also wears a dog belt and has a little white belly, too. You can crochet it within 45 minutes. So, continue reading for the full dog plush pattern.
Crochet Low-Sew Hugging Dog Plushie: Written Instructions
Below is the pattern to crochet this miniature dog plushie doll and keychain with the assembly in the end:
Materials You Will Need
To complete this amigurumi dog, you will need to gather a few essential crafting supplies. Ensure your yarn is of similar weights so that the proportions of the dog remain accurate.
-
Main Yarn: Velvet or Chenille plush yarn in Pink (or your preferred main body color).
-
Contrast Yarn: Velvet or Chenille plush yarn in White (for the lower face, paws, and belly).
-
Collar Yarn: A small amount of Red yarn (such as Milk Cotton 125g or any medium-weight yarn) for the collar detail.
-
Crochet Hook: A hook size appropriate for your plush yarn (usually a 4.0 mm to 5.0 mm hook depending on your tension).
-
Stuffing: High-quality polyester fiberfill.
-
Eyes: Safety eyes suitable for the size of your plushie.
-
Tools: A yarn needle, stitch markers, and sharp scissors.
-
Cosmetics: A little bit of blush or pink chalk for the rosy cheeks.
Stitch Abbreviations (Note: This pattern is written in standard US terminology, with UK equivalents provided for your convenience).
-
MR – Magic Ring (UK: Magic Ring)
-
ch – Chain (UK: Chain)
-
sc – Single Crochet (UK: Double Crochet / dc)
-
inc – Increase (Place 2 single crochets in the same stitch) (UK: dc inc)
-
dec – Decrease (Crochet 2 stitches together) (UK: dc dec)
-
sl st – Slip Stitch (UK: Slip Stitch)
Step-by-Step Crochet Instructions
Part 1: Crocheting the Head
We will begin by creating the top of the dog’s head using the main pink yarn. Remember to use a stitch marker at the beginning of each round to keep track of your stitch count.
Round 1: Using your Pink yarn, create a Magic Ring and make 6 sc into the ring. Pull the ring tightly closed, sl st to join, and ch 1. (6 stitches)
Round 2: Place 1 inc (2 sc) in every stitch around. Sl st to join, ch 1. (12 stitches)
Round 3: Repeat the pattern of (1 sc, 1 inc) a total of 6 times around. Sl st to join, ch 1. (18 stitches)
Round 4: Repeat the sequence of (1 sc, 1 inc, 1 sc) a total of 6 times around. Alternatively, this can be read as (2 sc, 1 inc) x 6. Sl st to join, ch 1. (24 stitches)
Round 5: Repeat the pattern of (3 sc, 1 inc) a total of 6 times around. Sl st to join, ch 1. (30 stitches)
Round 6: Work 1 sc in each of the 30 stitches around. Sl st to join, ch 1. (30 stitches)
Round 7: For this round, work the following sequence to shape the cheeks: 5 sc, followed by 3 inc, then 10 sc, followed by 3 inc, and finally 9 sc. Sl st to join, ch 1. (36 stitches)
Changing Yarn: At the very end of Round 7, change to your White yarn. Fasten off the pink yarn securely.
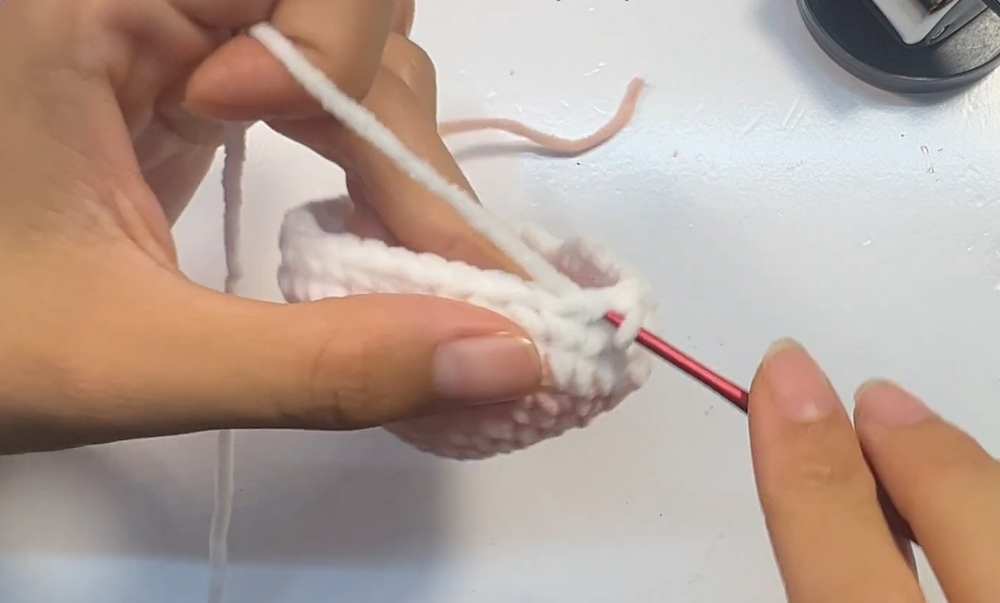
Round 8: With the White yarn, work 1 sc in each of the 36 stitches around. Sl st to join, ch 1. (36 stitches)
Round 9: Now we will begin decreasing to shape the bottom of the face. Work 5 sc, followed by 3 dec, then 10 sc, followed by 3 dec, and finish the round with 9 sc. Sl st to join, ch 1. (30 stitches)
Round 10: Repeat the pattern of (3 sc, 1 dec) a total of 6 times around. Sl st to join, ch 1. (24 stitches)
Round 11: Repeat the sequence of (1 sc, 1 dec, 1 sc) a total of 6 times around. Sl st to join, ch 1. (18 stitches)
Round 12: Repeat the pattern of (1 sc, 1 dec) a total of 6 times around. Sl st to join, ch 1. (12 stitches)
Finishing the Head: Fasten off, leaving a long tail for sewing. Firmly stuff the head with polyester fiberfill, making sure to push the stuffing into the cheek areas (where we placed the increases) to give the face a nice round shape.
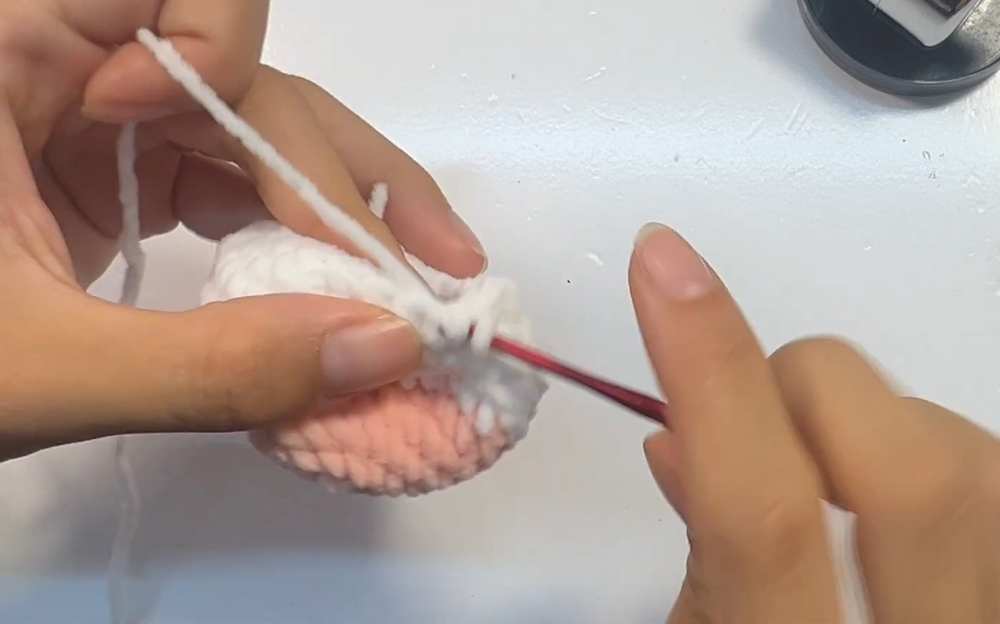
Part 2: Crocheting the Legs and Body
The legs and body are made in one continuous piece, starting from the feet up.
First Leg:
Round 1: Using White yarn, create a Magic Ring and make 6 sc into the ring. (6 stitches)
Round 2: Repeat the pattern of (1 sc, 1 inc) a total of 3 times. (9 stitches)
Fasten off the first leg.
Second Leg:
Repeat Rounds 1 and 2 for the second leg, but do not fasten off.
Joining the Legs and Starting the Body:
Round 3: With your White yarn still on your hook from the second leg, switch to the Pink yarn. Work 9 sc around the second leg. Next, chain 3. Now, join to the first leg and work 9 sc around the first leg. Finally, work 3 sc along the chain stitches. (24 stitches total)
Round 4 & Round 5: Work 1 sc in each of the 24 stitches around. (24 stitches)
Round 6: Repeat the sequence of (1 sc, 1 dec, 1 sc) a total of 6 times around. (18 stitches)
Round 7 & Round 8: Work 1 sc in each of the 18 stitches around. (18 stitches)
Round 9: Repeat the pattern of (1 sc, 1 dec) a total of 6 times around. (12 stitches)
Finishing the Body: Fasten off, leaving a tail. Stuff the legs and body firmly.
Part 3: Crocheting the Arms
You will need to make two of these arms.
Round 1: Using White yarn, create a Magic Ring and make 6 sc into the ring. (6 stitches)
Round 2: Work 1 sc in each of the 6 stitches around. (6 stitches)
Round 3: Change to Pink yarn. Work 1 sc in each of the 6 stitches around. (6 stitches)
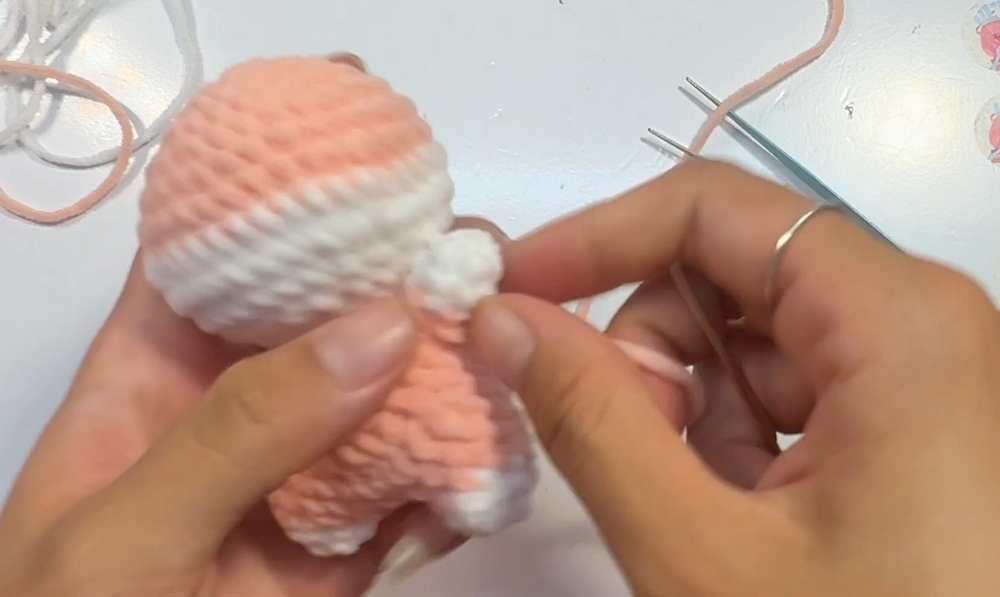
Finishing the Arms: Fasten off, leaving a long tail for sewing. Lightly stuff the arms if desired, or leave them unstuffed so they lay flat against the body.
Part 4: Crocheting the Inner Arms (Sitting detail)
Make two of these inner arm pieces to add extra dimension to the seated posture.
Round 1: Using Pink yarn, create a Magic Ring and make 4 sc into the ring. (4 stitches)
Round 2: Repeat the pattern of (1 sc, 1 inc) a total of 2 times. (6 stitches)
Round 3: Repeat the sequence of (1 sc, 1 inc, 1 sc) a total of 2 times. (8 stitches)
Finishing the Inner Arms: Fasten off, leaving a tail for sewing. Flatten the piece; do not stuff it.
Part 5: Crocheting the Tail
Round 1: Using White yarn, create a Magic Ring and make 6 sc into the ring. (6 stitches)
Round 2: Work 1 sc in each of the 6 stitches around. (6 stitches)
Finishing the Tail: Fasten off, leaving a tail for sewing.
Part 6: Crocheting the Snout/Muzzle
Round 1: Using White yarn, create a Magic Ring and make 6 sc into the ring. Sl st to join. (6 stitches)
Finishing the Muzzle: Fasten off, leaving a tail for sewing.
Part 7: Crocheting the Belly Patch
Round 1: Using White yarn, create a Magic Ring and make 8 sc into the ring. Sl st to join. (8 stitches)
Finishing the Belly: Fasten off, leaving a long tail for sewing.
Part 8: Crocheting the Collar
Using your Red milk cotton yarn (or chosen contrast yarn), start with a slip knot and crochet a chain long enough to wrap securely around the dog’s neck. Once you reach the desired length, fasten off.
Assembly and Final Details
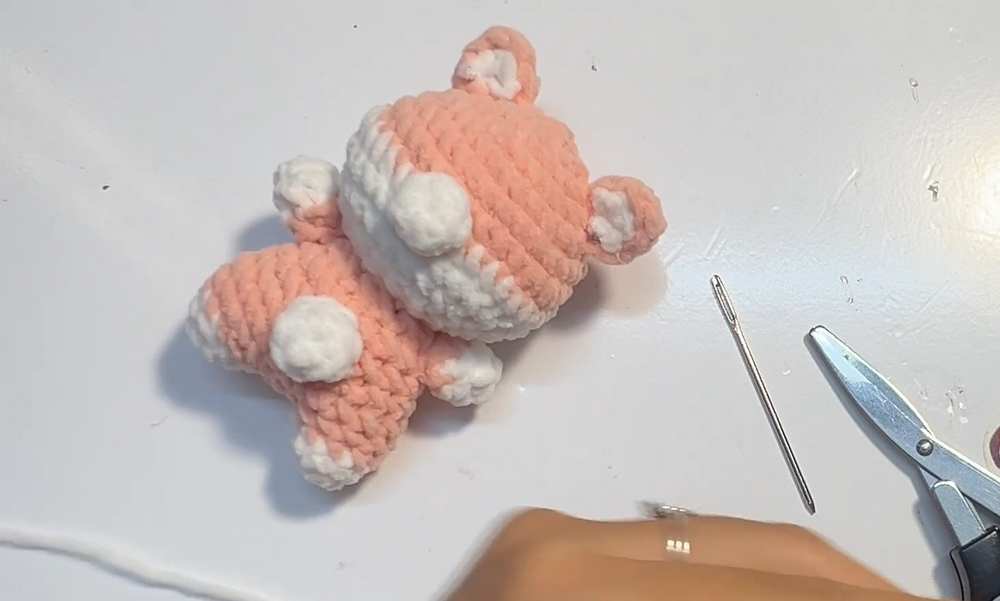
Step 1: Carefully position the head onto the top opening of the body. Ensure the cheeks and face are pointing straight forward. Use the yarn tail left from the head to securely sew the head and body together, going through every stitch. Hide the excess yarn tail inside the body.
Step 2: Take the main arms and flatten the top edges. Sew them to the sides of the body, right at the neckline (around rounds 4 or 5 of the body).
Step 3: Take the flat inner arm pieces and sew or securely glue them to the inside of the main arms, positioning them so they point slightly forward to emphasize the sitting pose.
Step 4: Position the round white belly patch right in the center of the lower front body. Sew or glue it firmly into place.
Step 5: Position the small white muzzle right in the center of the face, aligning it with the color-change line. Sew or glue it into place.
Step 6: Position the tail at the lower back of the body so that the dog can sit nicely. Sew the tail into place and weave in the loose ends.
Step 7: Attach your safety eyes on the face. Wrap the red crocheted chain collar around the dog’s neck and tie it securely, hiding the ends. Finally, use a small makeup brush to apply a little bit of pink blush to the cheeks beneath the eyes for that extra adorable, rosy touch!
Learn with the Video Tutorial