
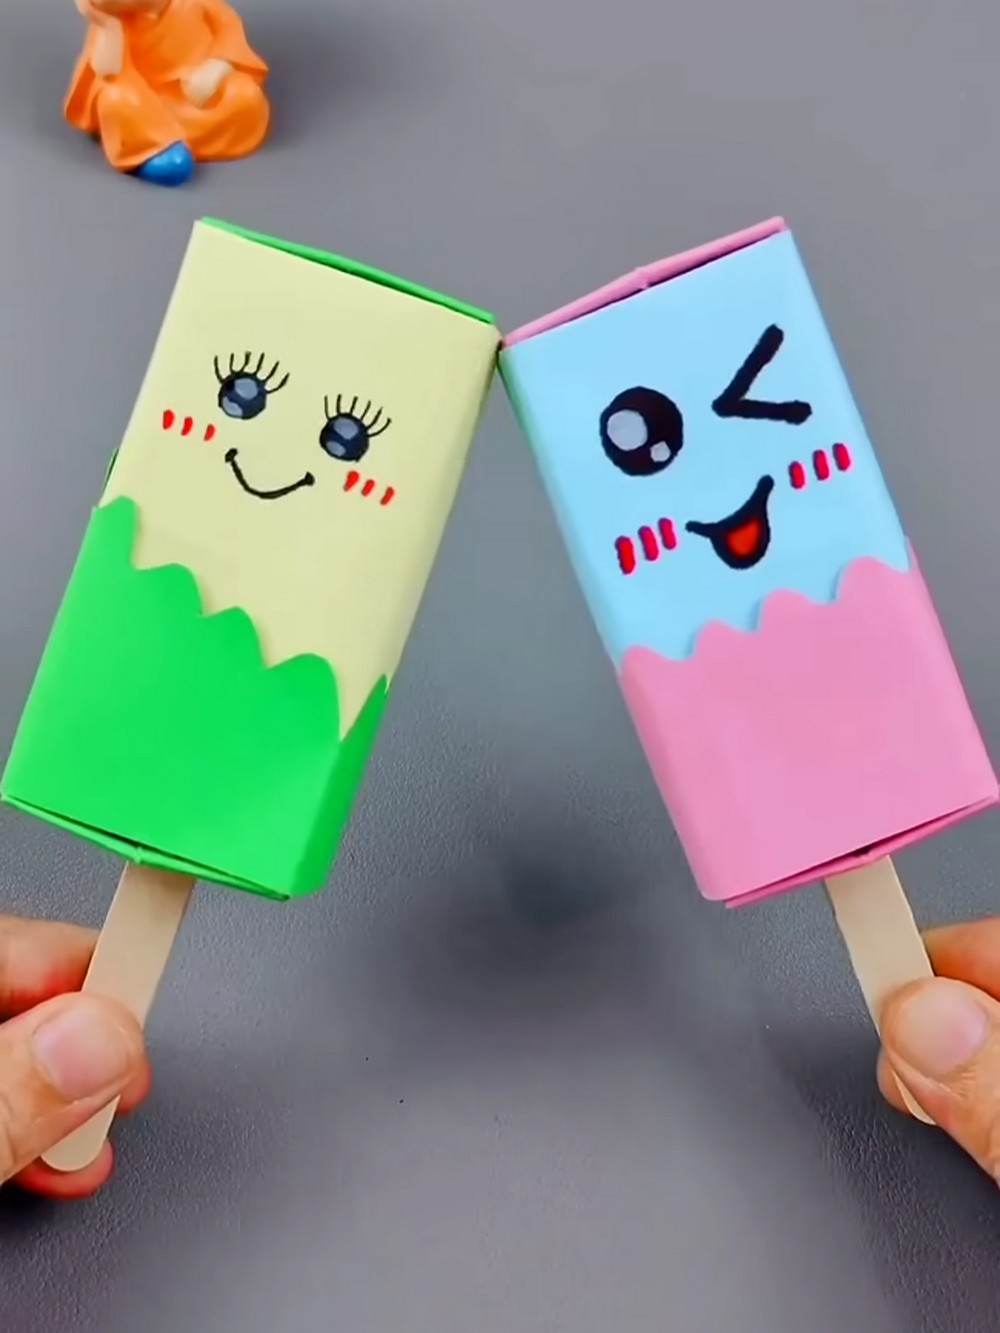
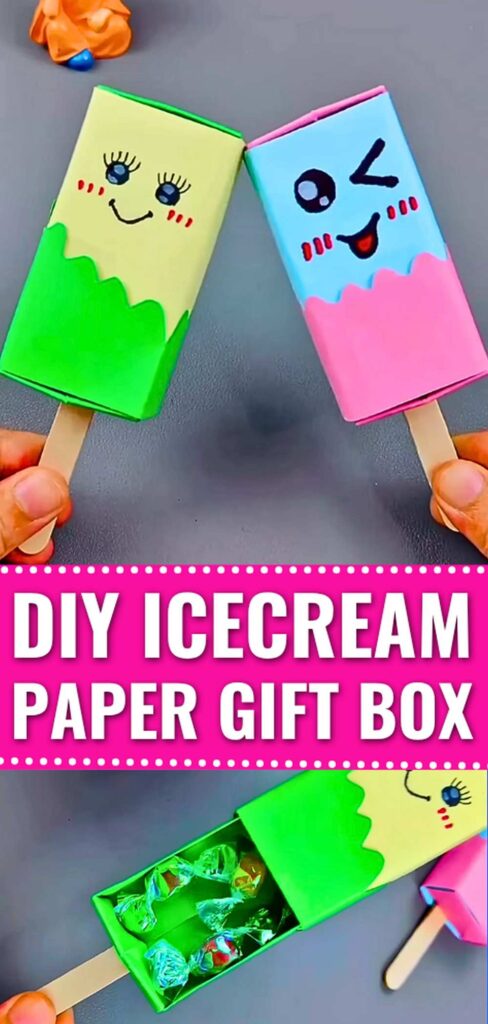
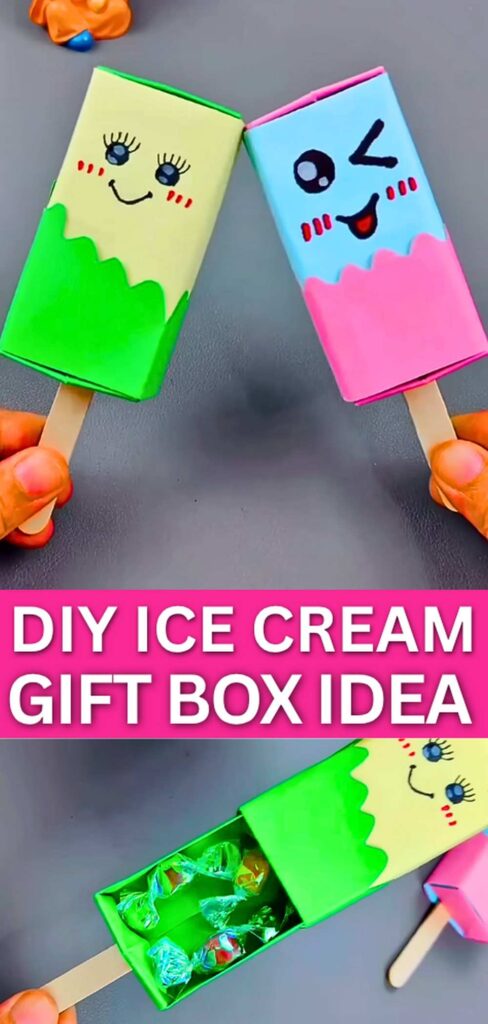
Make this KAWAII popsicle gift box in 12 simple steps to fill it with small gifts that kids can exchange at their mini parties or birthdays. They can pull the craft stick of this ice cream box like a drawer, and and reveals what they had put inside.
To me, that’s the MOST FUN surprise gift idea, even though it will contain the twisted wrap candies or chocolates along with a greeting card. We shall first make an origami box using the method I showed you while making my Chococat envelope.
Then attach the stick and wrap it so you can properly hide the gifts. It will also contain an ice cream icing cutout and a kawaii face you can draw in a way the kid is comfortable with. The method is pretty easy and can be followed in less than 10 minutes. Let’s show you how!
Model Type: Combination of traditional origami box + paper cutouts + drawing craft
Time: 10 minutes
How can you use this paper ice cream box?
- Small Gift Packaging: Hold small treats like candies, chocolates, or jewelry.
- Stationery Holder: It can be used to organize small desk items like paperclips, staples, or even small sticky notes.
- For learning how to make a box: The best thing about this craft is that you can learn how to make an origami box, which can be customized in limitless ways.
- Puppet Play: You can draw your favorite kawaii face for a kids’ puppet show.
Make Drawer Gift Box with Ice Cream Theme: Step-by-Step Instructions
Follow these step-by-step instructions to make this paper ice cream gif box craft:
Supplies Needed
- Square sheets of Tant paper in pink and blue. Or choose in greena nd yellow.
- Long Craft Stick
- Scallop cutting scissors.
- Glue or double-sided tape.
- Markers (Black and Red/Pink) for drawing the face.
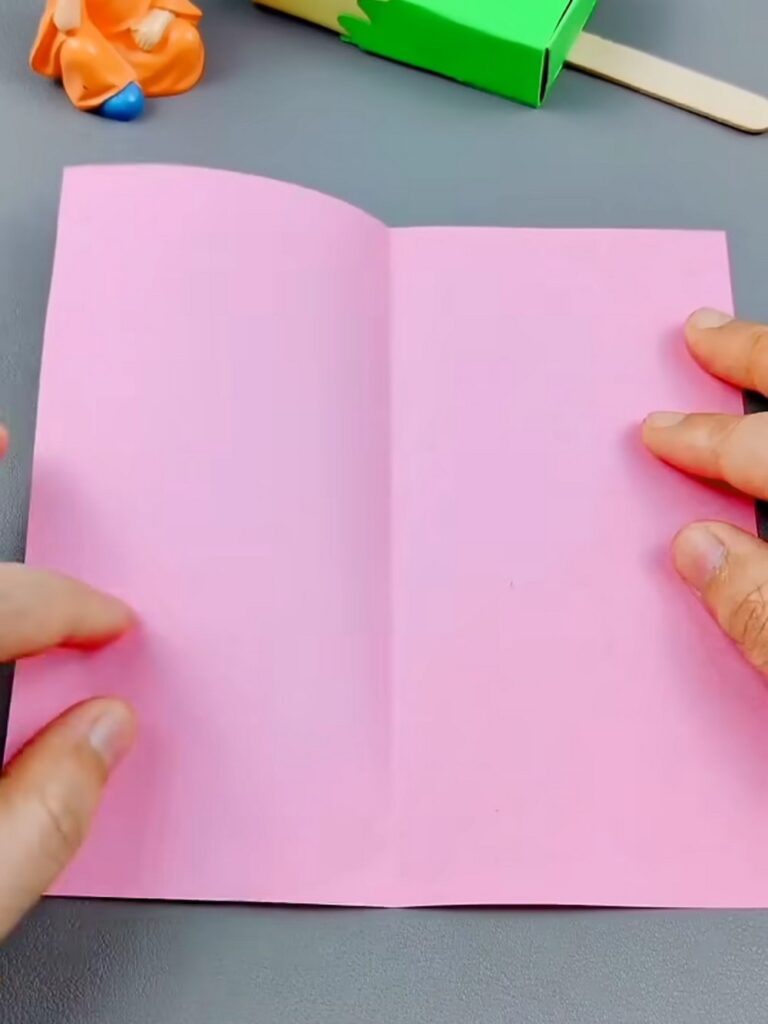
Step 1: Creating the Center Crease
Fold the square sheet in half to make a crease in the middle. Open the paper back up so it is flat again.
Step 2: The Cupboard Fold
Take the left edge of the paper and fold it inward so it perfectly aligns with the center crease you just made.
Repeat this with the right edge, folding it inward to meet the left edge at the center.
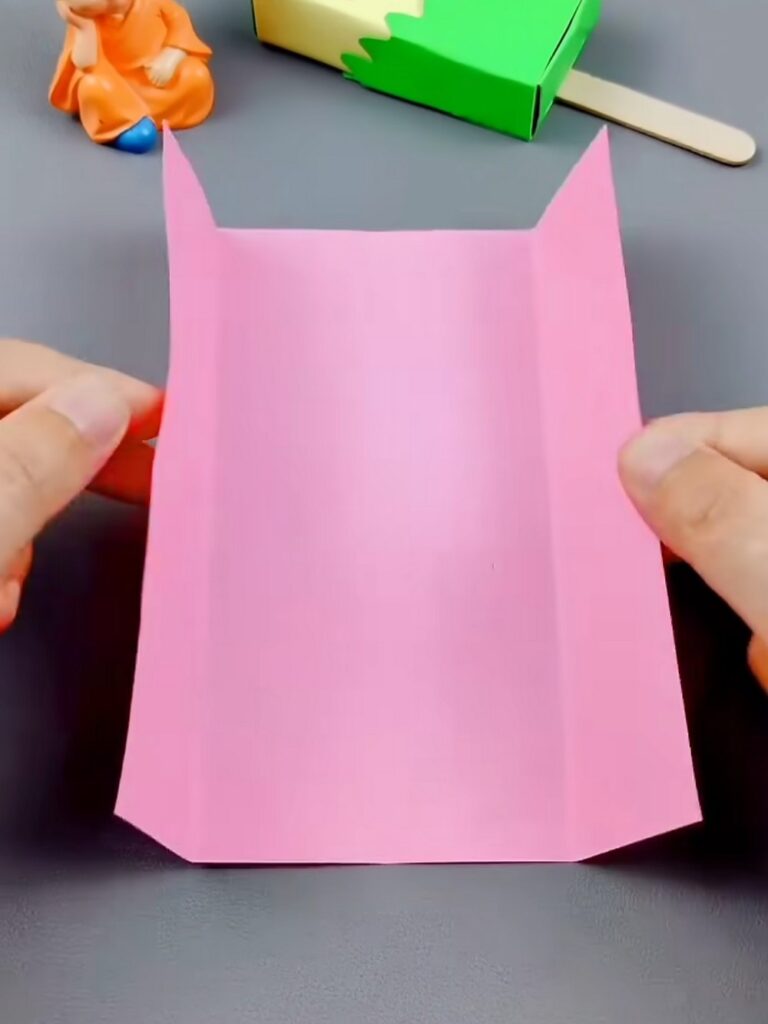
Your paper should now look like a set of closed double doors (an origami cupboard fold).

Step 3: Folding in Half
While keeping the “doors” closed, fold the entire piece of paper in half lengthwise along the original center crease.
You should now have a long, thick, and narrow strip of folded paper.
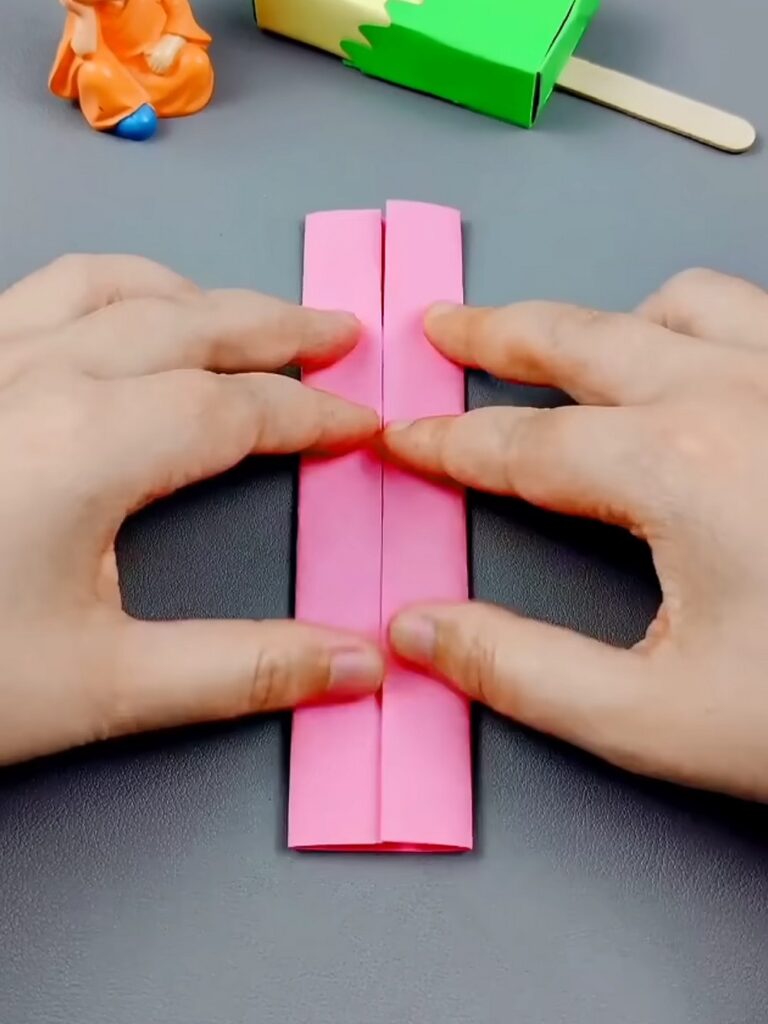
Step 4: First Diagonal Base Crease
Keep the paper in its narrow strip form from the previous step.
Take the bottom corner of the strip and fold it upward diagonally, aligning the bottom edge with the side edge to form a triangle.
Press down firmly to make a strong crease, as this will help form the side of your box.
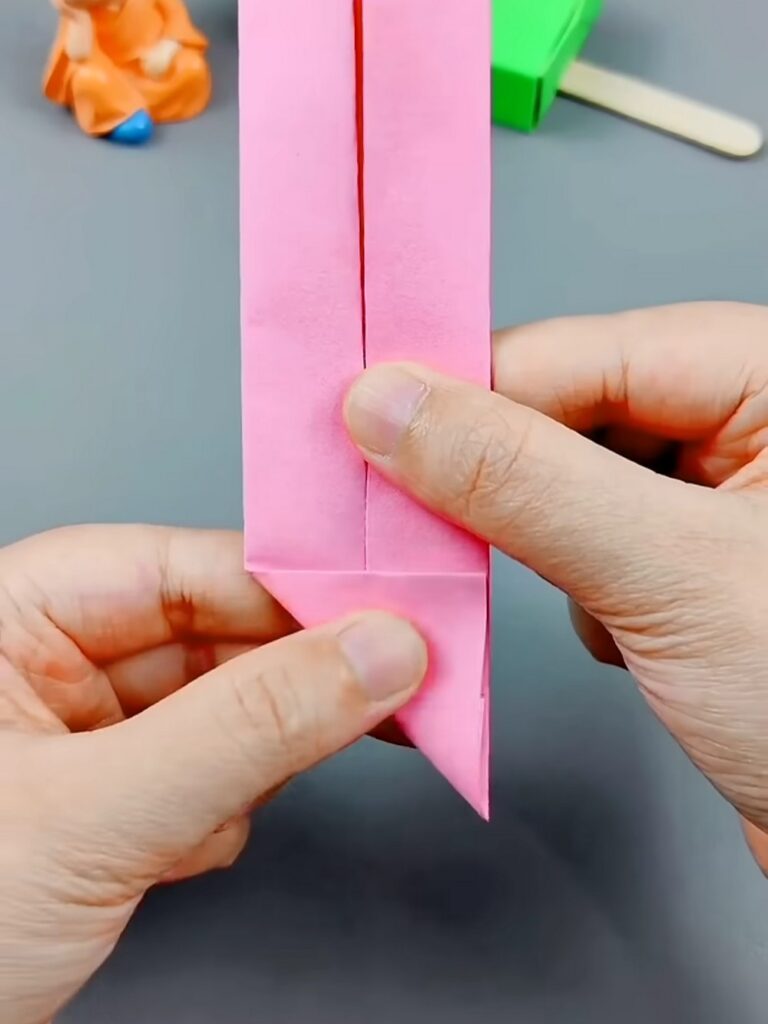
Step 5: Second Base Crease
Unfold the triangle you just made in Step 4.
Now, fold the entire bottom tip of the paper straight up horizontally, right at the point where the diagonal crease ends.
Press firmly and unfold. You have now pre-creased the guidelines for the bottom of the box.
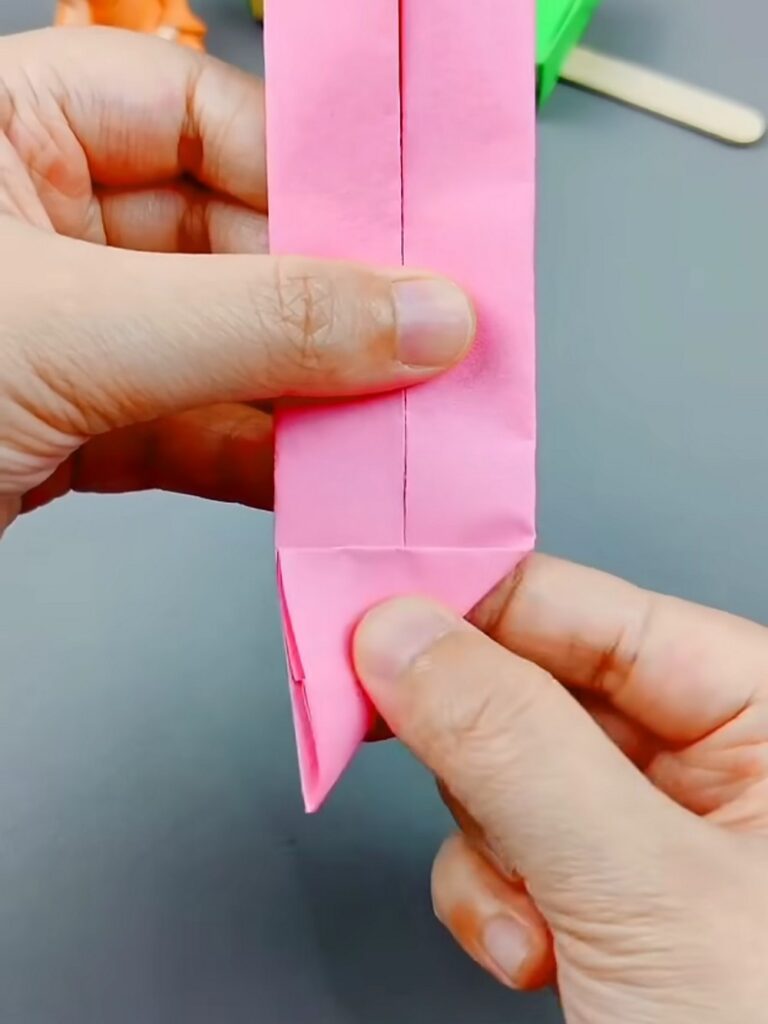
Step 6: Revealing the Creases
Unfold the main center fold to open the paper back up to the “cupboard fold” stage from Step 2.
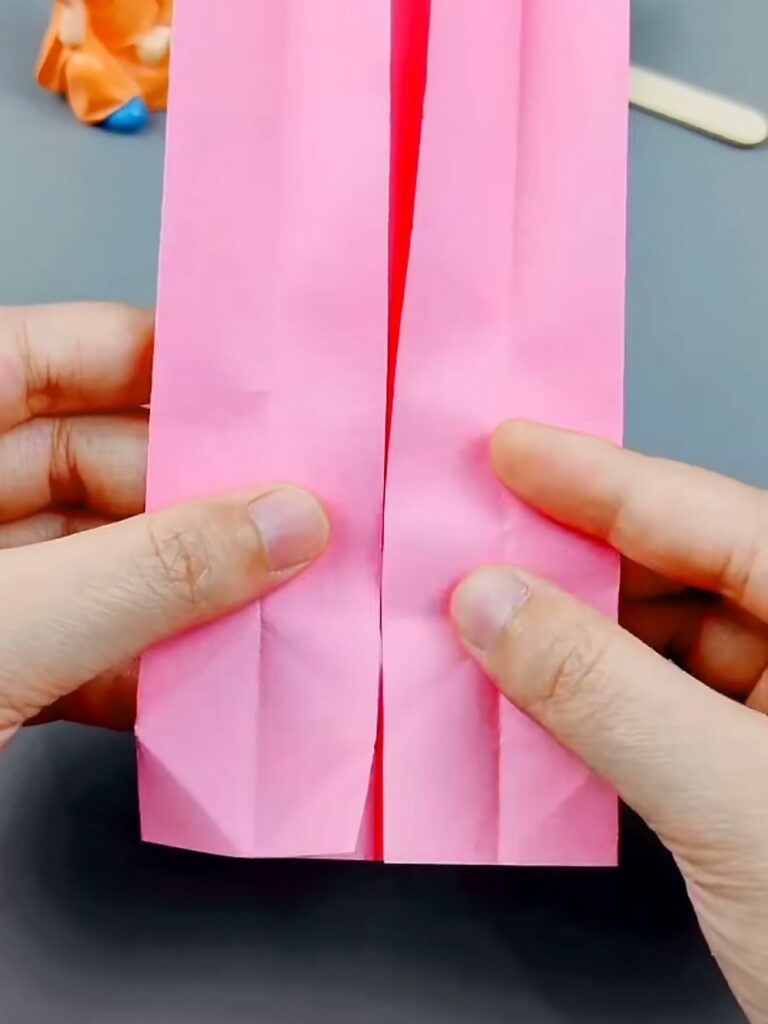
Look at the bottom of your paper; you will see the horizontal and diagonal creases you just created.
Step 7: Squashing the Base
Gently open the bottom section of the paper.
Using the diagonal creases as guides, push the left and right sides inward (mountain folds).
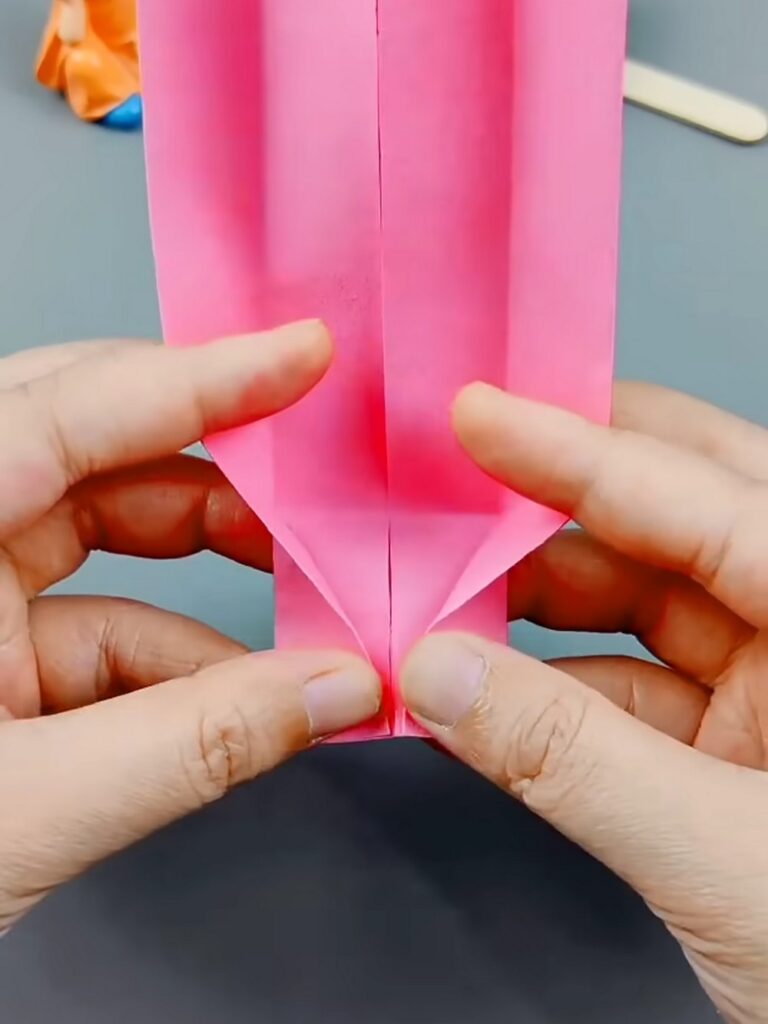
As you push the sides in, the bottom edge will naturally begin to lift and flatten out, creating a diamond-like shape at the base.
Step 8: Securing the Bottom Flaps
With the bottom flattened out, you will have two flaps pointing up and down (like an open envelope).
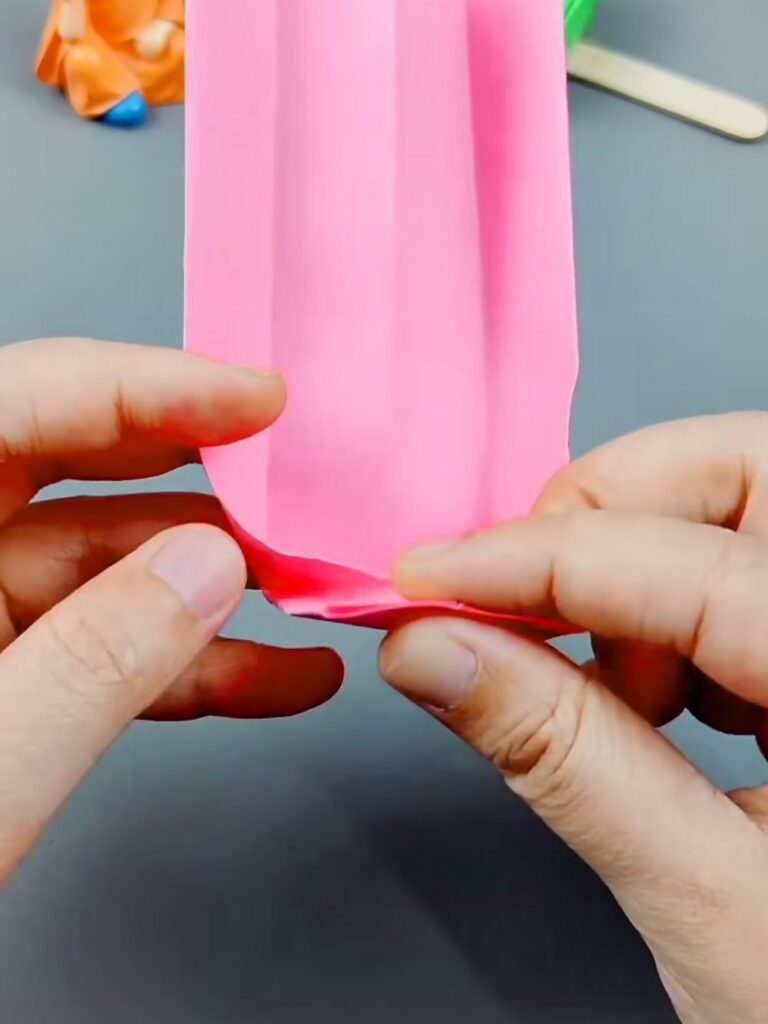
Fold the top flap slightly past the center of the base.
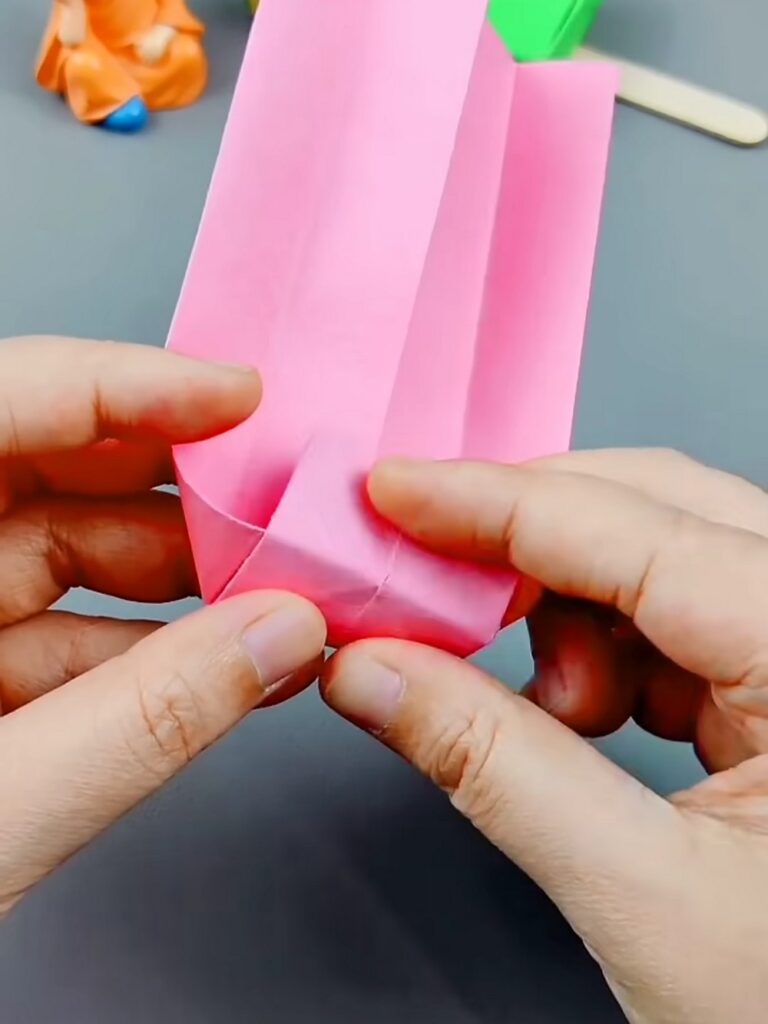
Fold the bottom flap upward so it overlaps the first flap.
Step 9: Shaping the Box
You can use glue or double-sided tape on the overlapping flaps from Step 8 to secure the bottom permanently.
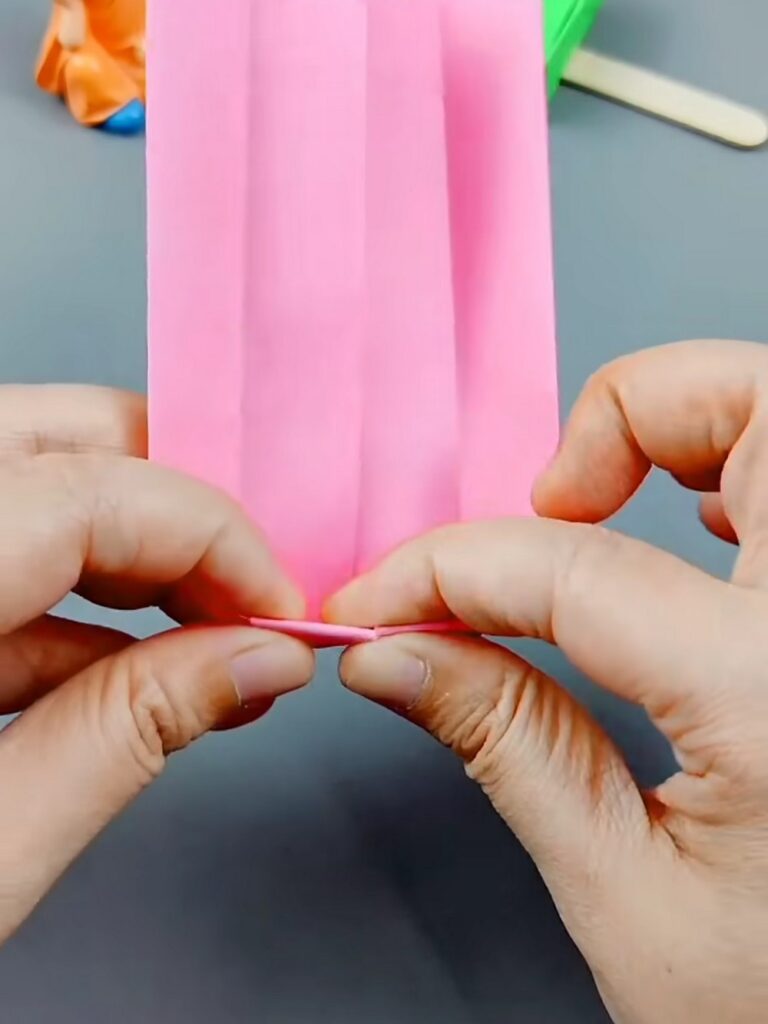
Gently open the top of the paper and push your fingers inside to square off the corners.
Your paper should now stand up as a 3D rectangular box or bag.
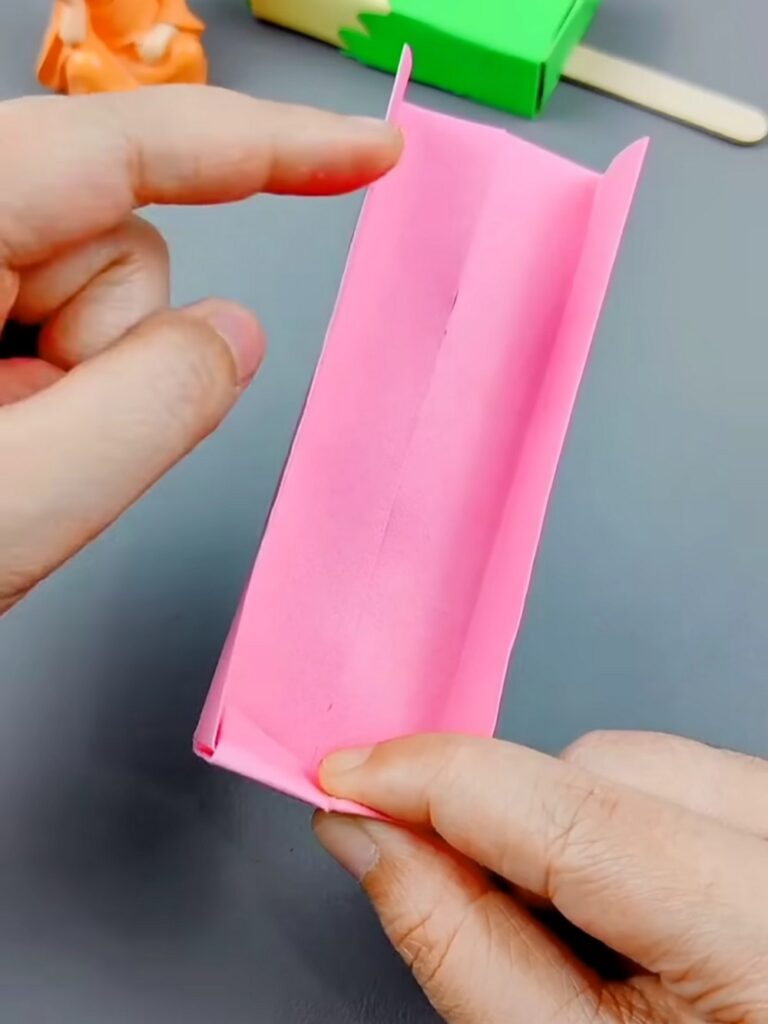
Step 10: Repeat
Repeat from step 4 for the top edge to make another side.
Step 11: Inserting the Popsicle Stick
Take your wooden popsicle stick and carefully slide it into the bottom opening of your folded pink paper box.
Push it in about halfway so that it feels stable.
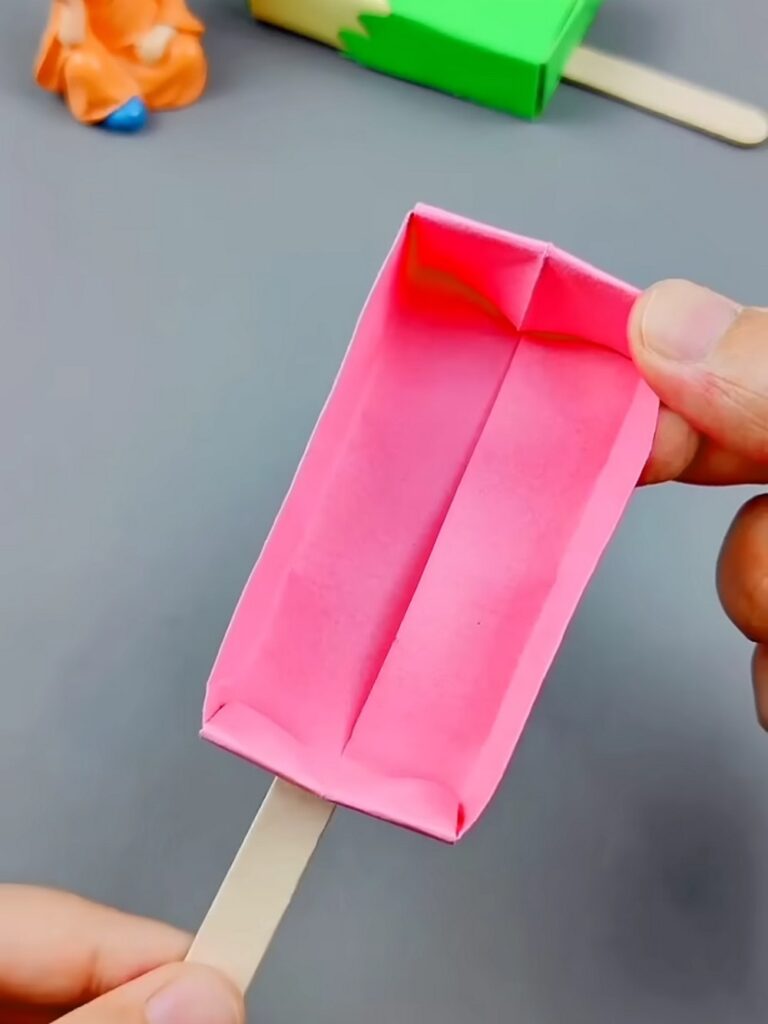
Use a little bit of glue or tape inside the opening to secure the stick tightly to the paper so it won’t fall out.
Step 12: Sizing the Blue Wrapper
Lay a rectangular piece of light blue craft paper flat on your table. You can make it in the intended dimensions by following the steps 1 to 4.
Place your pink box (with the stick attached) directly in the middle of the blue paper.
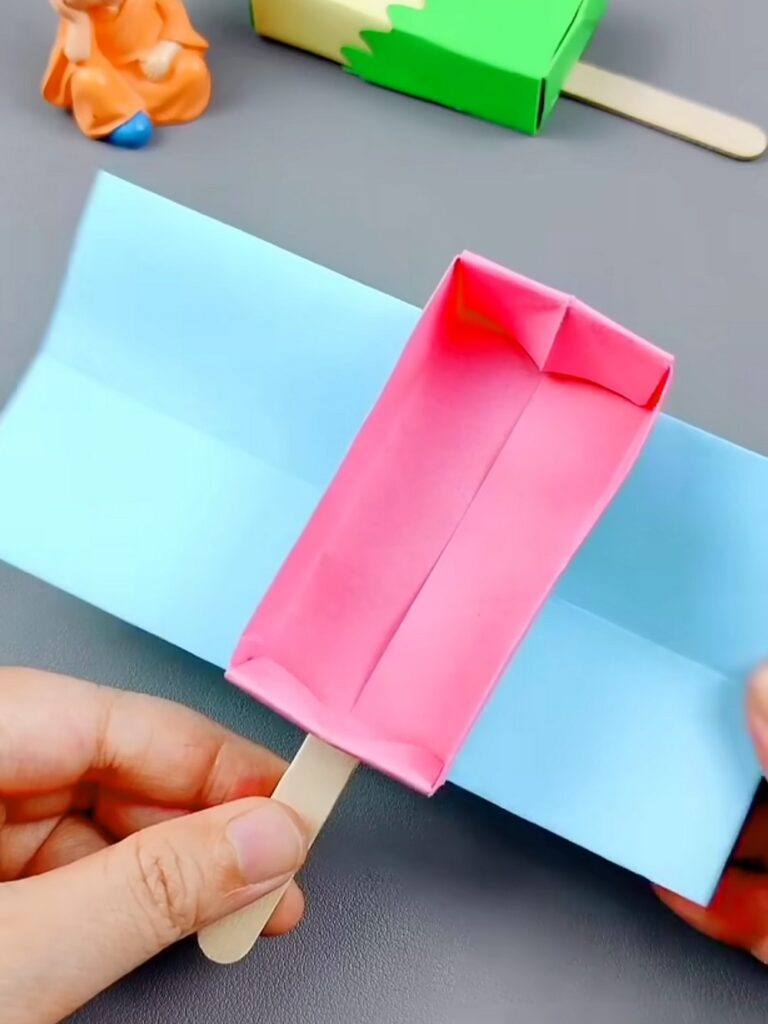
Make sure the blue paper is wide enough to wrap completely around the sides and back of the pink.
Step 13: Wrapping the Box
Fold one side of the light blue paper tightly over the front of the pink box.
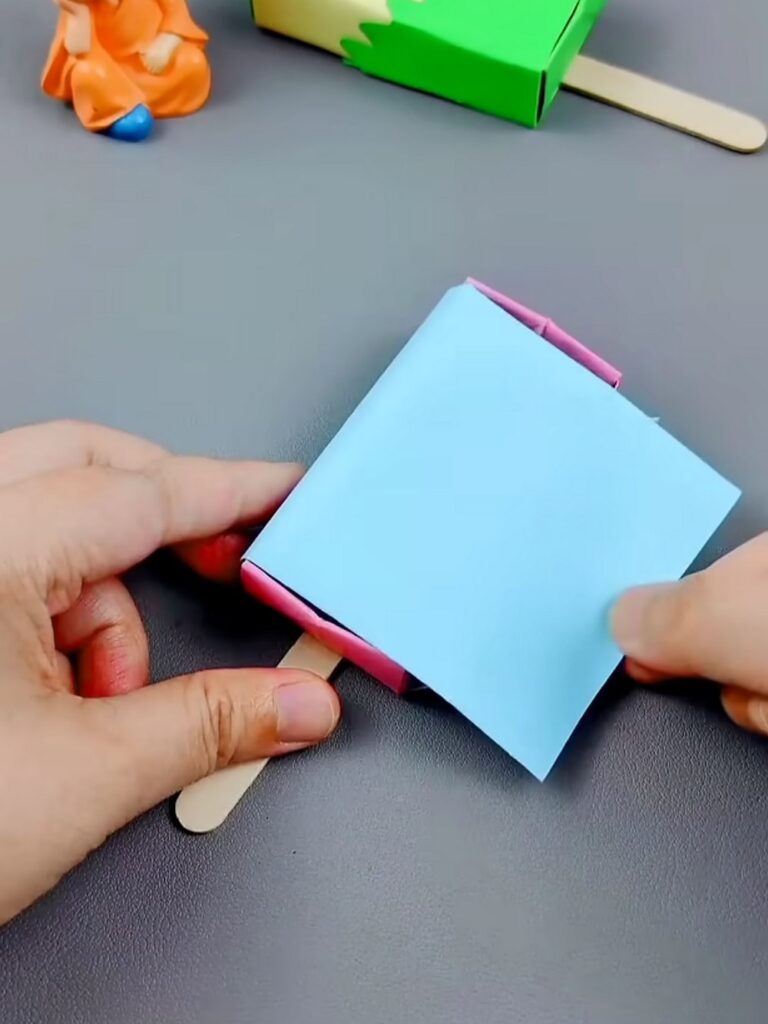
Fold the other side over so that it overlaps the first side at the back of the box.
Glue or tape the overlapping blue paper down securely, ensuring the pink core is completely covered by the blue paper on the top and sides.
Step 14: Adding the Ice Cream Drip
Take your strip of pink paper that has a wavy, scalloped edge and cut into the top.
Apply glue to the back of this pink strip.
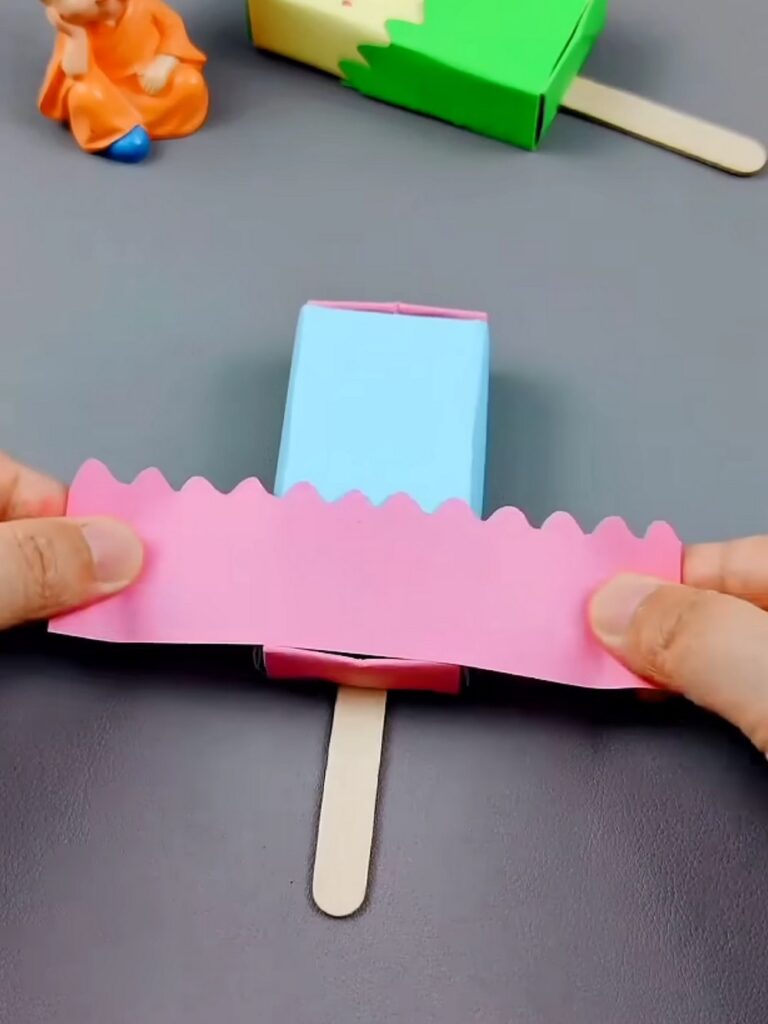
Wrap it around the lower half of your blue box, aligning the straight bottom edge of the pink strip with the bottom edge of the blue box.
The wavy top edge should look like pink strawberry ice cream melting over the blue base.
Feels Difficult?
Step 15: Drawing the Face
Take a black marker to bring your craft to life by drawing a cute face on the upper blue section.
Draw one thick circle for an open eye, leaving a small white dot uncolored for a cute highlight.
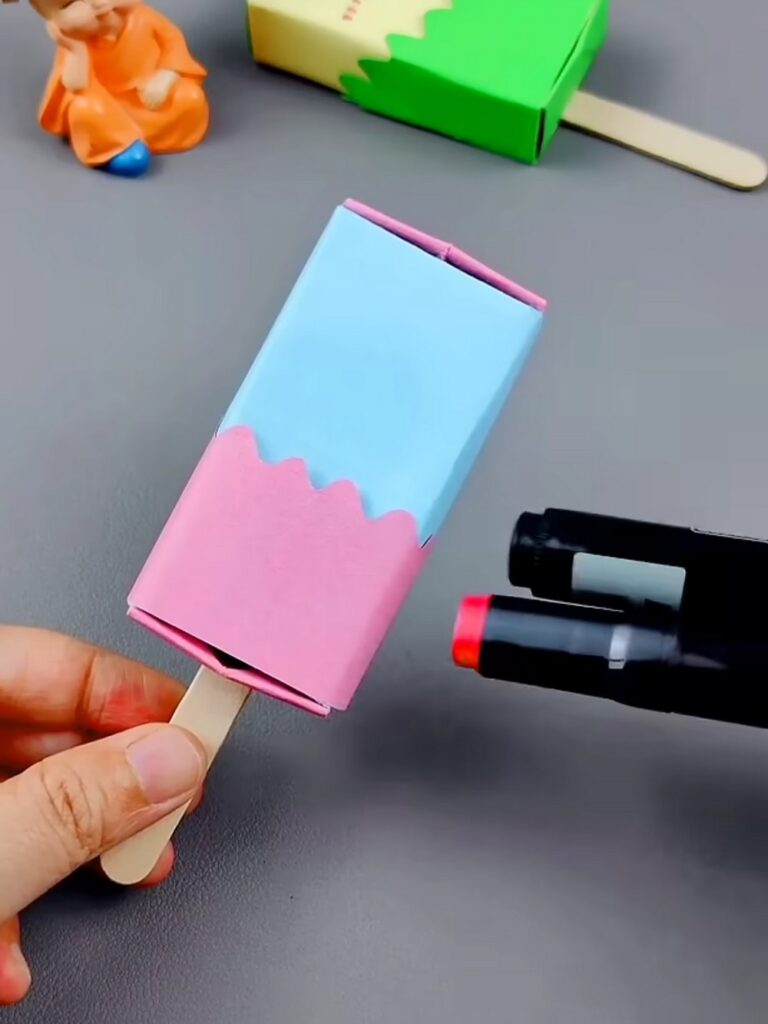
Draw a simple “V” shape turned sideways for a winking eye.
Draw a small, curved “U” shape in the middle for a smiling, open mouth.
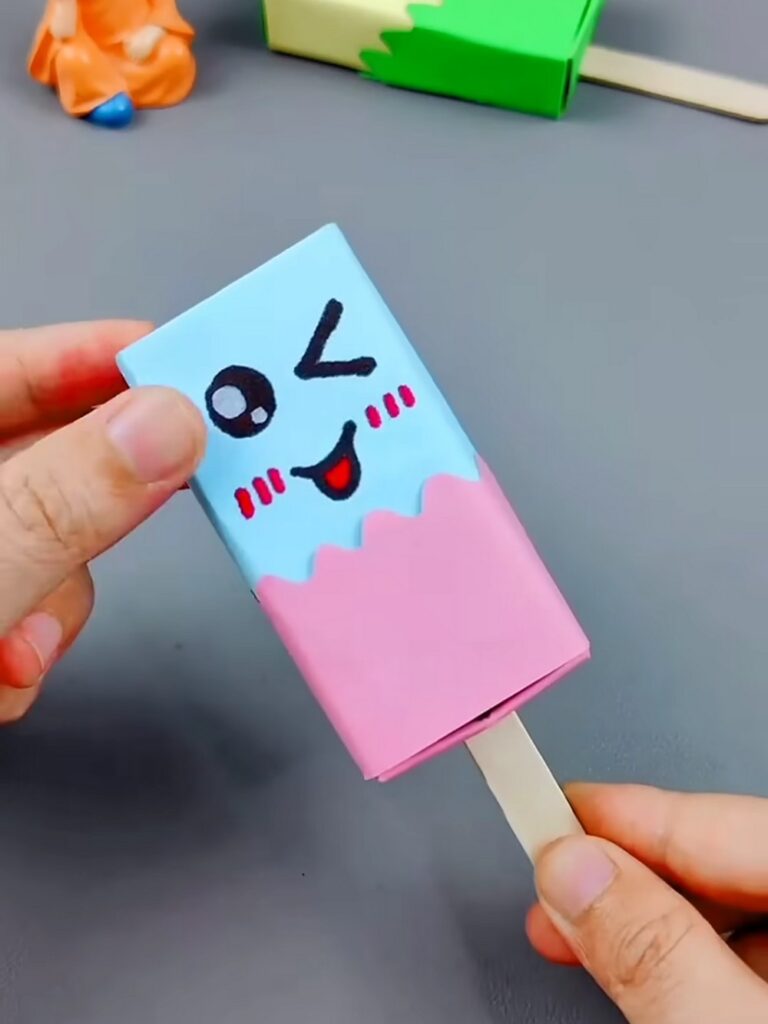
And that’s it! This way, you can make a smiling box for summer parties!
Was this Tutorial Helpful? Tell us in the Comments.
Your feedback is a great way for us to improve the tutorials. Did you find the tutorial helpful? Be sure to subscribe to the creator’s channel!
About "MAKE DIY via YouTube"
She is running one of the most special corner of paper crafts that are all quick and easier and require no skill!

About "Talha"
Hey, I’m Talha, the Crafter on Craftstive.com. I love to share guides on folding cute origami models and paper crafts, and I am always ready to inspire your next craft project with my weekly craft discussions.