
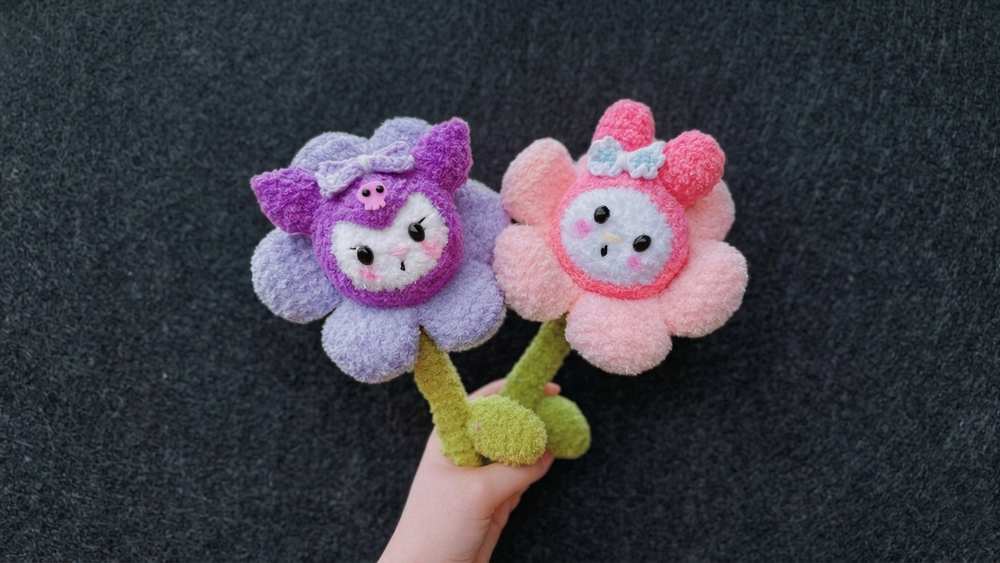
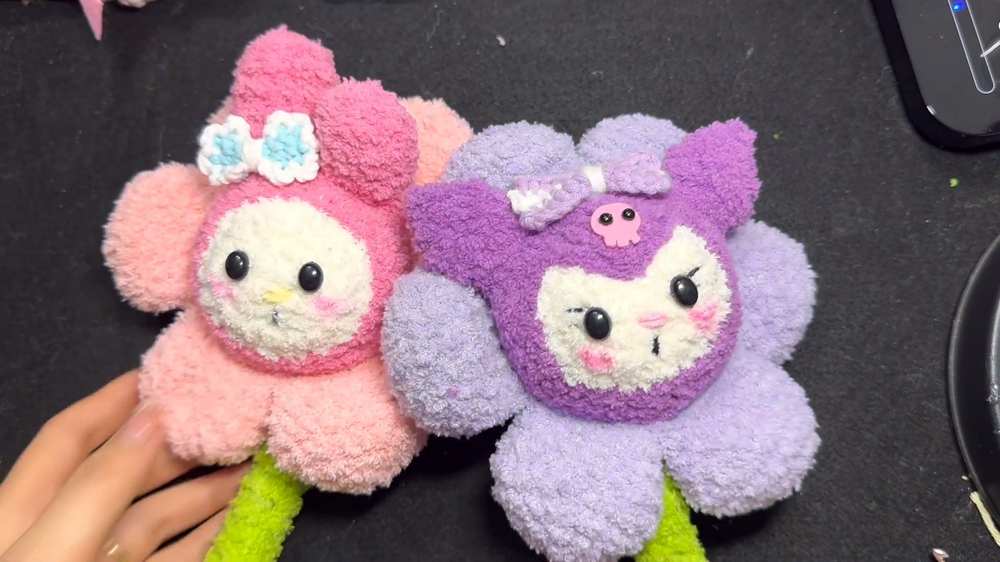
Crochet this set of oh-so cute, colorful, and unique Sanrio bouquets, including Kuromi and Melody, with this pattern. These big crochet stuffed flowers are made from fuzzy yarn, which makes them look SO PREMIUM and elegant. Our idea will be to crochet the Kuromi and My Melody face charm plushies separately and sew them in the centre with a crochet stuffed daisy flower in the respective colors.
Even the stems of these crochet Kuromi and Melody flowers are crocheted and very cushiony. We will use the oval eyes and add similar authentic details to the character plushies. So, kids in particular are gonna love this crochet pattern. Now, continue reading for the full detailed pattern to crochet them.
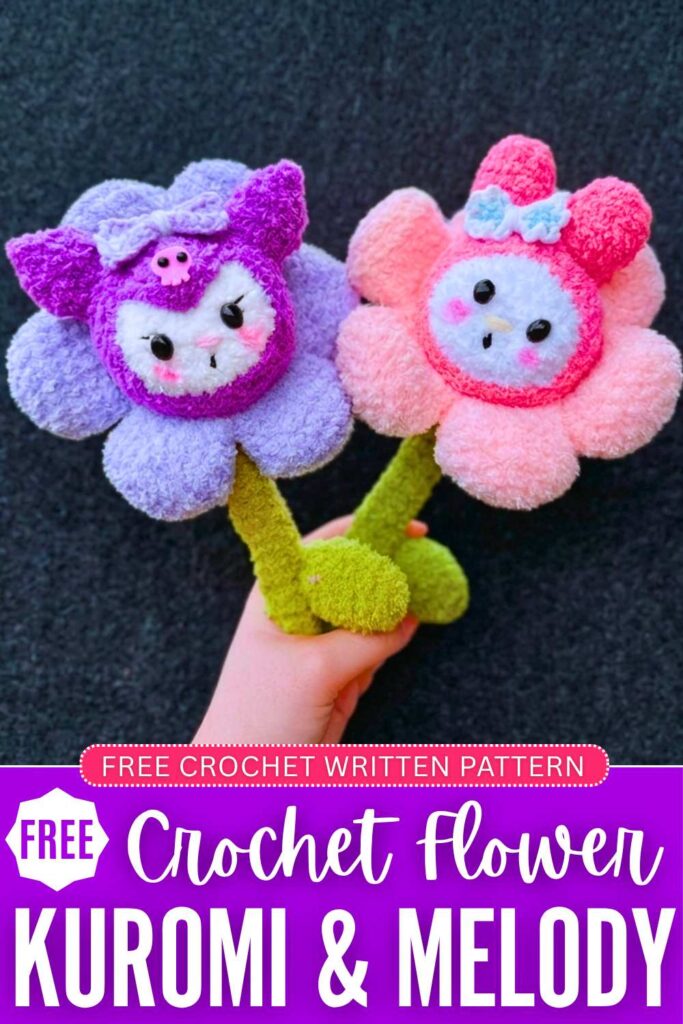
Crochet Sanrio Character Bouquets: Round-by-Round Pattern
Here is the complete crochet pattern for making the Kuromi and Melody Flower plush based on the video tutorial. This pattern covers both variants since their assembly, petals, stems, and leaves are the same, only their color themes and head/ear details differ.
Materials Needed
-
Yarn: Faux fur / fluffy chenille yarn (for the main head, ears, and petals) and regular 4-ply Milk Cotton yarn (25g for the decorative elements like bows).
-
Melody Color Theme: White, dark pink, light pink (for petals), light blue, or green.
-
Kuromi Color Theme: White, purple/black, dark pink, light pink.
-
-
Crochet Hooks: 4.0mm hook (for the fluffy yarn parts) and 2.5mm or 3.0mm hook (for the cotton yarn details).
-
Eyes: 8mm x 10mm oval safety eyes.
-
Wire/Stems: 40cm flower stem wire (to stabilize the petals and stem) and some crafting pliers to bend/cut the wire.
-
Other Essentials: Stitch markers (highly recommended for fluffy yarn), tapestry needle, fiberfill stuffing, hot glue gun, pink/black felt fabric (for the skull detail on Kuromi), and cosmetic blush for the cheeks.
Abbreviations (US Terms)
-
MR: Magic Ring
-
ch: Chain
-
sc: Single crochet
-
hdc: Half double crochet
-
inc: Increase (2 sc in the same stitch)
-
dec: Decrease (sc 2 stitches together)
-
w: 3 sc in the same stitch
-
BLO: Back loop only
-
sl st: Slip stitch
-
st(s): Stitch(es)
Pattern Instructions
Main Head & Hood
The head starts with white yarn for the face and changes to the hood color (pink for Melody, purple/black for Kuromi).
-
Round 1: Using White yarn and a 4.0mm hook, ch 5. Starting in the 2nd ch from the hook: 1 inc, 2 sc, 1 w (3 sc in the last chain). Turn to work along the opposite side of the chain: 2 sc, 1 sc in the last stitch to balance. (10 sts)
-
Round 2: 2 inc, 2 sc, 3 inc, 2 sc, 1 inc. (16 sts)
-
Round 3: (1 sc, 1 inc) repeat 8 times around. (24 sts)
-
Color Change Note: To keep the border clean, when finalizing the last stitch of Round 3, switch to your hood color (Pink or Purple).
-
Round 4: (3 sc, 1 inc) repeat 6 times around. (30 sts)
-
Round 5 (BLO): Working in the back loops only to create a clean edge, work 36 sc around. (Note: If your stitch count varies slightly due to the fluffy yarn, ensure you balance it to around 36 stitches by placing minor adjustments).
-
Round 6: (4 sc, 1 inc) repeat 6 times around. (42 sts)
-
Round 7: 36 sc around.
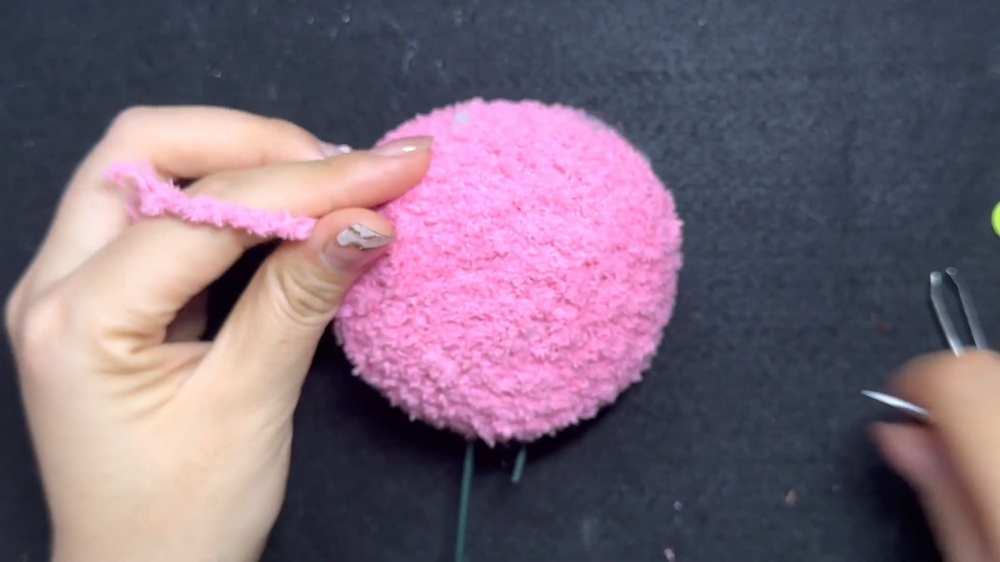
Round 8 Split (Where Melody and Kuromi differ for Ear Placement):
-
For Melody: 6 sc, ch 4 (skip 4 sts below), 2 sc, ch 4 (skip 4 sts below), 20 sc to the end of the round.
-
For Kuromi: 3 sc, ch 3 (skip 3 sts below), 7 sc, ch 3 (skip 3 sts below), 20 sc to the end of the round.
Resuming Head (Both Characters):
-
Round 9: 36 sc around (crochet into the chains created in Round 8).
-
Round 10: (4 sc, 1 dec) repeat 6 times around. (30 sts)
-
Round 11: 30 sc around.
-
Round 12: (3 sc, 1 dec) repeat 6 times around. (24 sts)
-
Round 13: (1 sc, 1 dec) repeat 8 times around. (16 sts)
-
Insert your 40cm flower stem wire through the bottom center of the head, ensuring it is secure. Stuff the head firmly with fiberfill.
-
Round 14: 8 dec. (8 sts) Fasten off, use your tapestry needle to weave through the front loops, pull tight to close the remaining gap, and hide the yarn tail inside.
Ears
My Melody Ears (Make 2)
Attach pink yarn to the 4-chain opening left on the hood.
-
Round 1: Work 8 sc evenly around the chain opening space. (8 sts)
-
Round 2: 8 sc around.
-
Round 3: (1 sc, 1 inc) repeat 4 times. (12 sts)
-
Rounds 4-6: 12 sc around (3 rounds total).
-
Round 7: (1 sc, 1 dec) repeat 4 times. (8 sts) Fasten off, leaving a tail. Lightly stuff the tips of the ears. For one ear, fold it down sideways at the base and use the tail yarn to sew it flat so it has a cute “floppy ear” look.
Kuromi Ears (Make 2)
Attach purple/black yarn to the 3-chain opening left on the hood.
-
Round 1: Work 6 sc evenly around the chain opening space. (6 sts)
-
Round 2: 6 inc. (12 sts)
-
Rounds 3-4: 12 sc around (2 rounds total).
-
Round 5: (2 sc, 1 dec) repeat 3 times. (9 sts)
-
Round 6: (1 sc, 1 dec) repeat 3 times. (6 sts)
-
Round 7: 3 dec. (3 sts) Fasten off, weave the tail through to close the tip of the jester-style ear. Lightly stuff and pinch flat.
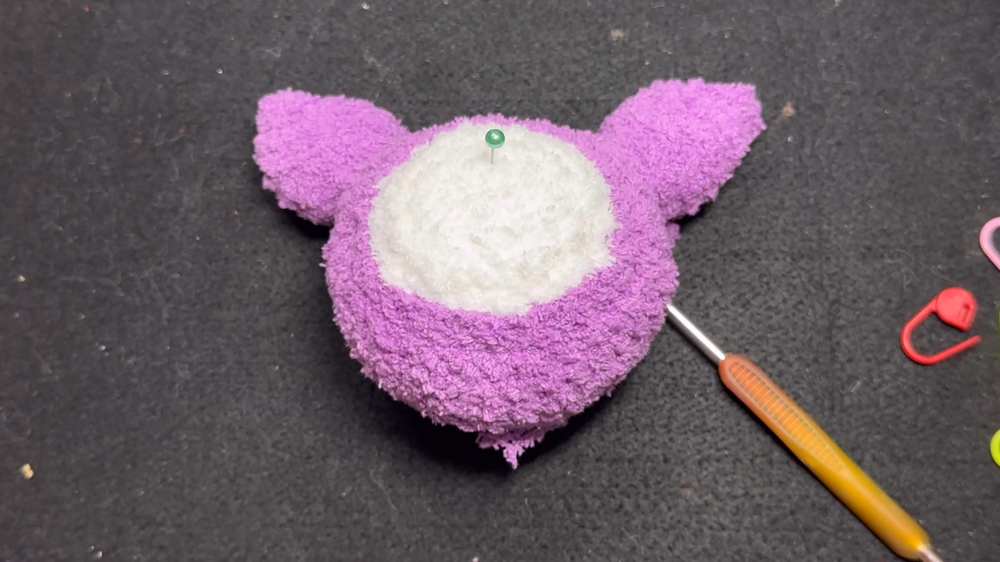
Flower Petals (Make 6)
Using the fluffy yarn color chosen for your petals (e.g., light pink or purple).
-
Round 1: Make a MR with 6 sc. (6 sts)
-
Round 2: 6 inc. (12 sts)
-
Round 3: (1 sc, 1 inc) repeat 6 times. (18 sts)
-
Round 4: (2 sc, 1 inc) repeat 6 times. (24 sts)
-
Round 5: 24 sc around.
-
Round 6: (2 sc, 1 dec) repeat 6 times. (18 sts)
-
Round 7: (4 sc, 1 dec) repeat 3 times. (15 sts)
-
Round 8: (3 sc, 1 dec) repeat 3 times. (12 sts)
-
Do not stuff the petals. Flatten them down.
-
For Petals 1 to 5: Fasten off and leave a tail.
-
For Petal 6: Do not cut the yarn. Lay all 6 petals side-by-side in a circle. Work 6 sc across the flattened base of each petal consecutively, joining all 6 together into a continuous ring of 36 stitches. Sl st to join the ring, leaving a long yarn tail for sewing the entire petal ring onto the back of the character’s head.
Flower Stem (Green Sleeve)
Using green yarn, this sleeve acts as the casing over the 40cm wire stem.
-
Round 1: Make a MR with 6 sc. (6 sts)
-
Rounds 2-35: Work 6 sc around in a continuous spiral for 34 rounds (or until it reaches roughly 24cm long, matching your desired stem size). Stuff lightly with a tiny bit of fiberfill as you slide it up over the wire. Sew the top securely to the bottom base of the head.
Leaf
Using green yarn.
-
Round 1: Make a MR with 6 sc. (6 sts)
-
Round 2: (1 sc, 1 inc) repeat 3 times. (9 sts)
-
Round 3: 9 sc around.
-
Round 4: (2 sc, 1 inc) repeat 3 times. (12 sts)
-
Round 5: 12 sc around.
-
Round 6: (2 sc, 1 dec) repeat 3 times. (9 sts)
-
Round 7: (1 sc, 1 dec) repeat 3 times. (6 sts) Fasten off, leaving a tail. Flatten the leaf out and sew it directly onto the green flower stem sleeve.
Bows & Accents (Using 3.0mm Hook and Milk Cotton Yarn)
Melody’s Small Flat Bow:
-
Row 1: Ch 7. Starting in 2nd ch from hook, work 6 sc. Ch 1, turn.
-
Row 2: 6 sc. Fasten off.
-
Border: Switch to White yarn. Join at any corner and work a decorative border around the rectangle by alternating (ch 3, sl st into next st) around all edges.
-
Wrap white yarn tightly around the center of the rectangle to pinch it into a bow shape. Glue or sew to the base of Melody’s floppy ear.
Kuromi’s Bow:
-
Row 1: Ch 12. Starting from the 3rd ch from hook, work 10 hdc. Ch 2, turn.
-
Rows 2-3: Change to white yarn, work 10 sc across.
-
Row 4: Switch back to main color, work 10 hdc across.
-
Wrap white yarn around the middle to pinch into a large bow and affix below Kuromi’s chin or onto the hood.
Assembly & Finishing Details
-
Face Placement: Securely glue or press the 8x10mm oval safety eyes onto the white face area. Use standard black embroidery yarn to stitch small eyelashes or simple smiles.
-
Kuromi Forehead Accent: Cut out a small classic skull icon from pink/dark pink felt fabric. Glue it directly to the center triangle forehead point of Kuromi’s hood.
-
Attaching Petals: Take the completed 6-petal ring, slide it over the wire stem from the bottom up, and position it directly behind the character’s hood. Use the long tail yarn to sew the inner ring of the petals firmly to the back of the character’s head. To keep the petals from sagging, add a tiny hidden stitch between the sides of each neighboring petal so they hold a neat, cupped shape around the face.
-
Rosy Cheeks: Dip a small makeup brush or cotton swab into cosmetic pink blush and gently dust the cheeks right beneath the eyes for that perfect handmade touch.
Learn with the Video Tutorial