
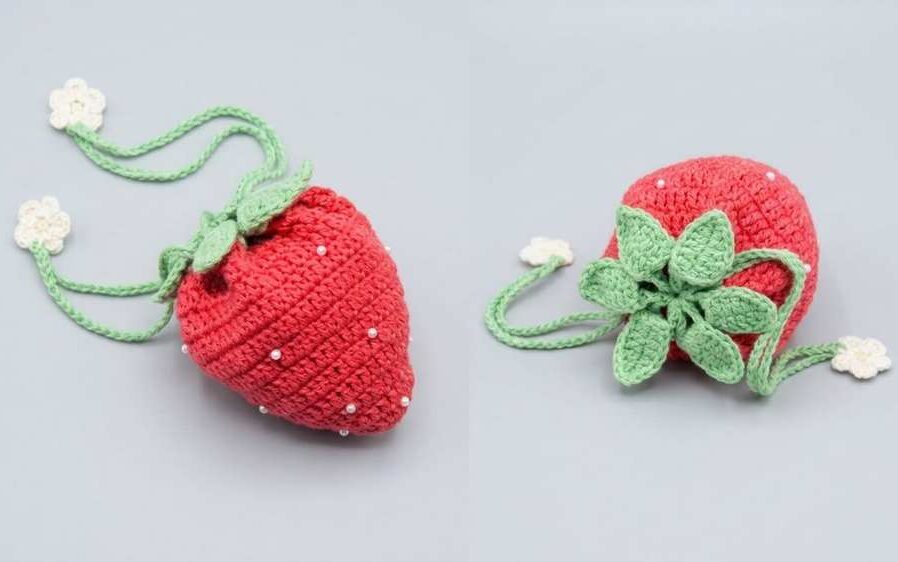
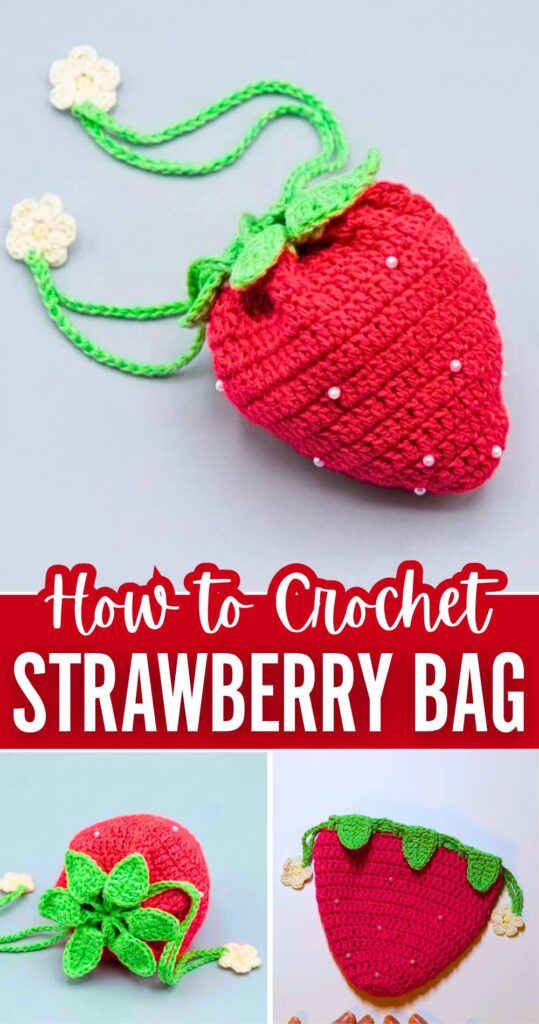
While I have already shared two patterns for crocheting a strawberry, there is no way I could miss the crochet strawberry pouch. You can turn a crochet strawberry into a drawstring pouch without affecting its shape, and that makes this project so FUN and a must-have. So, learn how to crochet a life-like strawberry pouch using cotton yarn with this FREE pattern. We will also crochet small leaves and attach the pearls all around, as the flowers.
Crochet Life-Like Strawberry Pouch Pattern
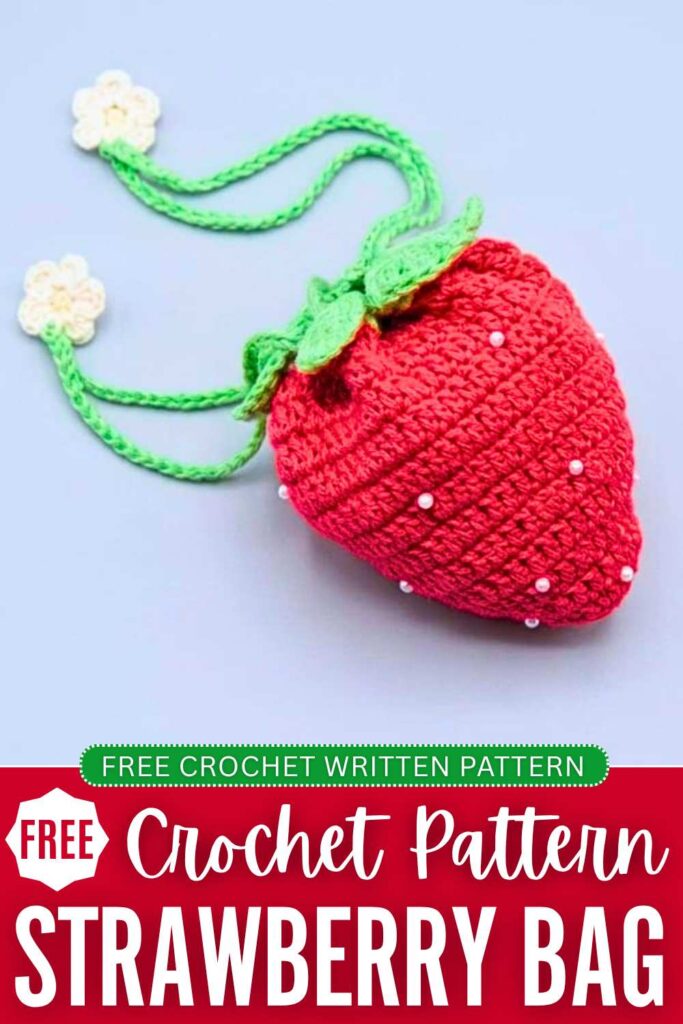
It is the BEST travel pouch, especially when you crochet long sling straps. It is actually colorful, as we shall use 4 yarn colors to crochet one. It will end up pretty big, and you can hold a lot in this bag. Now, continue reading for the full strawberry pouch pattern.
Free Crochet Strawberry-Shaped Pouch: Round-by-Round Pattern
While the previous strawberry pouch design called for incredibly thin lace yarn that could be quite tricky and fatiguing to work with, this updated version is completely redesigned for comfort and accessibility. It uses standard, readily available organic cotton yarn and a size 5/0 crochet hook, making it perfect for beginners and seasoned crafters alike.
The pouch features a wide, highly functional top opening that cinches tightly into a beautiful strawberry shape.
Even when completely empty, the structural design ensures it holds its plump, rounded form beautifully, and the drawstrings are adorned with lovely little white strawberry blossoms at the ends.
Materials Needed
- Yarn: Hamanaka Paume Organic Cotton 100% series (or any equivalent sport/DK weight cotton yarn).
- Main Strawberry Body & Leaves: Paume Baby Color in Pink (Color No. 303) and Green (Color No. 302).
- Blossom Details: Paume Crochet (a slightly finer weight) in White (Color No. 601) and Yellow (Color No. 603).
- Crochet Hooks:
- Size 5/0 (3.0mm) for the strawberry body, calyx leaves, and drawstring cords.
- Size 3/0 (2.2mm to 2.3mm) for the delicate white blossom charms.
- Notions:
- Tapestry/darning needle for weaving in tails and sewing the leaves.
- Sharp scissors.
- Pearl beads (your preferred quantity) to create the small strawberry seeds.
- A fine sewing needle (if your pearl beads have holes too small for a standard tapestry needle).
Abbreviations (US Terms)
- MR: Magic Ring
- ch: Chain stitch
- sl st: Slip stitch
- sc: Single crochet
- hdc: Half double crochet
- dc: Double crochet
- inc: Double crochet increase (work 2 double crochets into the same stitch)
- st(s): Stitch(es)
Step-by-Step Pattern: Strawberry Body
- Setup: Use your 5/0 (3.0mm) hook and the Pink yarn.
- Round 1: Start with a MR. Ch 3 (this counts as your first dc here and throughout the pattern). Work 11 dc into the ring. Join with a sl st to the 3rd ch of your starting ch-3. (12 sts)
- Round 2: Ch 3, work 1 dc into the very same base stitch as the join. Work 1 inc (2 dc) into every remaining stitch around. Join with a sl st to the 3rd ch of the starting ch-3. (24 sts)
- Round 3: Ch 3. Work 1 dc into each stitch around, without any increases. Join with a sl st to the 3rd ch of the starting ch-3. (24 sts)
- Note: This non-increase round causes the fabric to curve slightly into a bowl shape, building the pointed base of your strawberry.
- Round 4: Ch 3, work 1 inc into the next stitch. Repeat the sequence of (1 dc, 1 inc) all the way around. Join with a sl st to the 3rd ch of the starting ch-3. (36 sts)
- Round 5: Ch 3. Work 1 dc into each stitch around, with no increases. Join with a sl st to the 3rd ch of the starting ch-3. (36 sts)
- Round 6: Ch 3, 1 dc in the next stitch, work 1 inc into the following stitch. Repeat the sequence of (1 dc in each of the next 2 sts, 1 inc) all the way around. Join with a sl st to the 3rd ch of the starting ch-3. (48 sts)
- Round 7: Ch 3. Work 1 dc into each stitch around, with no increases. Join with a sl st to the 3rd ch of the starting ch-3. (48 sts)
- Round 8: Ch 3, 1 dc in each of the next 2 stitches, work 1 inc into the following stitch. Repeat the sequence of (1 dc in each of the next 3 sts, 1 inc) all the way around. Join with a sl st to the 3rd ch of the starting ch-3. (60 sts)
- Rounds 9 to 13: Ch 3. Work 1 dc into each stitch around for all five rounds, maintaining 60 stitches per round. On the final sl st of Round 13, pull through with the Green yarn to smoothly change your color. Fasten off and cut the pink yarn, leaving a tail to secure later.
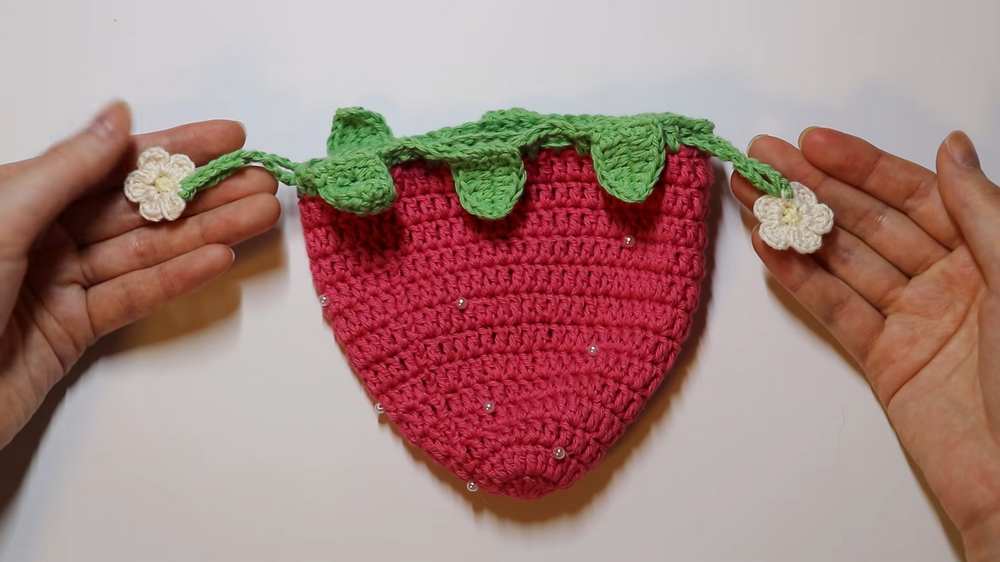
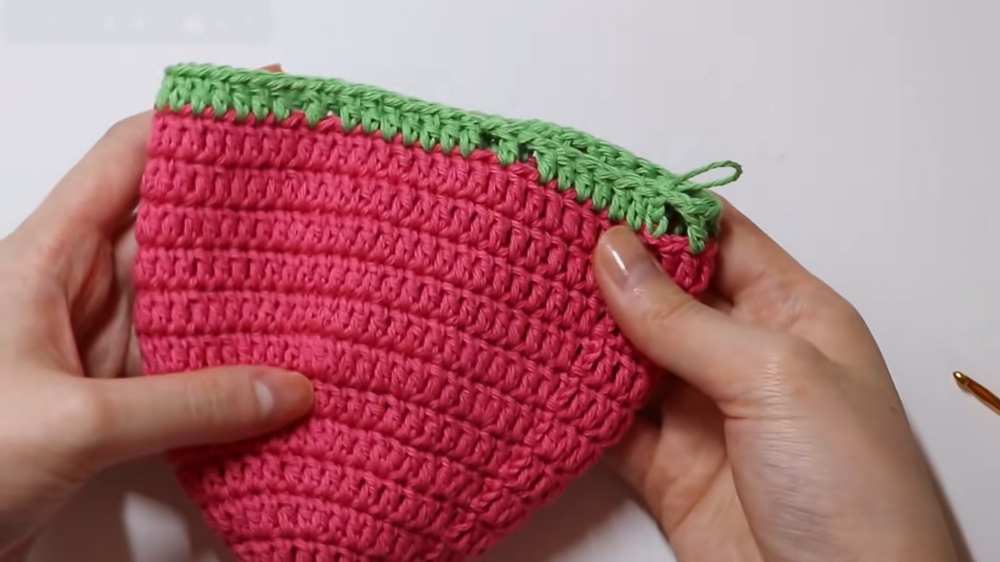
- Round 14 (Green Mesh Round): Ch 3, work 1 dc into each of the next 6 stitches (giving you 7 solid dc in a row including your ch-3). Ch 1, skip 1 stitch, 1 dc into the next stitch, ch 1, skip 1 stitch, then work 1 dc into each of the next 7 stitches. Repeat this sequence around the entire perimeter. You will finish the final repeat with a ch 1, skip 1, 1 dc, ch 1, skip 1. Join with a sl st to the 3rd ch of the starting ch-3. Fasten off and weave in all remaining green and pink yarn tails securely on the inside of the pouch.
Step-by-Step Pattern: Calyx Leaves (Make 6)
- Setup: Use your 5/0 (3.0mm) hook and Green yarn.
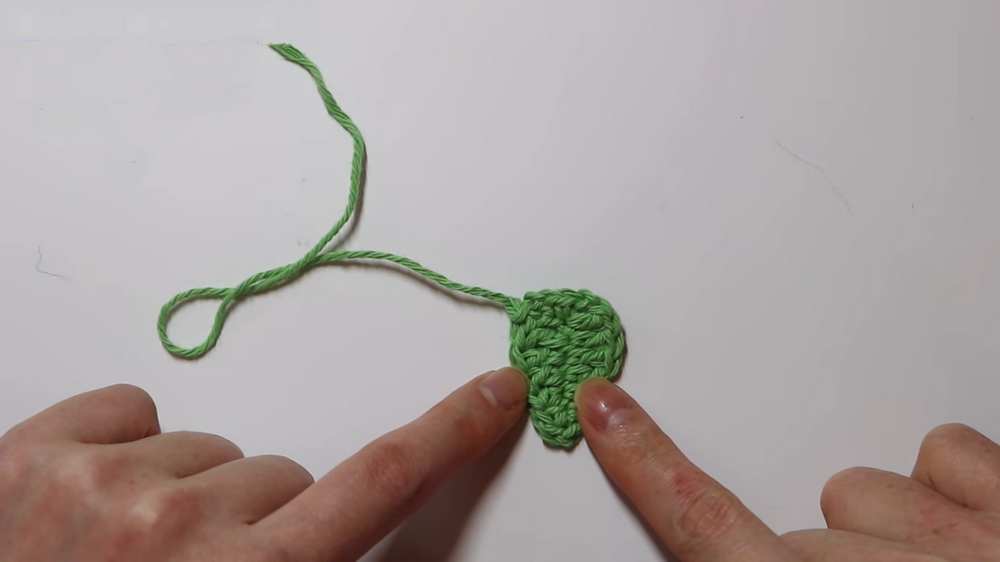
- Foundation: Start with a standard slip knot and chain 6.
- Leaf Side A: Ch 3 more (this acts as a turning chain/first dc). Counting down from your hook, skip the first 4 chains. Work 1 dc into the 5th chain from the hook, picking up the half-loop and the back ridge (裏山) together for a clean edge. Work 1 dc into each of the next 2 chains (giving you 4 dc total including the ch-3). Work 1 hdc into the next chain, and finish with 1 sc into the final chain.
- Turning: Ch 2. Rotate your piece upside down so you can work down the opposite side of your original foundation chain loops. Place your starting yarn tail along the edge so you can encase it as you crochet.
- Leaf Side B: Work 1 sc into the first loop directly opposite your last sc. Work 1 hdc into the next loop. Work 1 dc into each of the remaining 4 loops along the chain.
- Tip Finishing: Ch 2, work 1 sc into the base of that final dc stitch. Ch 2, then finish the leaf by making a neat sl st into the 3rd chain of your original starting ch-3 at the very top point. Fasten off, leaving a generous, long tail for sewing the leaf onto the pouch.
Step-by-Step Pattern: Drawstring Cords (Make 2)
- Setup: Use your 5/0 (3.0mm) hook and Green yarn.
- Execution: Make a slip knot and crochet a continuous chain of 80 stitches. This should measure roughly 35 cm (13.8 inches) in length. Feel free to add or subtract a few chains to customize the length if your tension is tighter or looser. Fasten off and pull the yarn tight to lock it.
Step-by-Step Pattern: White Blossom Flowers (Make 2)
- Setup: Switch to your smaller 3/0 (2.2mm) hook. Begin with Yellow yarn.
- Round 1 (Flower Center): Make a MR. Ch 1 to rise, then work 5 sc directly into the ring. Pull the yarn tail to tighten the center of the ring until it closes. Insert your hook into the first sc to join, but pull your White yarn through to complete the sl st and switch colors. Cut your yellow yarn. (5 sts)
- Round 2 (Petals): Remaining in the same base stitch where you joined, work: Ch 2, 3 dc into that same stitch, ch 2, sl st into the same stitch. (Your first white petal is complete).
- Remaining Petals: Sl st into the next sc stitch around, and repeat the petal sequence: Ch 2, 3 dc into the stitch, ch 2, sl st into the same stitch. Repeat this for all 5 stitches until you have 5 full petals. Fasten off, leaving a long white tail for sewing. Weave the shorter white and yellow tails into the back of the white petals to hide them completely.
Assembly and Finishing Touches
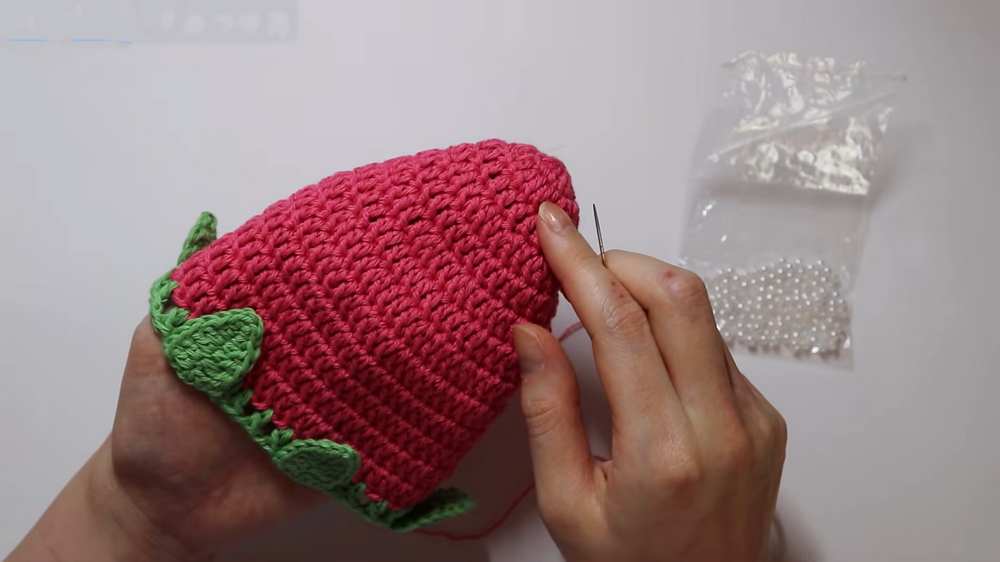
Attaching the Leaves: Take your 6 green leaves. Thread the long tail of one leaf onto a tapestry needle. Position it flat against one of the solid 7-dc sections from Round 14 on the green top of your pouch. Make sure it aligns with the middle 5 stitches of that section, leaving 1 dc exposed on each side, and do not block the ch-1 spaces (drawstring holes). Sew securely across the base using simple overcast stitches. Repeat this for all 6 leaves around the pouch.
Adding the Pearl Seeds: Cut a length of your Pink yarn and untwist it to separate the plies. It is made of 6 thin plies; draw out a strand consisting of 2 plies and thread it onto a fine needle. Anchor the thread on the inside of the strawberry body, push the needle to the outside, thread a pearl bead on, and sink the needle back inside close to where it came out. Stagger these beads across the pink rows to mimic natural strawberry seeds, keeping your internal thread transitions loose so the pouch can still stretch.
Weaving the Drawstrings: Lay the pouch flat. Take your first green chain cord and thread it onto your tapestry needle. Choose an open ch-1 mesh space between two leaves and weave the cord in and out of the mesh holes completely around the rim until it exits right next to where you started. Take your second green cord, start on the exact opposite side of the pouch rim, and weave it in and out until both of its ends exit on that side.
Securing the Blossom Charms: Hide and trim any remaining short drawstring tails. Take the white yarn tail of a blossom charm and thread it onto your needle. Gather the two ends of one drawstring set together and sew the base of the flower tightly into the tips of the green cords. Pass the needle through multiple times to ensure it cannot slide off when pulled. Repeat for the other flower on the opposite drawstring set, weave in your remaining white tails, and your beautiful strawberry pouch is completely ready to use!
Learn with Video Tutorial

About "Talha"
Hey, I’m Talha, the Crafter on Craftstive.com. I love to share guides on folding cute origami models and paper crafts, and I am always ready to inspire your next craft project with my weekly craft discussions.