
Be sure to subscribe to @thihoang.handmade! The video tutorial and instructions are below!
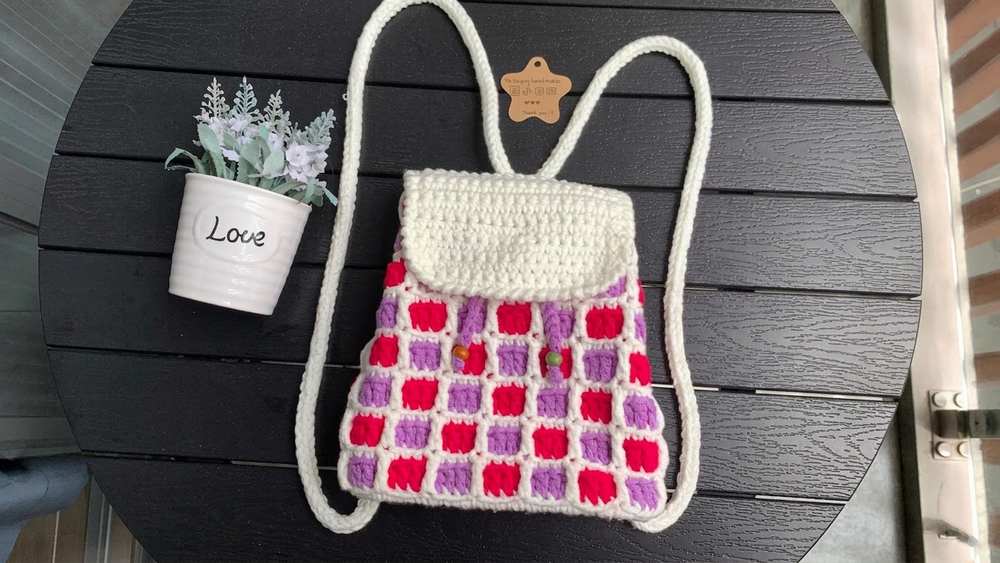
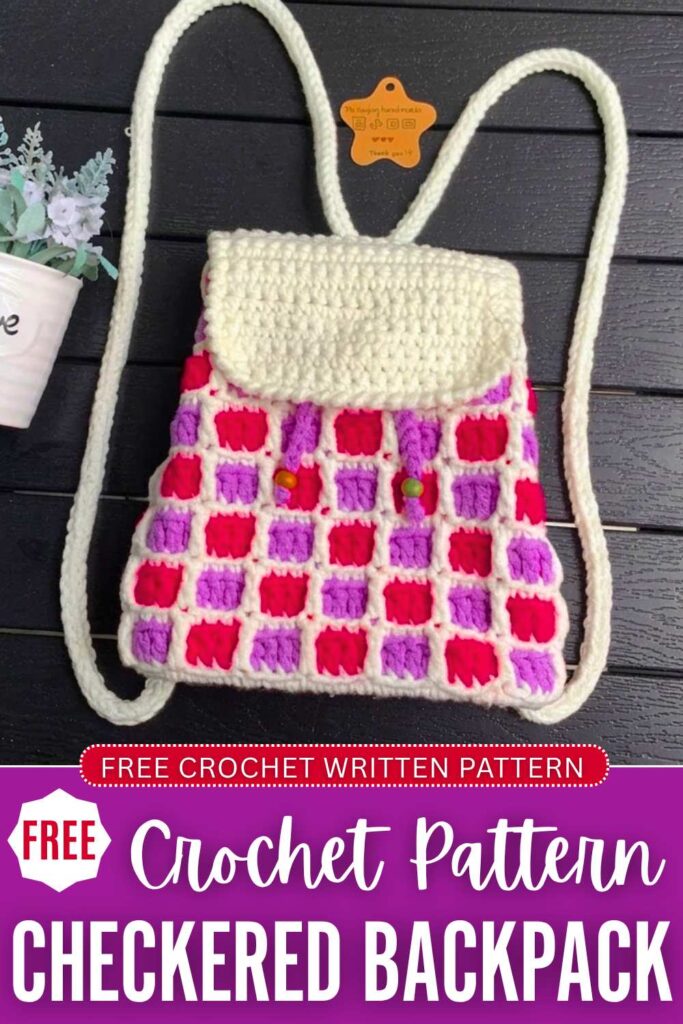
Today, let’s crochet this ELEGANT checkered backpack that features a beautiful waffle stitch texture, candy color-combo, and a comfy I-cord strap. There is also a fold-on strap and a leather base that make this crochet backpack super PROFESSIONAL. You can use it as a travel backpack, a back-to-school backpack, and even prepare it as a Father’s Day or graduation gift.
The strap also has a beautiful crab stitch edging. For now, we will use the red and purple checkered pattern with the white lining. But you can also crochet it in any other color combo, like my candy mug cozies. Now, continue reading for the highly detailed pattern to crochet this backpack bag.
Crochet Colorful Checkered Mini Backpack: Written Instructions
This project guides you through crocheting a beautiful, sweet checkered mini backpack. Measuring approximately 18 x 20 cm, its compact yet practical size makes it a wonderful accessory for school, work, or casual daily outings.
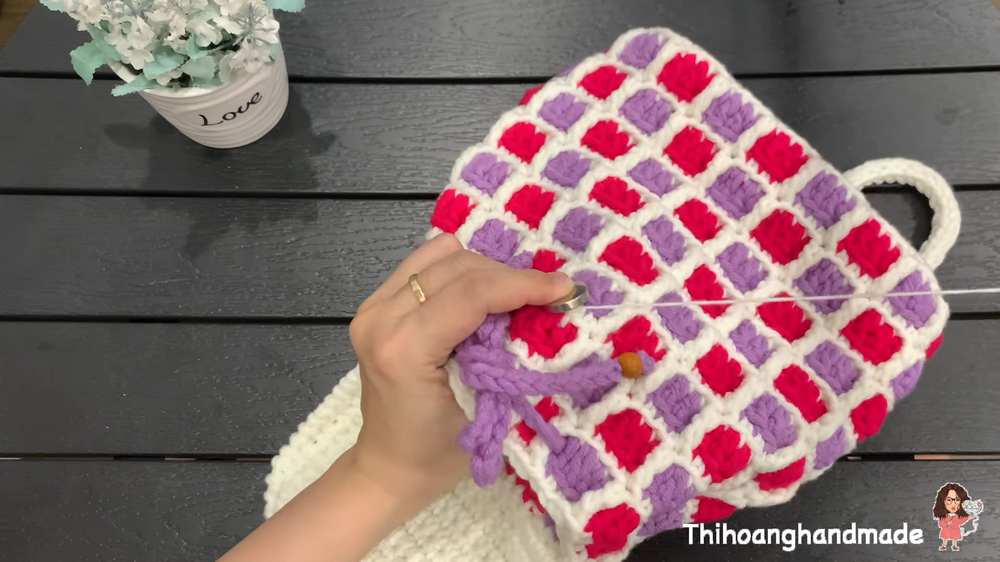
The design features a stylish plaid pattern created by alternating color blocks and dropping down stitches to give a textured, woven look.
By using a pre-made faux leather bag base, the backpack gains a sturdy, structured form that stands up beautifully on its own, while saving you the time of crocheting the bottom panel manually.
Materials Needed
-
Tube Yarn: Approximately 3.5 mm thick fiber yarn in three contrasting colors (White, Purple, and Pink are featured in this design).
-
Crochet Hook: A double-ended crochet hook, using size 7 (4.0mm) for the base connection and edging, and size 8 (5.0mm) for the main body rows.
-
Bag Base: A rigid faux leather oval bag base measuring 5 x 11 cm.
-
D-Ring: One metal D-ring for the back strap assembly.
-
Fastener: One magnetic snap button closure.
-
Decorations: Wooden decorative buttons, beads, or charms for the drawstrings.
-
Tools: Plastic yarn needle, scissors, and stitch markers.
Abbreviations (US Terms)
-
ch: Chain
-
sc: Single crochet
-
dc: Double crochet
-
tr: Treble crochet (yarn over twice)
-
inc: Increase (2 single crochets worked into the same hole or stitch)
-
dec: Decrease (single crochet 2 stitches together)
-
sl st: Slip stitch
-
Rnd: Round
Video Tutorial?
Pattern Instructions
1. Bag Base & Round 1 (White Yarn)
Start this section using the smaller size 7 crochet hook to easily fit through the pre-punched holes in the leather base. The base contains a total of 14 holes across the two curved ends (7 holes on each end) and straight side edges.
-
Create a slip knot outside the base, leaving a loop slightly longer than 1 cm.
-
Insert your hook into a starting hole along the curved end, pull the loop through, and chain 1 to secure.
-
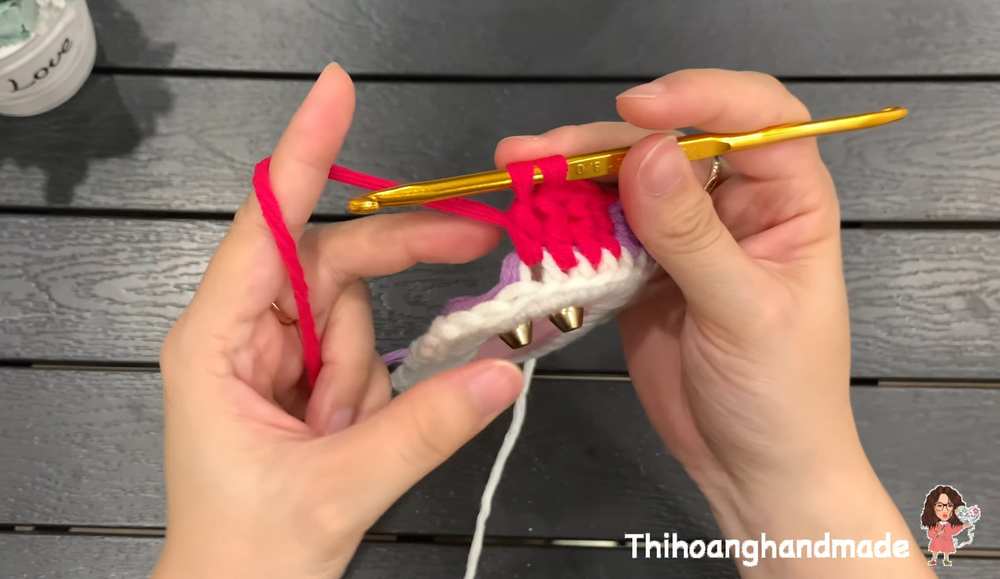
Curved End Holes (7 holes total): Work 2 single crochets into each of these 7 holes to create 7 increases (14 sc total). Place a stitch marker into the very first sc to mark the beginning of your round.
-
Straight Side Edge: Along the straight side, follow a repeating pattern of [1 sc, 1 inc] a total of 6 times.
-
Opposite Curved End Holes (7 holes total): Work 2 single crochets into each of these 7 holes to form another 7 increases (14 sc total).
-
Opposite Straight Side Edge: Follow the repeating pattern of [1 sc, 1 inc] a total of 6 times.
-
Joining the Round: Remove your stitch marker. Switch to the larger size 8 crochet hook. Insert your hook into the back loop (half loop) of the first marked stitch. Pull up a loop of your Purple yarn and execute a slip stitch to completely close Round 1. Pull the white tail firmly to secure the transition.
2. Main Checkered Body (Alternating Purple, Pink, and White Yarn)
The checkered texture is created in 4-stitch color blocks. Throughout the double crochet rounds, carry the inactive color along the inside of your stitches.
-
Rnd 2 (Double Crochet Color Block Round):
-
Chain 3 (counts as your first stitch). Working only into the back loops of the previous round, work 1 double crochet into the next stitch and mark it with a stitch marker.
-
Work 2 more double crochets into the next 2 back loops.
-
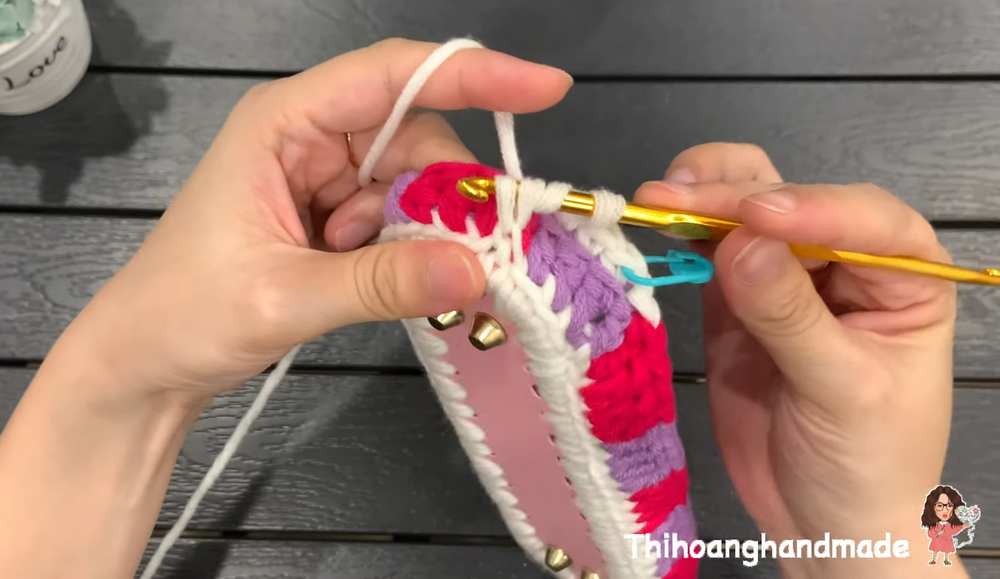
On the 4th double crochet of this block, begin your stitch normally: yarn over, insert hook, pull up a loop, yarn over, pull through 2 loops. With 2 loops remaining on your hook, drop the Purple yarn and pull through the final 2 loops with your Pink yarn to complete the color change.
-
Important Note: When changing colors, always position the old yarn strand directly above the new yarn strand to ensure a clean, seamless transition.
-
Work 4 double crochets with Pink yarn into the next 4 back loops, carrying the Purple yarn inside your stitches. On the 4th stitch, switch back to the Purple yarn.
-
Repeat this alternating sequence of 4 Purple double crochets and 4 Pink double crochets all the way around the base.
-
At the final stitch of the round, leave 2 loops waiting on your hook and pull through with your White yarn. Remove the stitch marker, insert your hook into the back loop of the first stitch, and make a slip stitch with White yarn to finish the round.
-
-
Rnd 3 (Single Crochet & Dropped Treble Round):
-
Chain 1. Working into the back loops, work 1 single crochet into the same stitch and mark it. Work 2 more single crochets into the next 2 back loops (3 sc total).
-
For the 4th stitch: Yarn over twice on your hook, drop down to the corresponding unworked front loop from Round 1 directly below. Insert your hook under this loop, pull up a loop, and complete a standard treble crochet. Skip the unworked stitch hidden behind this treble crochet on your current round.
-
Repeat this pattern sequence 15 more times around the bag: [3 single crochets in the back loops, 1 dropped treble crochet in the unworked front loop of Round 1, skip 1 stitch behind the treble crochet].
-
When executing the final treble crochet of the round, stop when 2 loops remain on your hook and drop the White yarn, pulling your Pink yarn through to complete the stitch. Slip stitch into your first marked stitch to close.
-
-
Rnd 4 (Shifted Double Crochet Round):
-
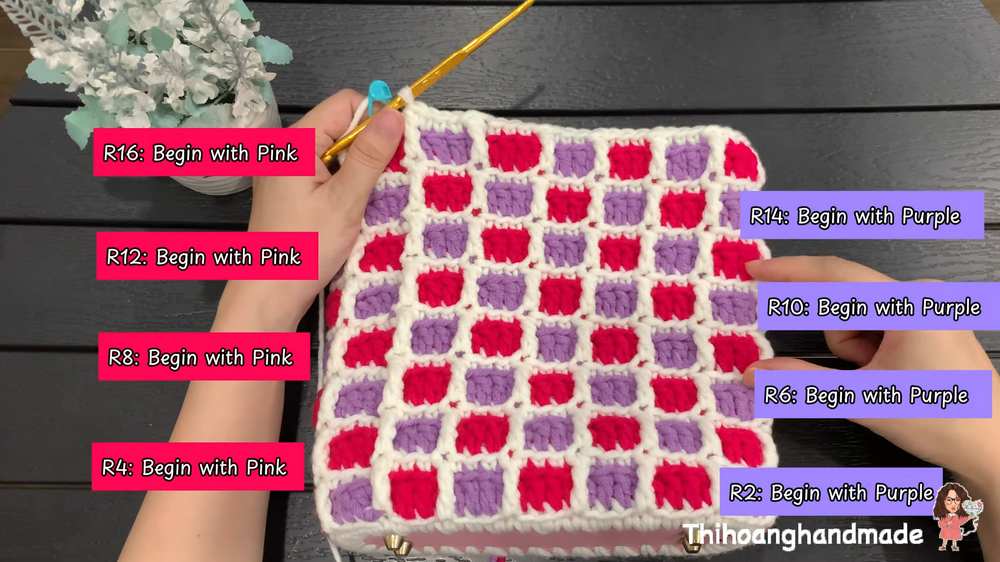
Repeat the double crochet color-block technique used in Round 2, but shift the placement of your color blocks to create a checkerboard effect (placing Pink blocks directly over previous Purple sections). Skip the very last leftover stitch at the edge if necessary, and close the round with a slip stitch.
-
-
Rnd 5 (Shifted Single Crochet & Treble Round):
-
Repeat the single crochet and dropped treble process from Round 3, adjusting your placement to match the shifted checkerboard layout. When working the final dropped treble crochet, insert your hook into the unworked front loops left over from the previous color layout. Close the round by slip stitching with your Purple yarn.
-
-
Rnds 6–17:
-
Continue alternating between the even double crochet rounds and the odd single crochet/treble rounds, maintaining your checkerboard color layout. You will complete a total of 8 full pattern sets, ending on Round 17.
-
At the end of Round 17, do not make a standard slip stitch. Cut your yarn, pull it through, and thread it onto a yarn needle. Insert the needle through the first stitch of the round from back to front, then run it back down through the back loop of your last stitch to create an invisible join. Securely weave in all loose yarn tails inside the bag.]
-
3. Gathering the Opening
-
Lay the backpack flat and locate the side profiles. Symmetrically pinch the top edges of the bag inward to create a classic bucket bag shape. The curved ends of your leather base should align roughly with three square blocks at the top opening, which will fold neatly in half inward.
-
Using your yarn, crochet a simple strand of 100 chains (ch 100) to serve as a secure drawstring.
-
Weave this drawstring evenly through the upper spaces along the top edge of the bag to lock the folded shape in place, leaving the two ends at the front to tie into a neat bow.
4. Bag Flap
The flap is worked in flat rows onto the back top edge of the backpack.
-
Position your bag flat and measure out a centered 18-stitch section along the back rim. Attach your yarn to the first stitch.
-
Row 1: Chain 1. Work 1 single crochet into the next stitch and mark it. Work a single crochet into each stitch across for a total of 18 single crochets.
-
Rows 2–12: Chain 1, turn your work. Gently work 18 single crochets across the row. To ensure your edges stay perfectly straight, do not insert your hook into the stitch you just cleared; instead, insert it directly into the small “V” shape situated slightly below it.
-
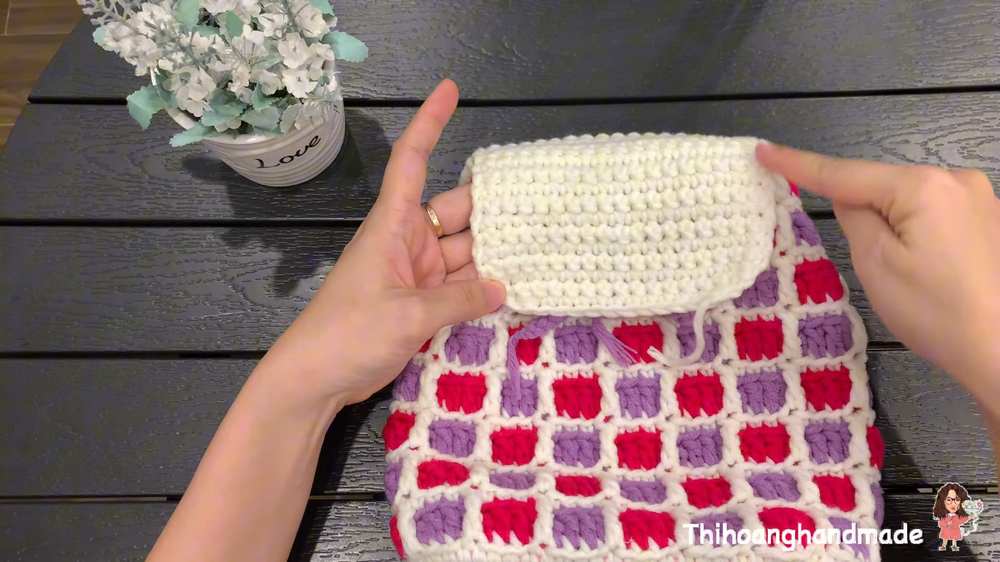
Row 13 (Corner Shaping): Chain 1, turn. Work 1 single crochet decrease, place a marker, work 14 single crochets across, and finish with 1 single crochet decrease over the last two stitches (16 stitches remaining).
-
Row 14: Chain 1, turn. Work 1 single crochet decrease, work 12 single crochets across, and finish with 1 single crochet decrease over the last two stitches (14 stitches remaining).
-
Row 15: Chain 1, turn. Work 1 single crochet decrease, work 10 single crochets across, and finish with 1 single crochet decrease over the last two stitches (12 stitches remaining).
-
Chain 1, fasten off, and cut the yarn.
5. Flap Border Edging
-
Flip the flap open and pull up a loop of yarn using your smaller size 7 hook at the edge seam where the flap meets the bag. Chain 1.
-
Work a decorative border using the reverse single crochet stitch (also known as the crab stitch). Instead of crocheting forward, insert your hook backward into the preceding stitch to your right, pull up a loop, yarn over, and draw through both loops on your hook.
-
Follow this reverse technique smoothly around the entire curved perimeter of the flap for a total of 42 reverse single crochets. Fasten off and weave in the loose ends cleanly.
6. D-Ring & Straps
-
Center your metal D-ring on the upper back panel of the backpack, right beneath the flap connection line, and sew it firmly in place with a yarn needle.
-
To create the long, durable straps, locate a specific purple checkered block on the lower right-back side of the bag.
-
Insert your hook into a full stitch, pull up a loop. Insert into the adjacent stitch, pull up a loop (2 loops on hook). Repeat one more time to collect a total of 3 loops on your hook.
-
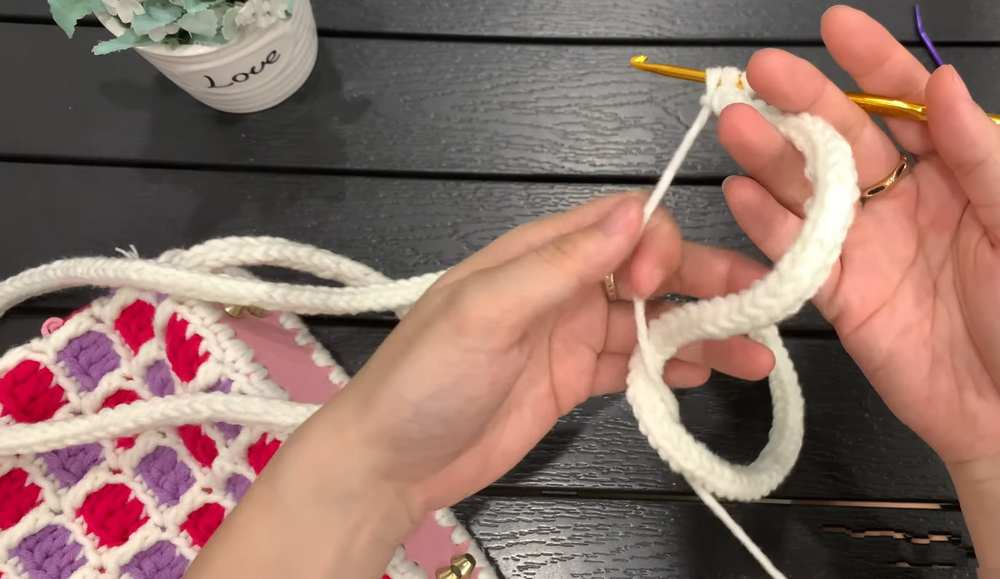
Work a 3-loop amigurumi I-cord style strap. Carefully slide the loops off the hook, hold them securely, and work individual single crochets sequentially through each loop to grow the strap length. Continue this process for a total of 200 rows.
-
Carefully slip a stitch marker into the 3 live loops at the end to keep them from unraveling, leave a long yarn tail, and cut the yarn.
-
Thread this long strap up through the attached back D-ring, then bring it back down toward the corresponding purple block on the lower left-back side of the bag.
-
Remove the stitch marker, thread the yarn tail into your needle, and neatly stitch the 3 live loops directly into the fabric of the left purple block. Secure with a double knot and hide the yarn end inside the backpack body.
7. Assembly & Final Flourishes
-
Take your decorative wooden buttons or beads and anchor them securely onto the dangling ends of your front drawstring.
-
Position your magnetic snap button on the inside center of the finished flap, and stitch its matching piece onto the front face of the checkered body. Press firmly together to lock your new handmade backpack securely closed!
Quick Pattern – Yes, The Above is Not Quick
1. Bag Base & Round 1 (White Yarn, Hook 7)
-
Rnd 1: Join yarn to a curved end hole of the leather base. Work 2 sc into each of the 7 curved holes (7 inc). Along the straight side edge, repeat [1 sc, 1 inc] 6 times. Work 2 sc into each of the 7 holes on the opposite curved end (7 inc). Along the second straight side edge, repeat [1 sc, 1 inc] 6 times. Switch to Hook 8, sl st into the back loop of the first stitch using Purple yarn to join, and pull the white yarn tight.
2. Checkered Body (Colors: Purple & Pink, Hook 8)
-
Note: Carry the inactive yarn color along the inside of your stitches throughout the double crochet rounds. Always keep the old strand above the new strand during color changes.
-
Rnd 2: ch 3 (counts as first dc), work 3 dc into the back loops. On the 4th dc, drop Purple and pull through with Pink yarn. Work 4 Pink dc into the back loops, switching back to Purple on the 4th stitch. Alternate [4 Purple dc, 4 Pink dc] around the entire base. On the final stitch, pull through with White yarn and sl st to close.
-
Rnd 3 (White Yarn): ch 1. Working into back loops, work 3 sc. For the 4th stitch, work 1 tr dropped down into the unworked front loop of Rnd 1 directly below. Skip the unworked stitch hidden behind this tr. Repeat [3 sc in back loops, 1 dropped tr in Rnd 1 loop, skip 1 stitch] 15 more times around. Switch to Pink yarn on the final stitch and sl st to close.
-
Rnd 4: Repeat Rnd 2 color-block structure, but shift the block positions to form a checkerboard pattern (Pink blocks over previous Purple blocks). Skip the last leftover stitch if necessary and sl st to close.
-
Rnd 5: Repeat Rnd 3 dropped-stitch structure, adapting the placement to match the shifted blocks. Sl st with Purple yarn to close.
-
Rnds 6–17: Repeat the alternating sequence of double crochet rounds (even rounds) and single crochet/treble rounds (odd rounds), maintaining the checkerboard grid. Complete a total of 8 full block sets up to Rnd 17. Cut yarn and finish with an invisible join.
3. Drawstring & Gathering
-
Pinch the sides of the top opening symmetrically inward to create a structured bucket-style shape.
-
ch 100 to create the drawstring strand.
-
Weave the strand evenly through the upper spaces of the bag rim and tie a decorative front knot.
4. Bag Flap (Worked in Flat Rows)
-
Center an 18-stitch section along the top-back edge of the bag rim and attach yarn.
-
Row 1: ch 1, work 18 sc across.
-
Rows 2–12: ch 1, turn. Work 18 sc across. (Insert your hook into the small “V” below the normal space to maintain perfectly straight edges).
-
Row 13: ch 1, turn. 1 dec, 14 sc, 1 dec (16 stitches).
-
Row 14: ch 1, turn. 1 dec, 12 sc, 1 dec (14 stitches).
-
Row 15: ch 1, turn. 1 dec, 10 sc, 1 dec (12 stitches). ch 1, fasten off and cut yarn.
5. Flap Border Edging (Hook 7)
-
Attach yarn to the edge seam where the flap meets the main body.
-
ch 1, then work reverse single crochets (crab stitch) backward into each preceding stitch around the entire curved flap perimeter. Total 42 reverse single crochets. Fasten off
 .
.
6. Straps & D-Ring
-
Center and sew the metal D-ring right below the flap line on the back panel.
-
To start the straps, pull up 3 loops from a purple block on the lower right-back side of the bag.
-
Work a 3-loop amigurumi I-cord style strap sequentially across the loops for 200 rows.
-
Thread the long finished strap up through the back D-ring and bring it down toward the lower left-back side.
-
Use a yarn needle to securely stitch the 3 live strap loops directly into the corresponding purple block on the left side. Fasten and weave in ends.
7. Assembly
-
Attach wooden buttons or beads onto the ends of the front drawstrings.
-
Sew one half of the magnetic snap button to the inside center of the flap, and stitch the matching side to the front of the checkered body.