
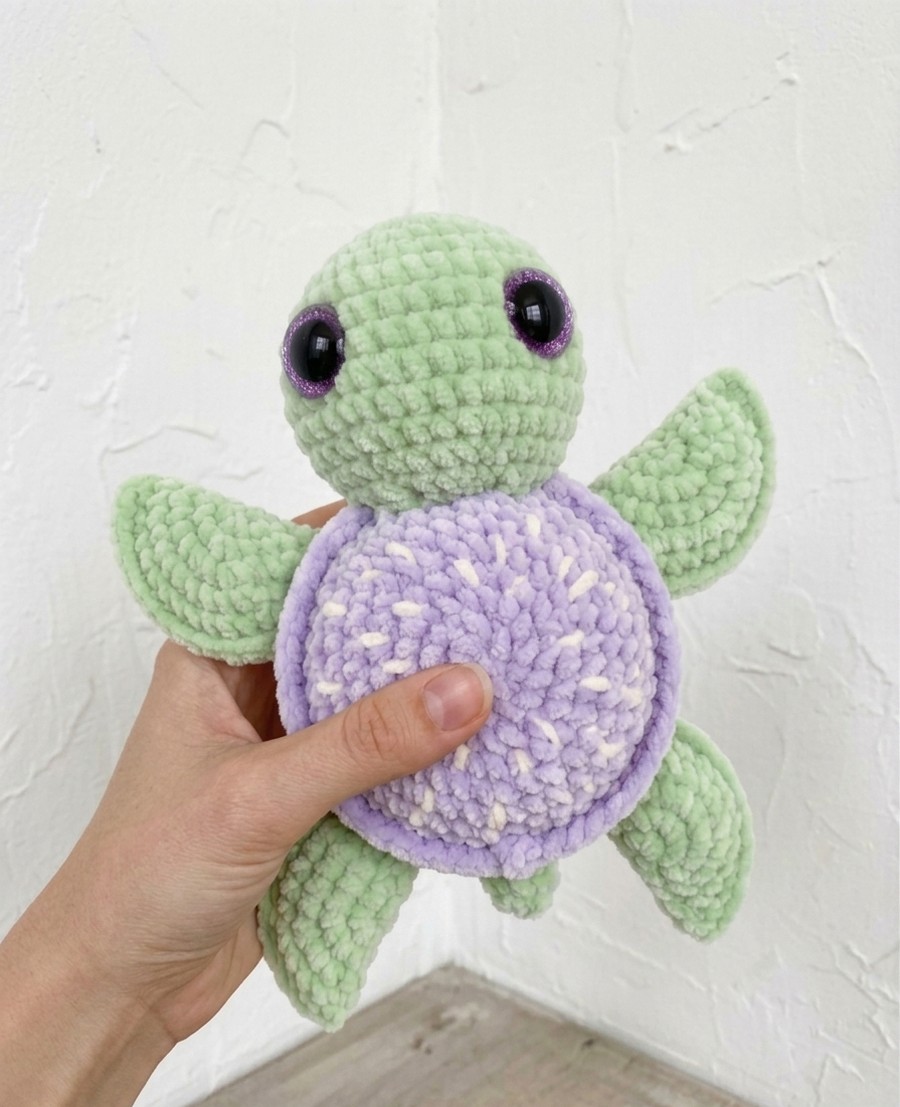
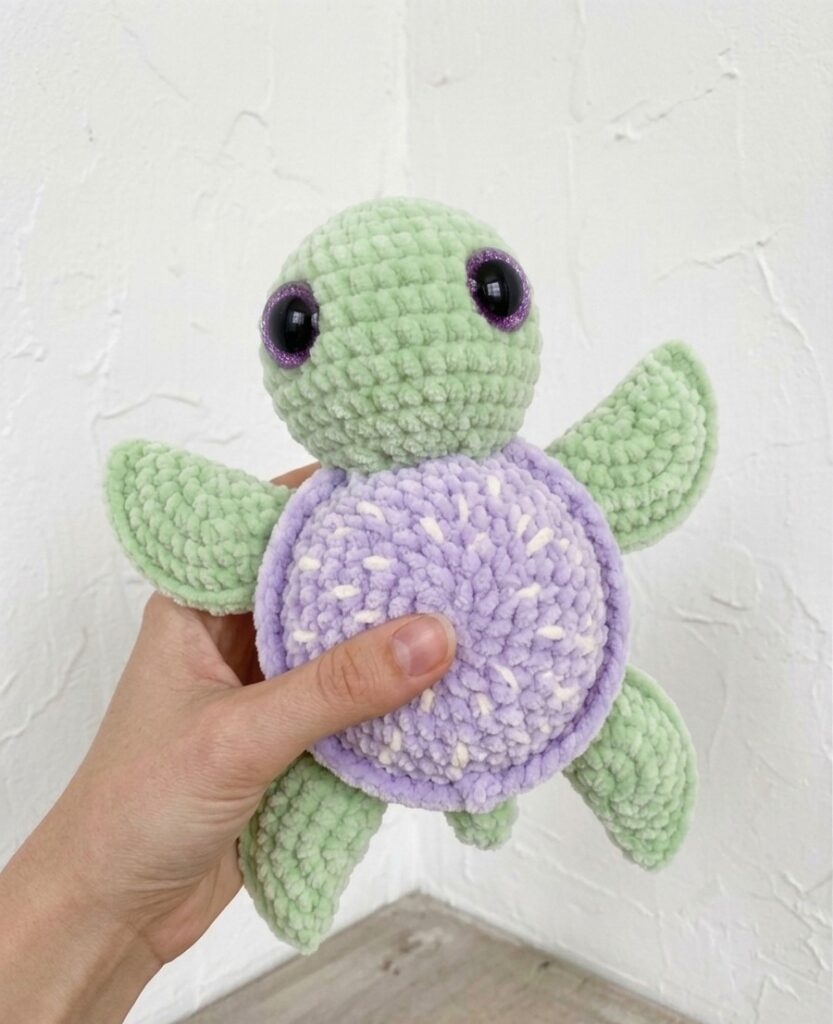
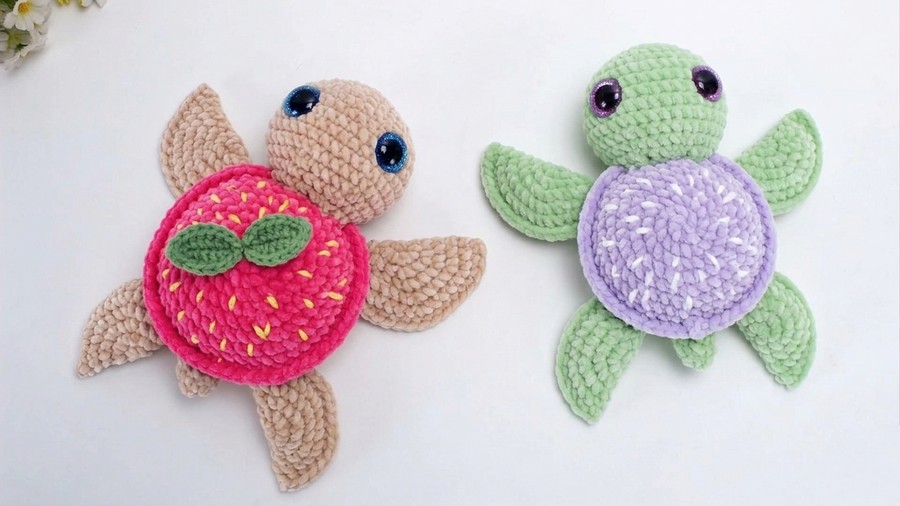
While many of you may have seen or probably crocheted the viral fruity turtle plushie set, I did not find a veggie turtle anywhere. So, introducing the very first easy and quick crochet eggplant turtle plushie pattern for summer. It is a big turtle plushie featuring a purple shell with embroidered white seeds, big glitter eyes, and a light purple shell. Well, I have kept it near to the traditional turtle pattern; still, with the color choice and the eyes, it looked simply elegant.
You can definitely make it your next summer buddy, and with the amigurumi yarn, your bag charm, too. I will soon provide you with a strawberry turtle pattern that only differs in the color. This means you can also customize it for an orange shell turtle, dragonfruit shell turtle, and other fruits, too. Now, let me provide you with a pattern to crochet this eggplant!
Maybe you are looking for a quicker and smaller turtle tutorial. If that’s the case, check the following:
Crochet Eggplant Veggie Turtle: Round-by-Round Pattern
Here is the complete crochet pattern for this big turtle plushie that you can customize for any fruit or veggie. It is crocheted with separate parts for the head, arms, legs, and body:
Materials Required
- Yarn: Plush/velvet yarn in two colors—Shell Top Color (e.g., purple) and Body/Bottom Color (e.g., light green).
- Crochet Hook: 5mm crochet hook
- Safety Eyes: Glitter eyes are recommended of about 20mm
- Stuffing: PP cotton/polyester fiberfill.
- Tools: Stitch markers, yarn needle, and scissors.
- Plush Yarn: White for embroidery
Abbreviations Guide
- MR: Magic Ring
- ch: Chain
- sc: Single Crochet
- inc: Increase (2 sc in the same stitch)
- dec: Decrease (Invisible single crochet decrease)
- FLO: Front Loop Only
- BLO: Back Loop Only
- sl st: Slip Stitch
- st(s): Stitch(es)
- Rnd: Round
Head Pattern
Make it in light green.
Work in continuous spiral rounds. Do not join unless instructed.
- Rnd 1: MR, 6 sc (6 sts)
- Rnd 2: 6 inc (12 sts)
- Rnd 3: (sc, inc) × 6 (18 sts)
- Rnd 4: (2 sc, inc) × 6 (24 sts)
- Rnd 5: (3 sc, inc) × 6 (30 sts)
- Rnd 6: (4 sc, inc) × 6 (36 sts)
- Rnd 7–11: 36 sc (36 sts)
- Installation: Install safety eyes between Rnds 5 and 7, spaced 12 stitches apart. Secure the washers firmly on the inside.
- Rnd 12: (4 sc, dec) × 6 (30 sts)
- Rnd 13: (3 sc, dec) × 6 (24 sts)
- Rnd 14: (2 sc, dec) × 6 (18 sts)
- Finish: sl st to the first stitch, leave a long tail for sewing, and fasten off. Stuff firmly with PP cotton.
Tail Pattern
Make it in light green.
- Rnd 1: MR, 4 sc (4 sts)
- Rnd 2: 4 inc (8 sts)
- Rnd 3–5: 8 sc (8 sts)
- Finish: Leave a long tail for sewing and fasten off. No stuffing is needed for the tail.
Back Legs Pattern (Make 2)
Make it in light green.
- Rnd 1: MR, 7 sc (7 sts)
- Rnd 2: 7 inc (14 sts)
- Rnd 3: (sc, inc) × 7 (21 sts)
- Finish: Fold the circular piece completely flat in half. Add a small amount of PP cotton stuffing inside. Work sc stitches straight across both aligned edges to close the opening. Leave a long tail for sewing and fasten off.
Front Legs Pattern (Make 2)
The front legs are worked like the back legs but include one extra expansion round to make them larger.
- Rnd 1: MR, 7 sc (7 sts)
- Rnd 2: 7 inc (14 sts)
- Rnd 3: (sc, inc) × 7 (21 sts)
- Rnd 4: (2 sc, inc) × 7 (28 sts)
- Finish: Fold the circular piece completely flat in half. Add a small amount of PP cotton stuffing inside. Work sc stitches straight across both aligned edges to close the opening. Leave a long tail for sewing and fasten off.
Shell & Body Pattern
Start with purple.
- Rnd 1: MR, 6 sc (6 sts)
- Rnd 2: 6 inc (12 sts)
- Rnd 3: (sc, inc) × 6 (18 sts)
- Rnd 4: (2 sc, inc) × 6 (24 sts)
- Rnd 5: (3 sc, inc) × 6 (30 sts)
- Rnd 6: (4 sc, inc) × 6 (36 sts)
- Rnd 7: (5 sc, inc) × 6 (42 sts)
- Rnd 8: (6 sc, inc) × 6 (48 sts)
- Rnd 9: 48 sc (48 sts)
- Rnd 10: FLO 48 sc (48 sts). Fasten off with a clean invisible join to the second stitch and weave in the tail.
- Rnd 11: Switch to your Body/Bottom Color. Join yarn to the remaining BLO loops from Rnd 10: BLO 48 sc (48 sts).
- Rnd 12 (Limb Gap Round): 5 sc, 4 ch (skip 4 sts), 8 sc, 3 ch (skip 3 sts), 3 sc, 2 ch (skip 2 sts), 3 sc, 3 ch (skip 3 sts), 8 sc, 4 ch (skip 4 sts), 5 sc (48 sts/chains total).
- Rnd 13: (6 sc, dec) × 6. Note: Treat all chain stitches from the previous round as normal stitches. (42 sts)
- Rnd 14: (5 sc, dec) × 6 (36 sts)
- Rnd 15: (4 sc, dec) × 6 (30 sts)
- Rnd 16: (3 sc, dec) × 6 (24 sts)
- Rnd 17: (2 sc, dec) × 6 (18 sts). Pause here to assemble limbs and stuff the body. Also sew the white seeds all over the shell. You can sew Vs and straight lines.
- Rnd 18: (sc, dec) × 6 (12 sts)
- Rnd 19: 6 dec (6 sts)
- Finish: Cut the yarn, leaving a tail. Weave through the FLO of the last 6 stitches, pull tight to seal the base completely, and hide the tail inside.
Assembly Instructions
Securing the Limbs & Tail: Pause your main body work once you complete Rnd 17. Secure your live stitch loop with a stitch marker so it doesn’t unravel.
Identifying the Gaps: Look at the row of open chain gaps created along Rnd 12 of the body shell. The two large 4-stitch gaps are for your front legs, the two 3-stitch gaps are for the back legs, and the single 2-stitch gap at the back is for the tail.
Sewing the Front Legs: Take the flat-closed edge of a Front Leg and place it right against one of the 4-stitch gap openings on the shell. Using your yarn needle and the long tail left on the leg, sew the leg firmly into the gap. Ensure the flat row sits evenly along rows 4 and 5 of the shell opening alignment, with the curved fan edge of the flipper pointing completely outward. Repeat this for the second front leg on the opposite side.
Sewing the Back Legs & Tail: Position and sew the two Back Legs into their designated 3-stitch gaps using the same sewing technique. Then, align and sew the Tail into the remaining 2-stitch gap at the rear base of the turtle shell. Push all leftover yarn tails cleanly into the inside of the shell body.
Stuffing the Body: Pack your PP cotton fiberfill stuffing through the bottom opening of the shell until the entire body feels completely firm and holds a plump, rounded shape.
Closing the Base: Place your crochet hook back into the live loop from Rnd 17 and complete Rnd 18 and Rnd 19 to finish tapering the bottom surface down to 6 stitches. Cut your working yarn, thread it onto a needle, and weave it cleanly through the front loops of the final 6 stitches. Pull the yarn tight like a drawstring to close the hole perfectly flat, knot it securely, and hide the remaining thread inside the body.
Attaching the Head: Ensure your pre-crocheted head component is filled firmly with PP cotton stuffing. Position the open neck base of the head right in the middle space between the two attached front legs. Carefully adjust the alignment so that the safety eyes sit perfectly level and centered facing forward.
Final Stitching: Using the long yarn tail from the head, stitch around the neck opening and directly into the stitches of the body shell. Sew around the entire circumference tightly multiple times until the head is perfectly secure and does not wobble. Fasten off securely and conceal the yarn tail inside the plushie.

About "Talha"
Hey, I’m Talha, the Crafter on Craftstive.com. I love to share guides on folding cute origami models and paper crafts, and I am always ready to inspire your next craft project with my weekly craft discussions.