
With this 20-minute crochet plushie pattern, you will learn how to crochet this CUTE little no-sew snail plushie! It is the legendary Gary the Snail plushie from SpongeBob SquarePants with CUTE googly eyes. There is also a little spiral embroidery done using the plush yarn that makes it looks even appealing.
You can also sell this crochet snail plushie at craft fairs as you can crochet a handful of it within an hour. We shall use the blue, red and white color o super bulky yarn for it and crochet a snail that measures 5 by 5 inches.
You can use it as a keychain, summer tote bag charm or crochet it as a part of SpongeBob amigurumi set. I have already shared a pattern to crochet the Patrick Star plushies, so be sure to check them, too, afterwards. Now, continue reading for the full pattern to crochet this snail.
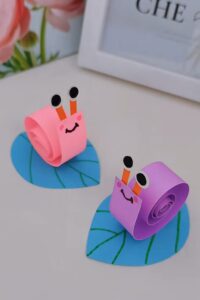
Crochet Little Snail Plush: Written Instructions
This project is a small snail toy. You can make it with soft yarn. It is quick to finish. It looks like a cartoon character. You will use a crochet hook to make the body and the shell.
Materials Needed
- Plush yarn: Pink for the shell and blue or turquoise for the foot.
- Crochet hook: 3.5 millimeter size.
- Eyes: Black plastic safety eyes or half-beads, 10 to 12 millimeters.
- Stuffing: Fiberfill for the shell.
- Embroidery thread: Red color.
- Extras: Scissors, a tapestry needle, and felt circles or glitter dots for spots.
Abbreviations
- MR: Magic Ring.
- SC: Single Crochet.
- INC: Increase (two stitches in one).
- DEC: Decrease (combine two stitches into one).
- CH: Chain.
- SL ST: Slip Stitch.
- HDC: Half Double Crochet.
- DC: Double Crochet.
- ST: Stitch.
Pattern Instructions
The Shell
Round 1: Start with a magic ring. Work 6 SC into the ring. Tighten to close.
Round 2: Work 6 INC. You will have 12 stitches.
Round 3: Work (1 SC, 1 INC) four times. Then work 1 SC, add a white popcorn stitch (5 DC together in one loop) for the eye, 1 SC, then work another popcorn stitch for the second eye. Finish the round. You will have 18 stitches.
Rounds 4 to 5: Work 18 SC in each round. Do not increase.
Round 6: Work 9 DEC. You will have 9 stitches left.
The Foot (Base)
Change to blue or turquoise yarn.
Work into the front loops of the previous stitches.
Work a sequence of SL ST and CH to create the wavy edge of the foot.
Alternate between SL ST, CH, and stitches like HDC and DC to create a decorative wavy shape around the base of the shell.
Work three SL ST along the base to secure the shape.
Assembly and Decoration
Turning: Turn your work to create rows without using turning chains.
Connection: Connect the base to the eye area using CH 2 and SL ST.
Stuffing: Lightly stuff the shell with fiberfill before closing the opening completely.
Closing: Use the remaining yarn tail and a tapestry needle to sew the final opening closed using DEC stitches.
Details: Embroider a swirl on the side of the shell using red thread. Glue or sew on felt circles or fabric spots to decorate the shell. Attach the eyes securely if using safety eyes. Hide all loose yarn ends inside the toy.