
Show support for DIY dreams!
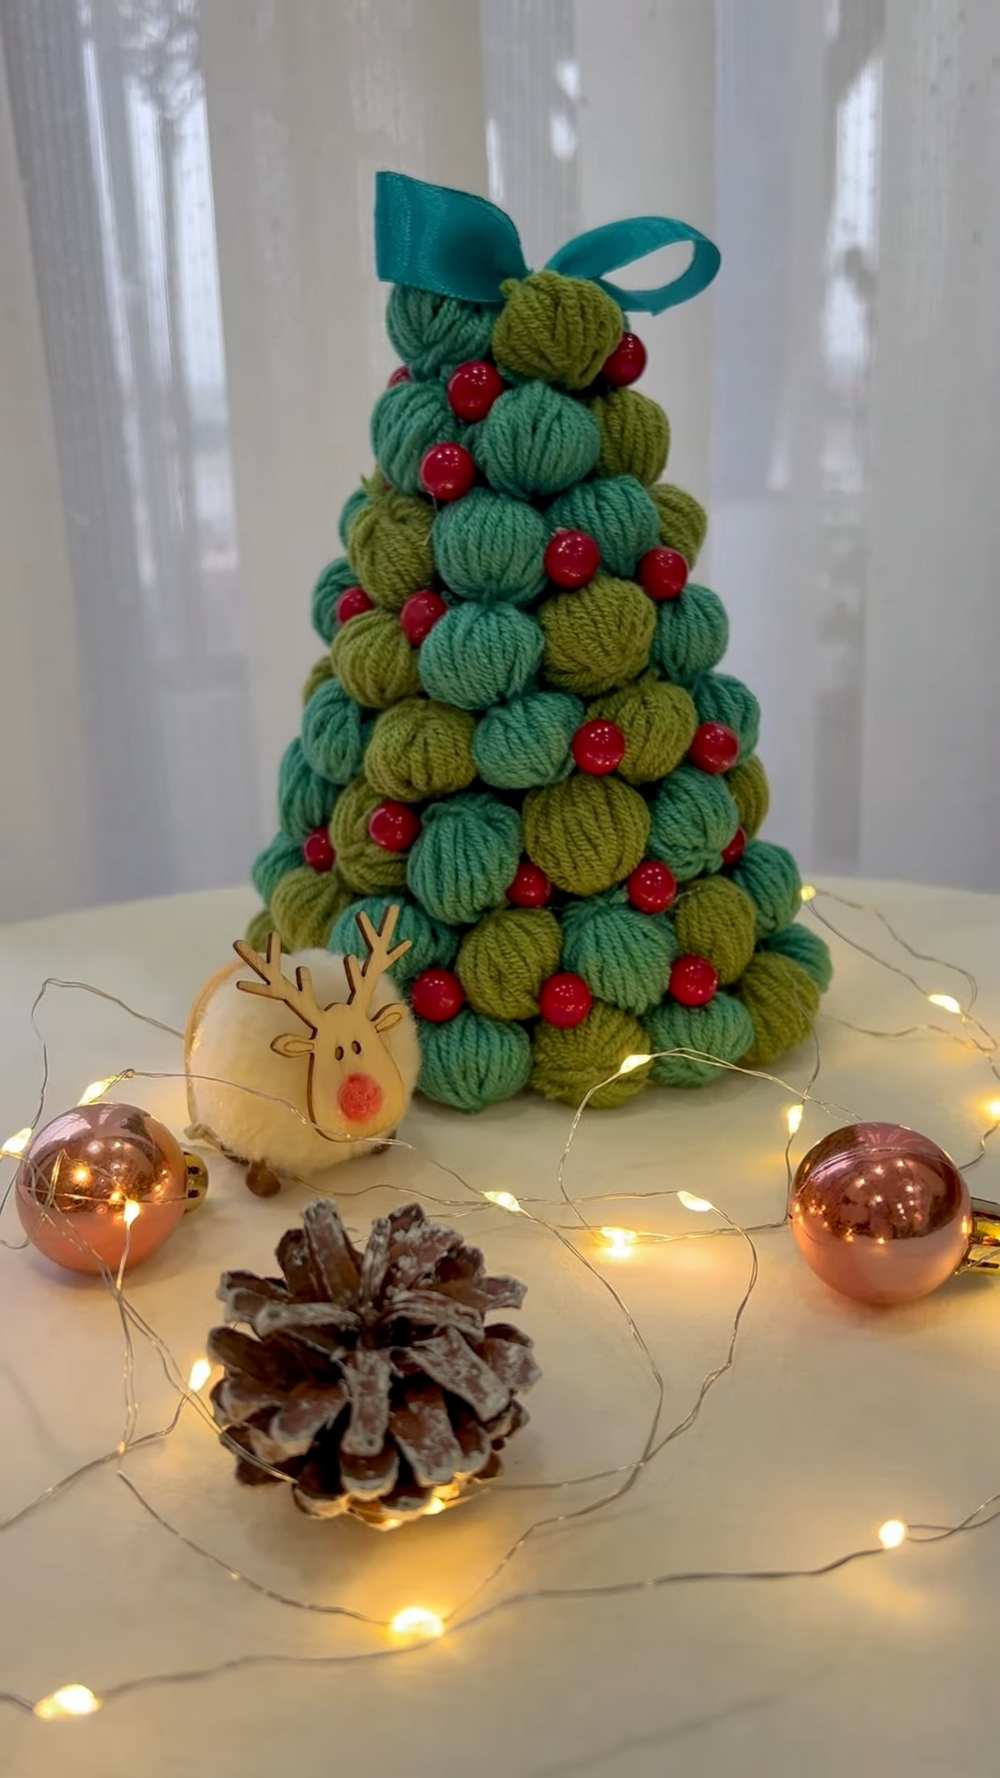
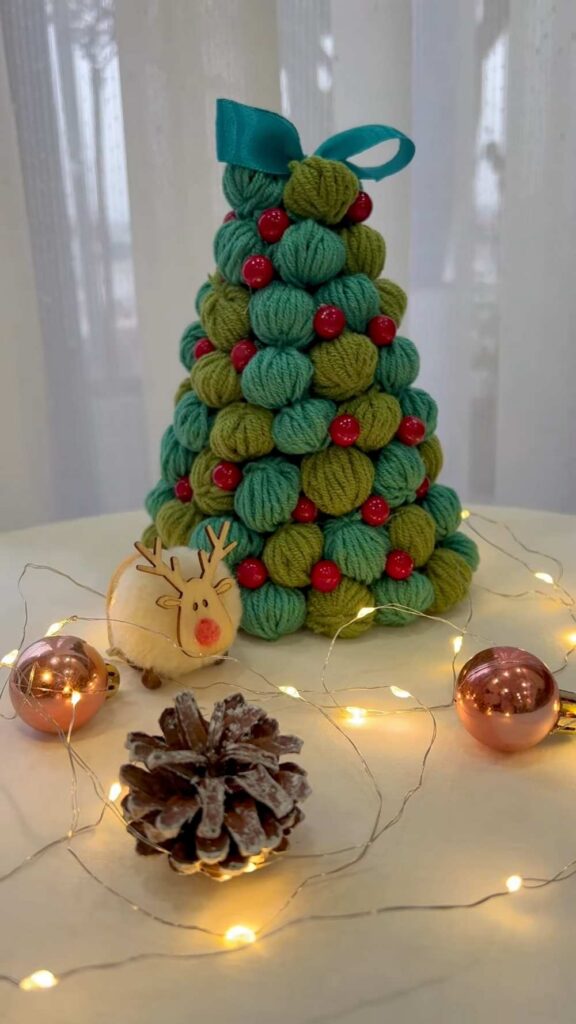
Looking for an absolutely zero-mess, no-trim, and no-knit yarn Christmas tree project? This year, learn how to DIY this UNIQUE puffy Christmas tree table decoration that is charmed up further with red pearls and a ribbon bow. Follow this step-by-step tutorial to make this multi-shaded green Christmas tree plushie using the yarn-ball-stacking method. Surround your Christmas tree with the fairy lights, pinecones, and reindeer wooden decorations.
This DIY yarn Christmas tree has a higher remake success rate, as you don’t have to knot the yarn wrappings, unlike the DIY pom pom yarn Christmas tree plushie. Also, it looks so elegant with this puffy tiered design.
Learn how to make this quick, easy, and last-minute Christmas tree by making small yarn wrappings, securing them, and gluing them. You might need to make more than 70 wrappings, so be sure you have enough yarn and a party of helpers! Anyway, continue reading to learn more about this crochet Christmas tree project + learn how to make one in detail.
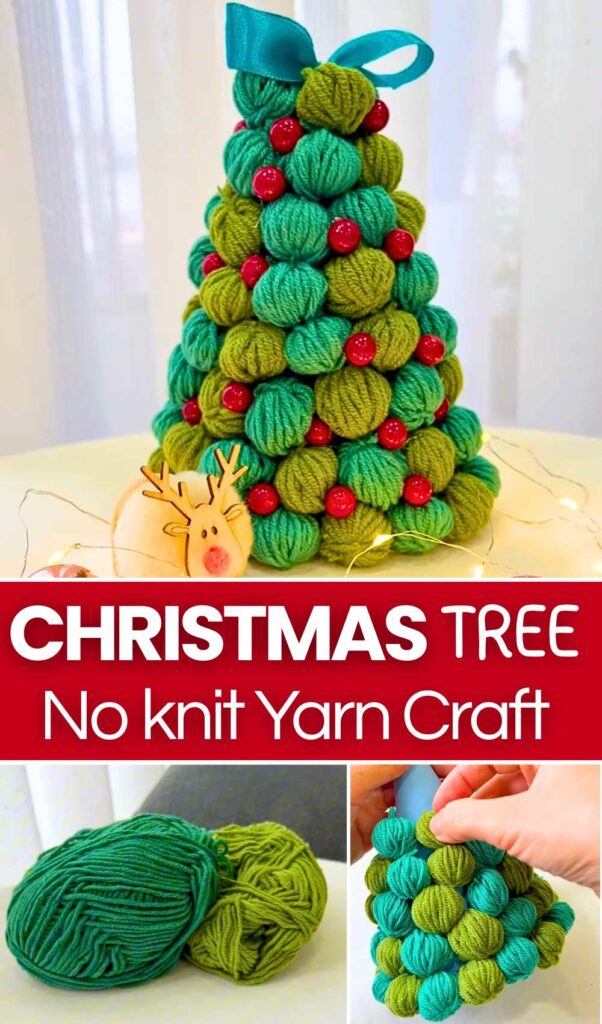
This yarn ball Christmas tree transforms skeins of green yarn into an appealing, tiered 3D tree that looks like it belongs in a high-end boutique. You will need dozens of miniature, finger-wrapped yarn “bundles,” which are then layered onto a paper cone.
By alternating different shades of green, you create a natural look. Finished with red bead accents and a silk bow, this tree is a perfect centerpiece or mantel decoration.
Materials Needed
-
Yarn: At least two different shades of green (e.g., forest green and sage green).
-
Cardstock: A large sheet of paper or thin cardboard (blue or green).
-
Red Beads: Small faux berries or red plastic beads.
-
Ribbon: A matching silk or satin ribbon for the topper.
-
Hot Glue Gun & Glue Sticks.
-
Needle and Matching Thread.
-
Scissors.
Feels Difficult?
Step-by-Step Instructions
Step 1: Create the Yarn Balls
You will need to make many small yarn balls to cover the entire tree.
-
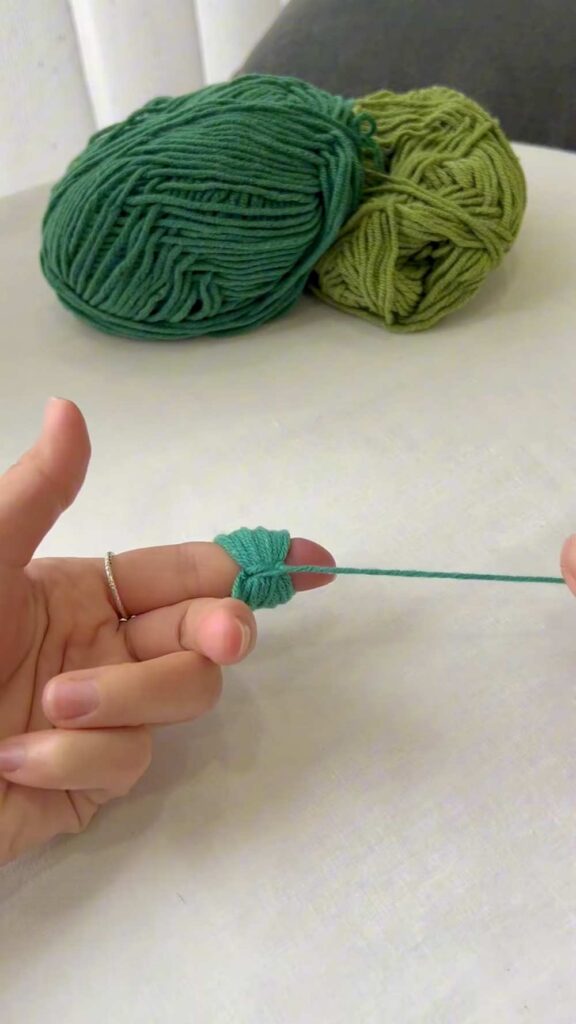
Wrap: Hold the end of the yarn against your index finger and wrap the yarn around your finger about 20 to 30 times until it forms a thick bundle.
-
Tie: Cut the yarn. Use a needle and thread to go through the center of the yarn loops on your finger. Tie it tightly in the middle to secure the bundle.
-
Shape: Slide the bundle off your finger. The tension from the center tie will naturally pull it into a small, rounded ball shape.
-
Repeat: Make enough balls in both shades of green to cover your cone (usually 40–60 balls depending on the size of your cone).
Step 2: Build the Cone Base
-
Take your sheet of cardstock and roll it into a cone shape.
-
Adjust the bottom so it stands flat on the table.
-
Secure the edge with hot glue or tape to hold the shape.
Step 3: Assemble the Tree
-
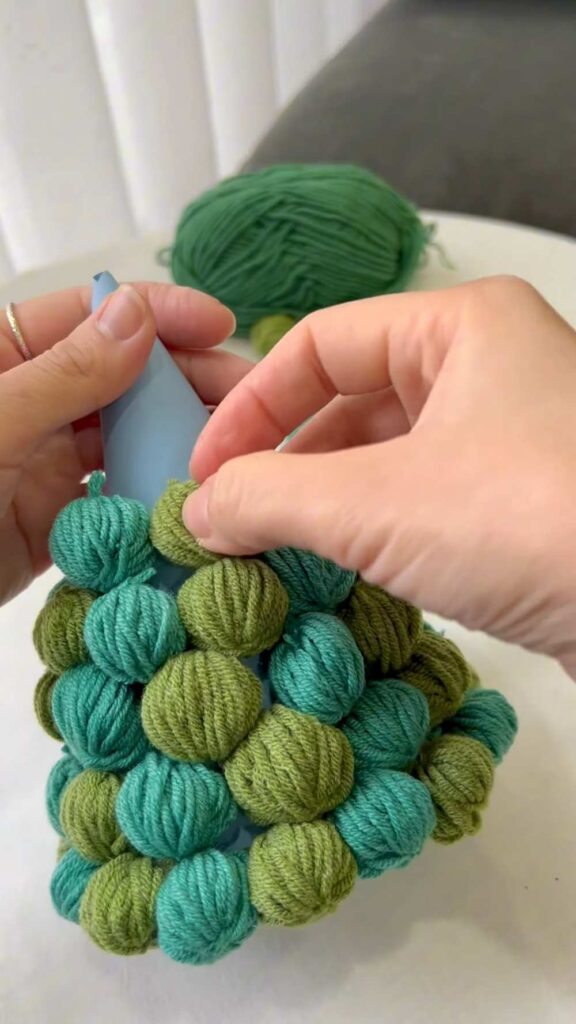
Start at the Bottom: Apply a dab of hot glue to the bottom edge of the cone. Press one yarn ball into the glue.
-
Create Rows: Continue gluing the yarn balls in a circle around the base. Alternate the colors (light green and dark green) for a more textured look.
-
Work Upward: Start the next row slightly above the first, tucking the balls into the gaps of the row below. Continue this until the entire paper cone is hidden.
Step 4: Add the “Berries”
-
Apply a tiny drop of hot glue to various yarn balls across the tree.
-
Press a small red bead onto the glue. These represent holly berries or ornaments and provide a beautiful pop of color.
Step 5: Add the Finishing Touches
-
The Bow: Tie your ribbon into a pretty bow and glue it to the very top of the tree.
-
Display: Place your tree on a table. For extra magic, you can wrap a small string of fairy lights around the base or add miniature holiday figurines like reindeer or pinecones to complete the scene.
Your Yarn Ball Christmas Tree is now ready to shine!