
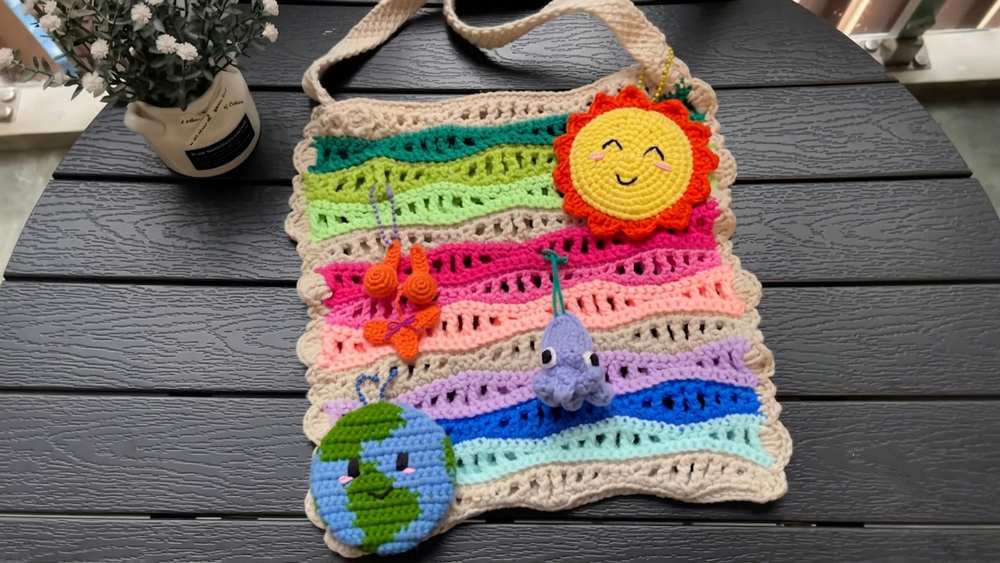
The pattern to crochet the most elegant, lively, and colorful crochet bag for summer is here! Introducing the crochet ocean waves tote bag, a striped large crochet bag with a beautiful striped colorwork of ripple stitch. You can embellish it even more by crocheting small summer bag charms such as the watermelon, fish, starfish, and more.
We will use two shades of each color, including blue, lime green, pink, and purple. The beige background lets the colors stand out awesomely. For this ripple stitch bag, we will crochet a beautiful and stretchy cluster stitch bag.
Overall, with all the colors this bag contains, I can say for sure that this is the only crochet bag you need for this summer. Each row needs a three-row repeat pattern before you change the color. So, you won’t find it tiresome. Now, continue reading for the full bag pattern.
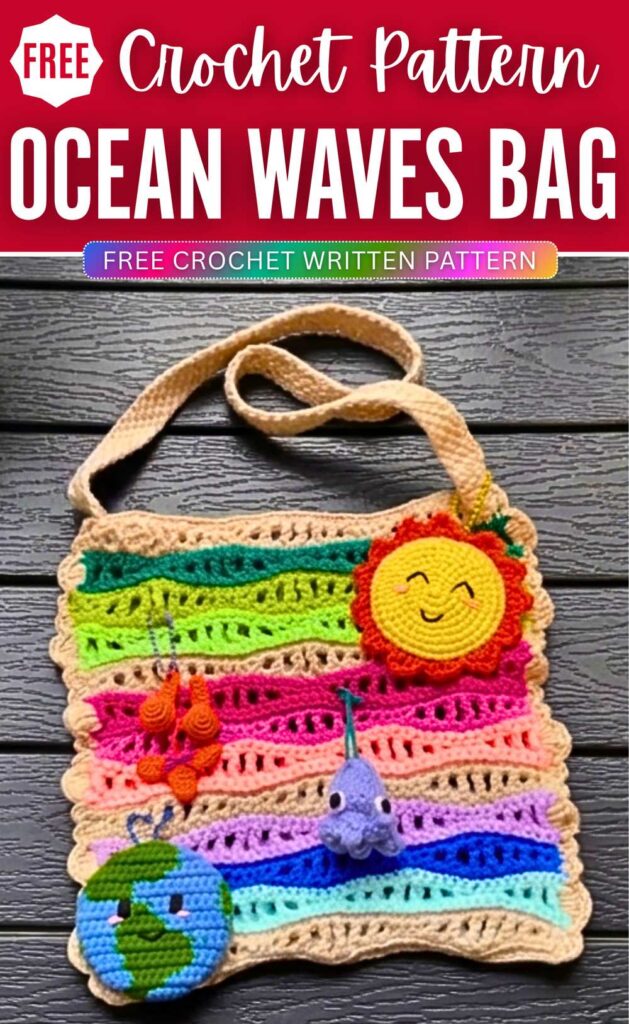
Crochet Ripple Stitch Ocean-Themed Beach Tote Bag: Written Instructions
This project is a tutorial to make a colorful crochet bag. The bag has a pattern that looks like waves in the ocean. It is a great bag to use when you go on a trip or in the summer. You will make this bag by crocheting from the top part down to the bottom part.
The wave look comes from changing between short stitches and tall stitches. You can use different colors of leftover yarn to make it look bright and unique.
Materials Needed
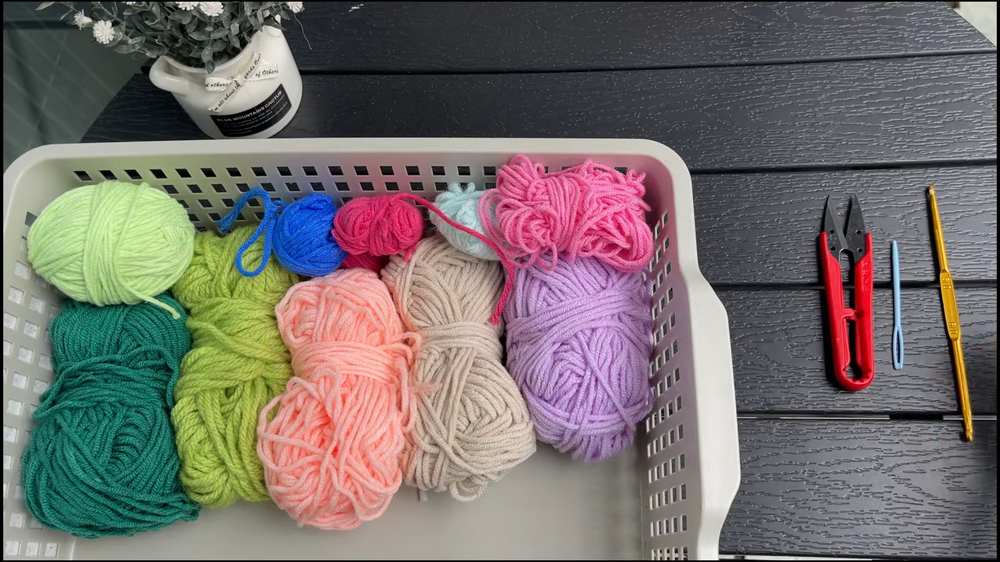
- Yarn: Milk Cotton yarn or Cotton Bamboo yarn in multiple bright colors (such as Beige, Blue, Lime Green, and Neon Green).
- Crochet Hook: Size 5 double-ended hook (around 3.0 mm).
- Scissors: To cut your yarn when changing colors.
- Tapestry Needle: To sew the handles and hide the yarn ends.
Abbreviations
- ch: chain stitch
- sc: single crochet
- hdc: half double crochet
- dc: double crochet
- tr: treble crochet (double treble/tall stitch)
- sl st: slip stitch
- st / sts: stitch / stitches
- BLO: back loops only
Part 1: The First Wave Panel
The Base and Beige Wave Section:
- Row 1: Use your beige yarn to make a slip knot. Build a foundation chain of 49 ch. Turn your work, make 1 ch, and complete 49 sc all the way across the row. You will have 49 stitches total.
- Row 2 (Wave Setup Row): Chain 1 and turn your work. Make 2 sc in the first two stitches.
- First Wave Cluster: Chain 1, skip 1 stitch, work 1 hdc in the next stitch. Chain 1, skip 1 stitch, work 1 dc in the next stitch. Chain 1, skip 1 stitch, work 1 tr in the next stitch. Chain 1, skip 1 stitch, work 1 tr in the next stitch. Chain 1, skip 1 stitch, work 1 dc in the next stitch. Chain 1, skip 1 stitch, work 1 hdc in the next stitch. Chain 1, skip 1 stitch, then work 3 sc into the next three stitches.
- Second Wave Cluster: Chain 1, skip 1 stitch, work 1 hdc in the next stitch. Chain 1, skip 1 stitch, work 1 dc in the next stitch. Chain 1, skip 1 stitch, work 1 tr in the next stitch. Chain 1, skip 1 stitch, work 1 tr in the next stitch. Chain 1, skip 1 stitch, work 1 dc in the next stitch. Chain 1, skip 1 stitch, work 1 hdc in the next stitch. Chain 1, skip 1 stitch, then work 3 sc into the next three stitches.
- Third Wave Cluster: Chain 1, skip 1 stitch, work 1 hdc in the next stitch. Chain 1, skip 1 stitch, work 1 dc in the next stitch. Chain 1, skip 1 stitch, work 1 tr in the next stitch. Chain 1, skip 1 stitch, work 1 tr in the next stitch. Chain 1, skip 1 stitch, work 1 dc in the next stitch. Chain 1, skip 1 stitch, work 1 hdc in the next stitch. Chain 1, skip 1 stitch, then work 2 sc into the final two stitches of the row.
- Row 3: Chain 1 and turn your work. Make 49 sc across the entire row. Work directly into the stitches and work into the open chain spaces to keep your stitch count at exactly 49. On the very last stitch, pull through with your next color (Blue yarn) to change colors. Cut the beige yarn.
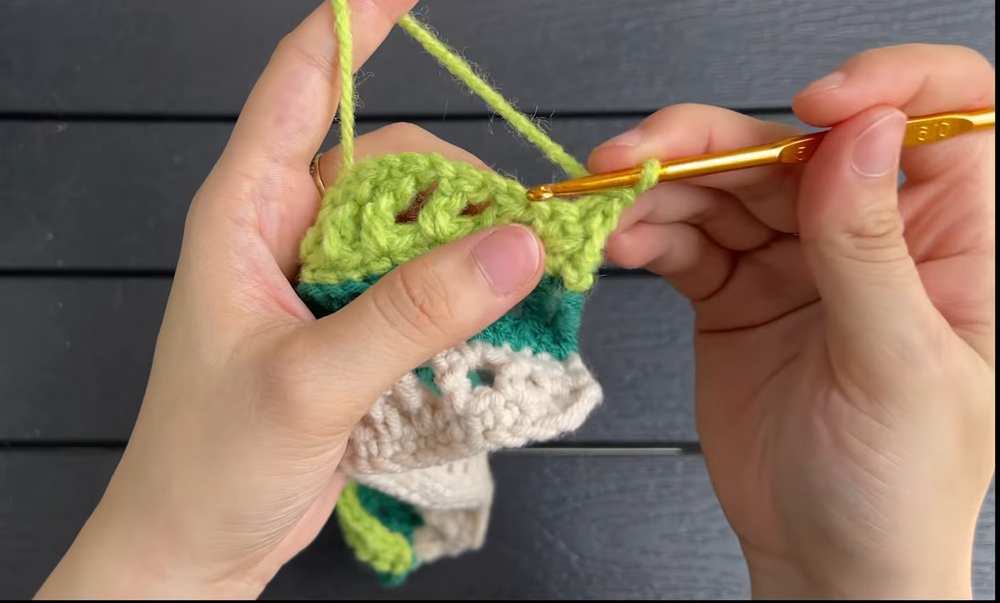
The Blue Wave Section (Inverse Waves):
- Row 4: Turn your work. To make a neat wave ridge line, work this entire row in the BLO (Back Loops Only). Make 49 sc across the row while hiding your loose yarn ends under your stitches.
- Row 5 (Inverse Wave Setup Row): Chain 5 and turn your work (this chain counts as your first tr). Make 1 tr in the next stitch so you have two tall stitches at the start.
- Inverse Pattern: Chain 1, skip 1 stitch, work 1 dc. Chain 1, skip 1 stitch, work 1 hdc. Chain 1, skip 1 stitch, work 3 sc in the next three stitches. Chain 1, skip 1 stitch, work 1 hdc. Chain 1, skip 1 stitch, work 1 dc. Chain 1, skip 1 stitch, work 1 tr. Chain 1, skip 1 stitch, work 1 tr.
- Repeat this inverse sequence across the row to fill in the valleys of the previous rows.
- At the end of the row, complete your last 1 tr and work another 1 tr directly into the final stitch without a chain space between them.
- Row 6: Chain 1 and turn your work. Complete 49 sc across the row by working into the stitches and the chain spaces. On the final stitch, pull through with your next color (Lime Green yarn) and cut the blue yarn.
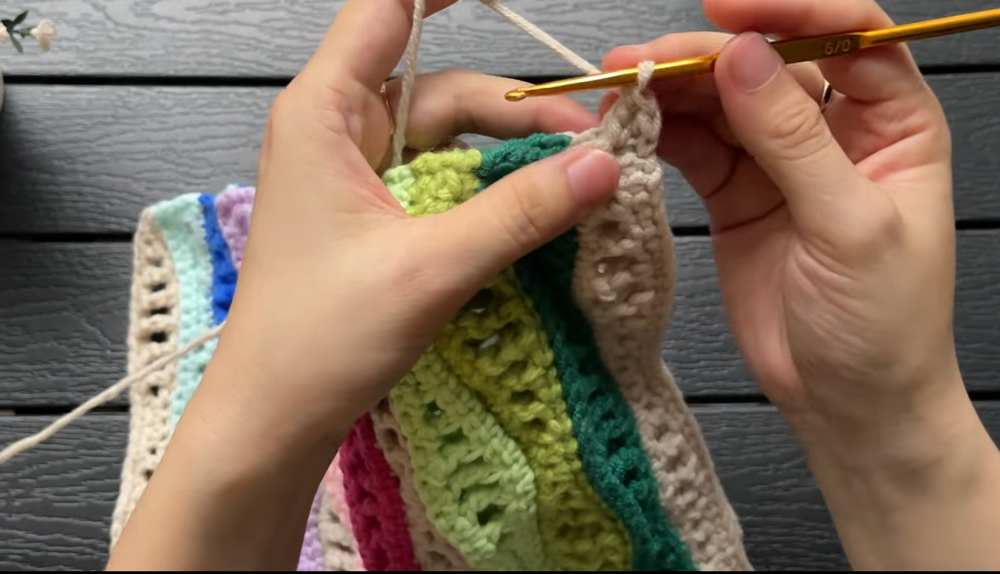
Continuing the Panel:
- Row 7 to Row 39: Keep alternating your yarn colors for each new wave block. Each individual color section uses a 3-row repeating pattern (one row of sc in BLO, one wave setup row, and one row of regular sc).
- All odd-numbered wave sections will use the exact pattern layout as the Beige section (starting with small sc stitches).
- All even-numbered wave sections will use the exact pattern layout as the Blue section (starting with tall tr stitches).
- Continue until you have completed a total of 13 colored wave stripes. Fasten off and cut your yarn.
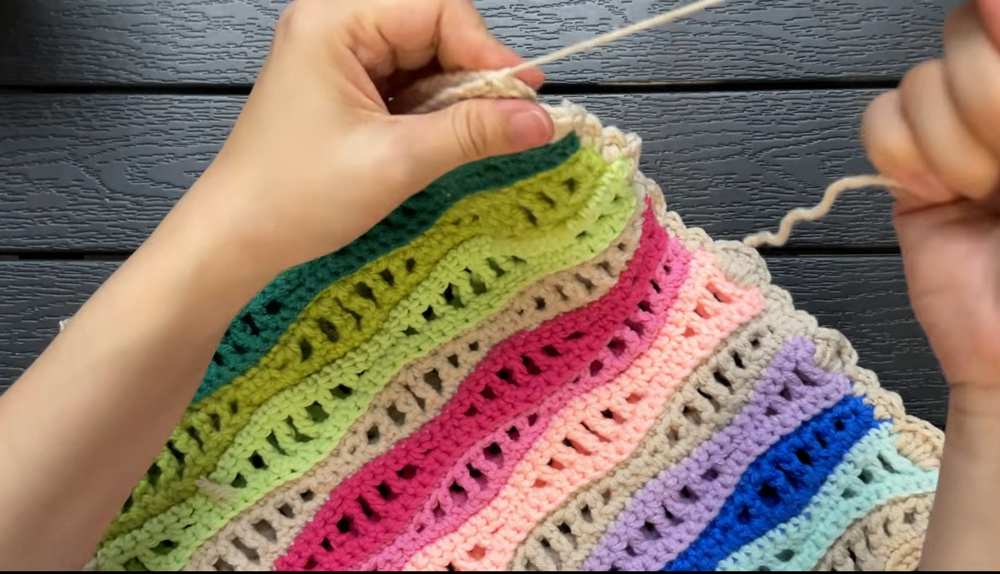
Part 2: The Second Wave Panel
- Repeat every step from Part 1 to create a second matching wave panel that is the exact same size.
Part 3: Joining the Bag Together
- Place your two finished panels together so that their wrong sides face each other and the clean right sides face outward.
- First Side Border: Attach your beige yarn through the top corner stitch of both panels to join them. Chain 1.
- Work 2 dc into the first side space. Slip stitch into the next space, chain 1, and work 2 dc into the following space to form two small decorative shell shapes.
- When you reach the large open gaps created by the tr stitches, work a large shell by putting 5 dc into the exact same gap space, then secure it with a slip stitch in the next space.
- Repeat this border sequence (two small shells and one large shell) a total of 6 times down the first side edge of the bag. At the bottom corner space, chain 1, work 2 dc, and slip stitch into the corner.
- Bottom Seam Join: Move along the bottom edge of the bag. Insert your hook only through the inner half loops of both panels. Work 49 sl st across the bottom to create a beautiful raised seam.
- Second Side Border: Work up the remaining side edge of the bag. Mirror the first side by starting with a large shell (5 dc) into the first tr gap space, followed by a slip stitch, and then your two small shells.
- Repeat this matching sequence 6 times up to the top edge of the bag. Leave a long yarn tail at the end for assembly, then cut the yarn.
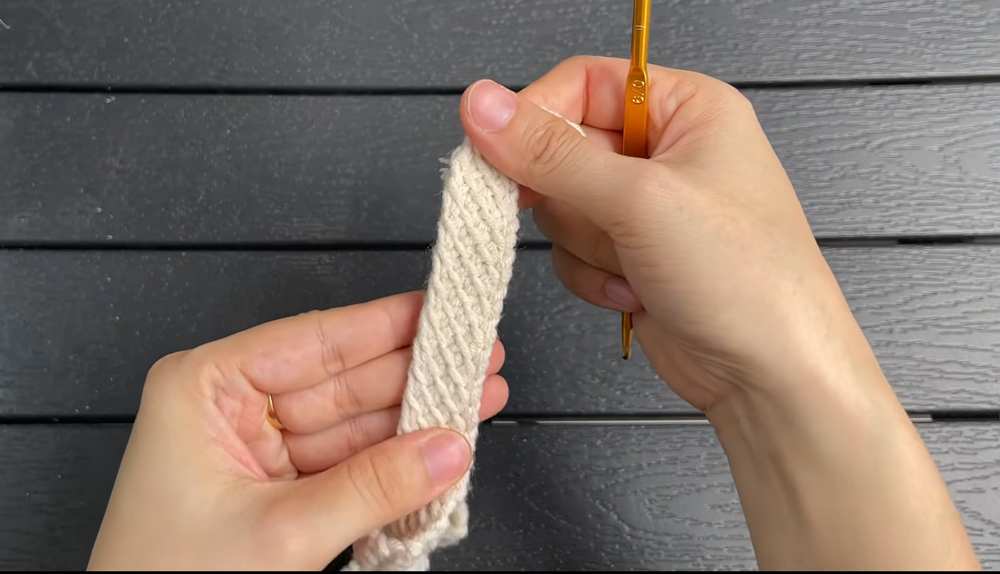
Part 4: Crocheting the Bag Straps
Make Two Handles:
- Row 1: Make a slip knot with your yarn and create 6 ch. Insert your hook into the first chain loop, yarn over, and pull up a loop. Leave this loop on your hook so you have 2 loops. Pull up a loop from each remaining chain across until you have 6 loops on your hook. Yarn over and pull through 2 loops at a time. Repeat this 5 times until you are left with only 1 loop on your hook.
- Row 2: Chain 1. Insert your hook into the vertical bars created by the stitches from your last row. Pull up a loop from each bar until you have 6 loops on your hook again. Yarn over and pull through 2 loops at a time, repeating 5 times until 1 loop remains.
- Row 3 to Row 70: Keep repeating the steps from Row 2. This creates a dense, non-stretch strap. Continue until your strap measures 70 rows long (or your preferred handle length). Fasten off and leave a tail for sewing.
Part 5: Final Assembly
- Take your first finished strap and use your tapestry needle to sew the ends securely to the top beige corners of the first panel.
- Take your second strap and sew it to the top beige corners of the second panel.
- Weave in all remaining loose yarn tails inside the bag and cut off any extra pieces. Your ocean waves bag is now complete and ready to use!
Learn with the Video Tutorial